![]()
User Help
- User Help Home Page
-
 Quickstart User Guides
-
 Data Workflow User Guides
-
More Workflow User Guides
-
Other OMERO Applications
-
More

Managing an OMERO Group
Introduction
This section describes how a PI or other owner of an OMERO group can manage the group for their laboratory.
The server administrator must assign the lab PI as the group owner. Then as group owner, the PI can add other users to the group and, if desired, assign others in the lab as group owners as well.
Most lab groups are set up with Read-Annotate permissions. This allows members of the group to:
- view data other members have placed in the group
- add tags, key-value pairs, attachments, ratings and comments to data in the group
- adjust and save rendering settings under their own name
- draw and save ROIs on the images
- use the data in analysis and figures.
In addition to the other interactions, group owners can:
- change the permissions level of the group (except for promoting to Read-Write, which is an admin privilege)
- import data for other users in the group
- delete or move the data belonging to any members of the group
- using the Command Line Interface, change the owner of the data, for example if the original owner has left the lab.
Details of the Command Line Interface OMERO.cli are in the OME documentation.
Details on accessing OMERO with the OMERO.web client are in the Using the OMERO.web Client section of User Help.
Note
The following issues will arise if the permissions of a group are reduced to Private:
- when one member has created output from another member's image in the group using a script, e.g. made a projection, the permissions change will fail
- any annotations, such as ratings, tags, attachments, key-value pairs or comments, created by a member on another member’s data will be lost.
Default groups
A user who is a member of more than one group can set any group as their default group. This group will be then shown in the data tree each time they log in. For details on how users can change their default group see Changing your default group in the Sharing Data section of User Help.

Adding a user to your group
OMERO.web
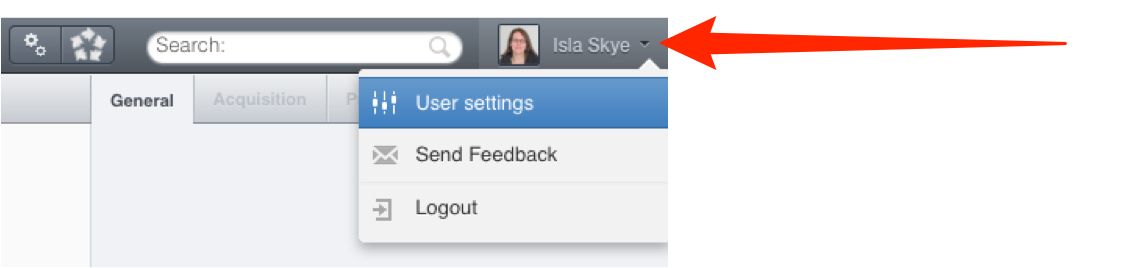
Click on the menu with your name on the right in the top toolbar.
Select User Settings in the menu.
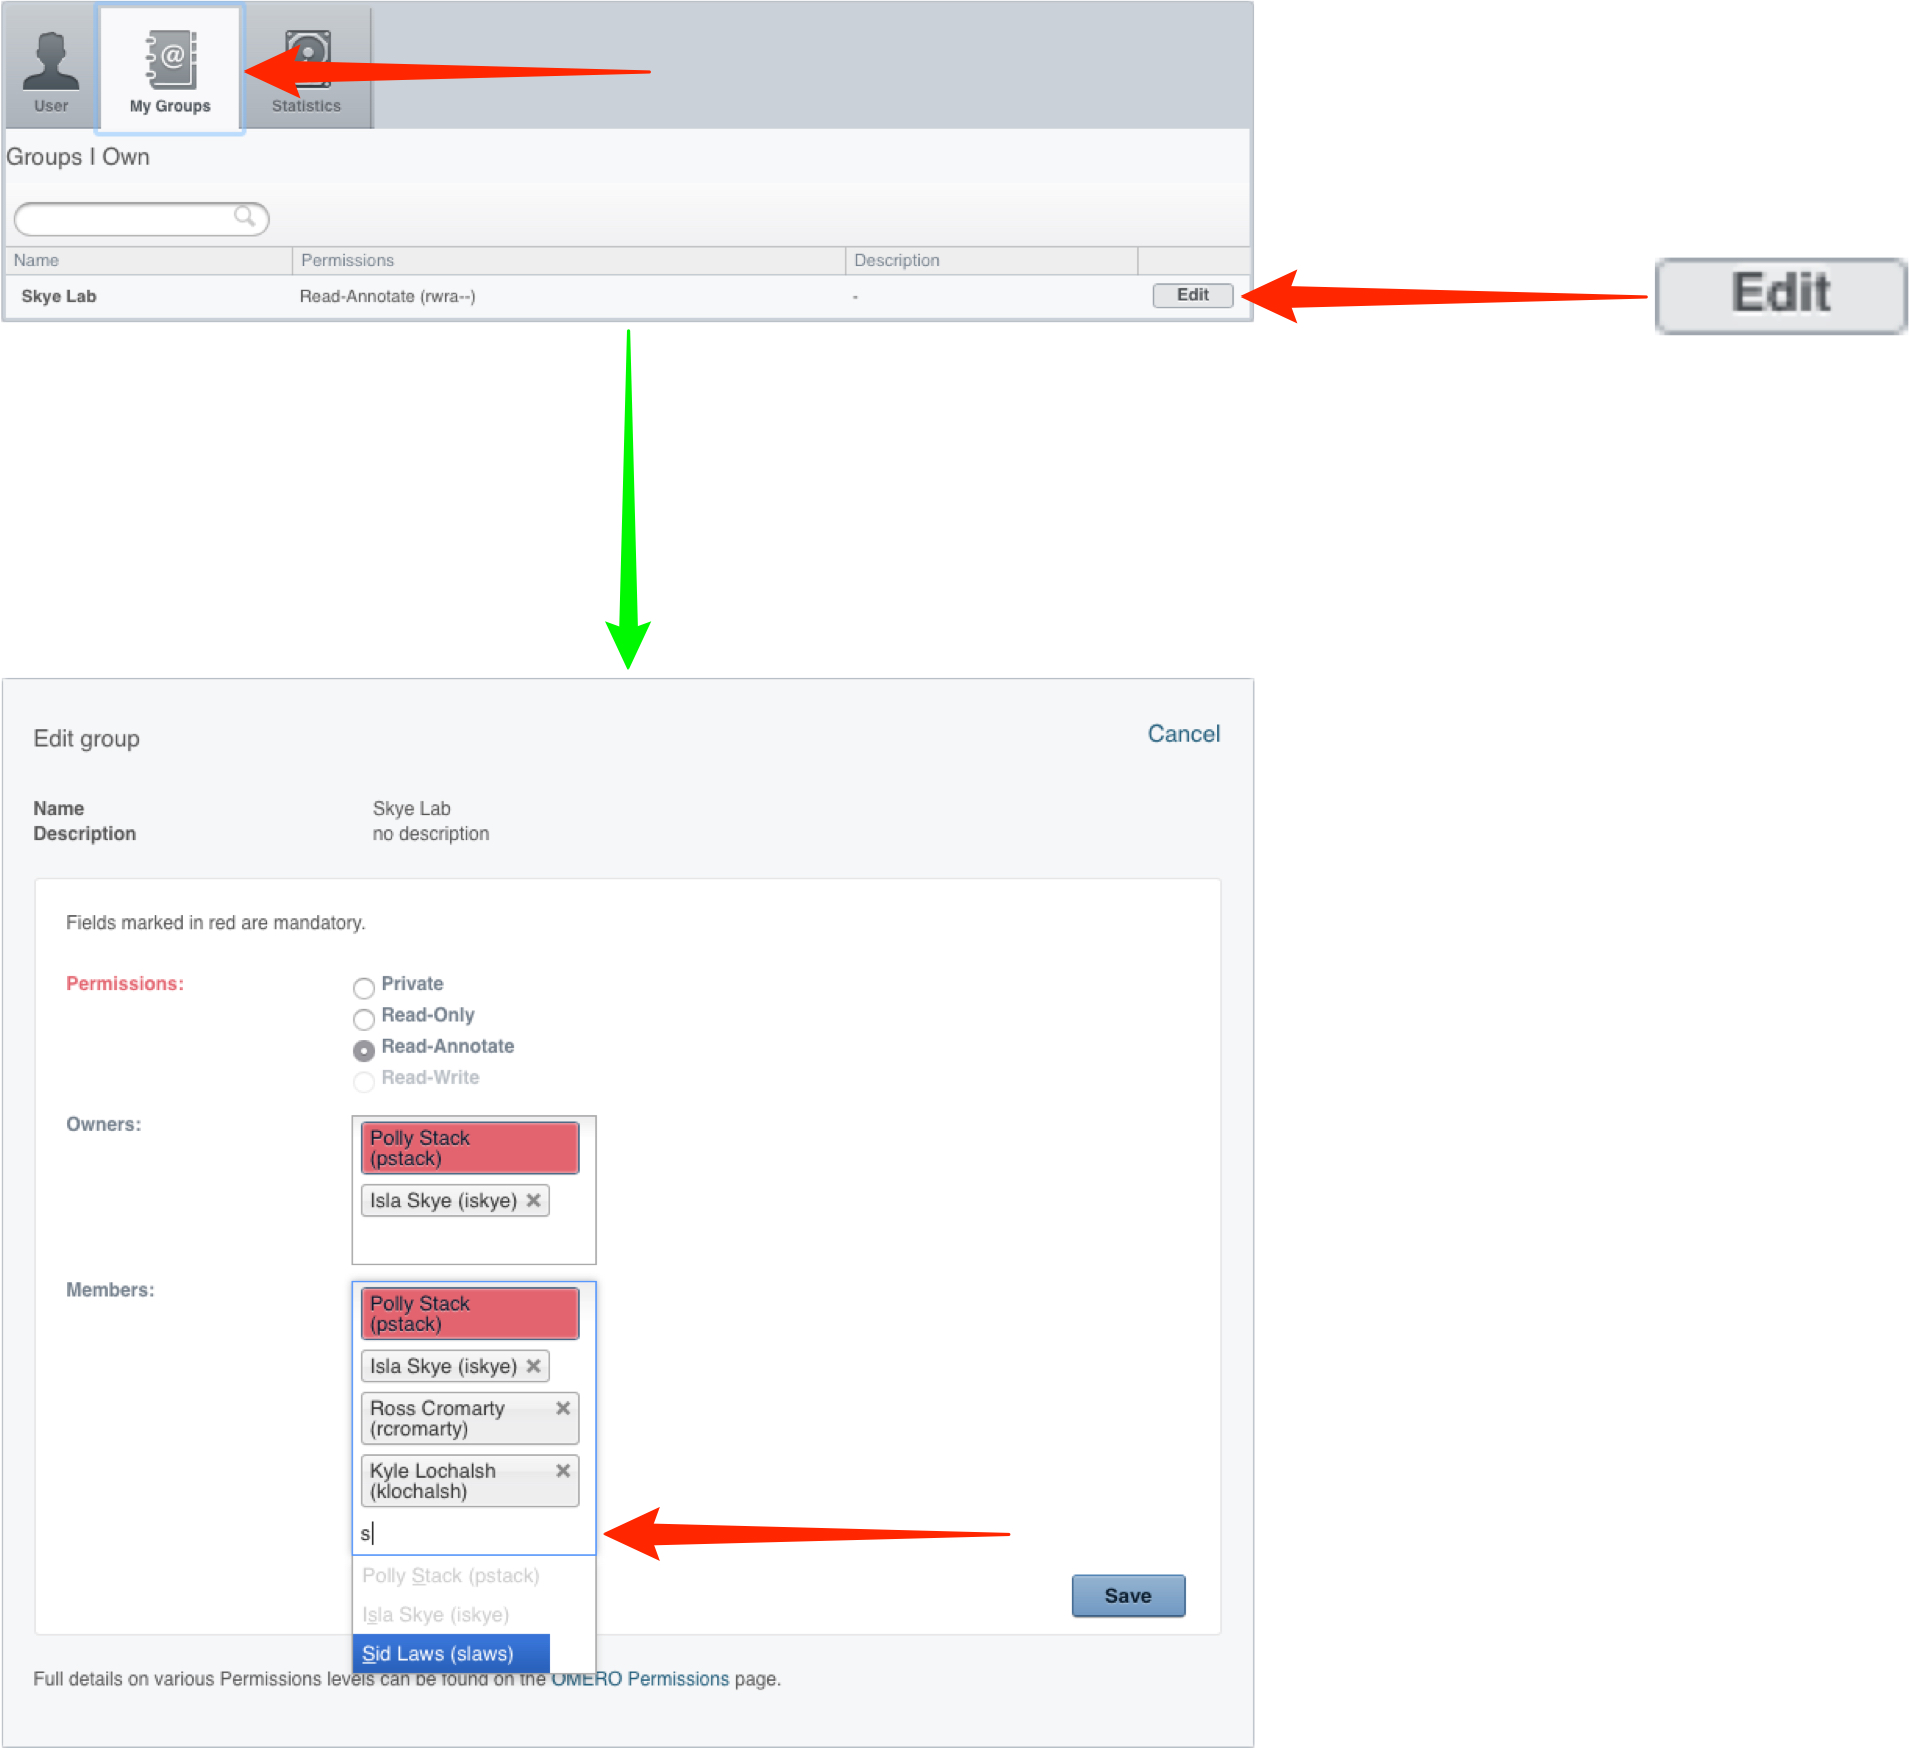
Click on the My Groups tab.
Click on the Edit button.
Click into the Members or Owners text box and start typing a user's name, select the user from the list, and click or hit return to add them to the group.
Removing a user from your group
Click on the menu with your name on the right in the top toolbar.
Select User settings in the menu.
Click on the My Groups tab.
Click on the Edit Group button.
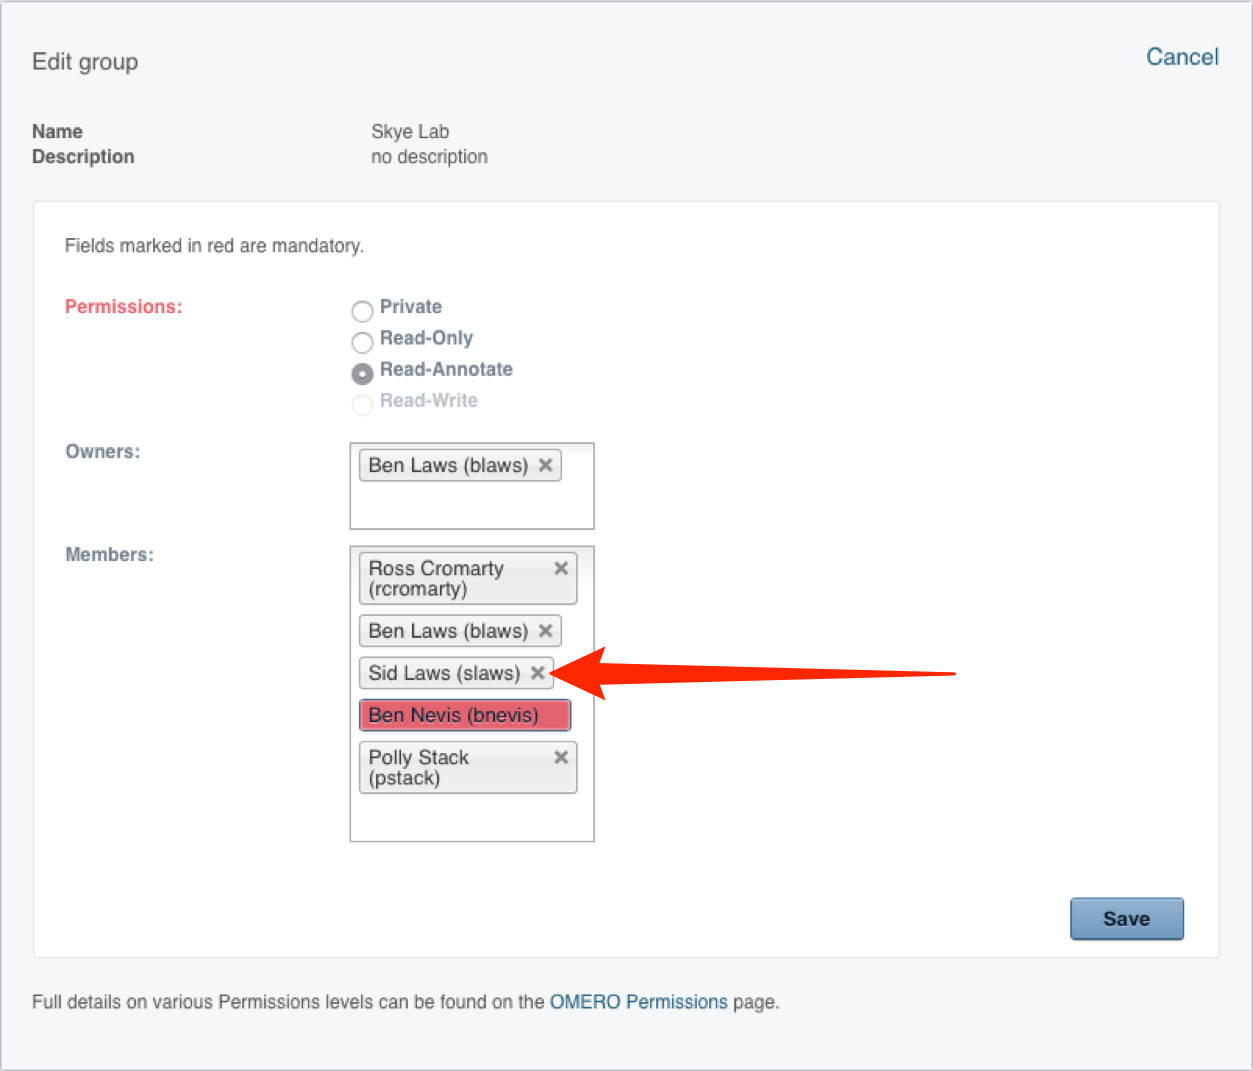
Click on the X to the right of the user’s name in the members or owners list.
Click Save to complete the change.
OMERO.web
Note
If a user is not a member of any other group, their name will be in a red box, and they cannot be removed from the group.
Administrator permissions are required to remove a user from their only group.
Moving data
When a user is removed from a group, any data they have in the group remains in the group, and is still owned by the user.
Data can be moved to another group by the user before they are removed, or by the group owner or administrator at any time.
OMERO.web
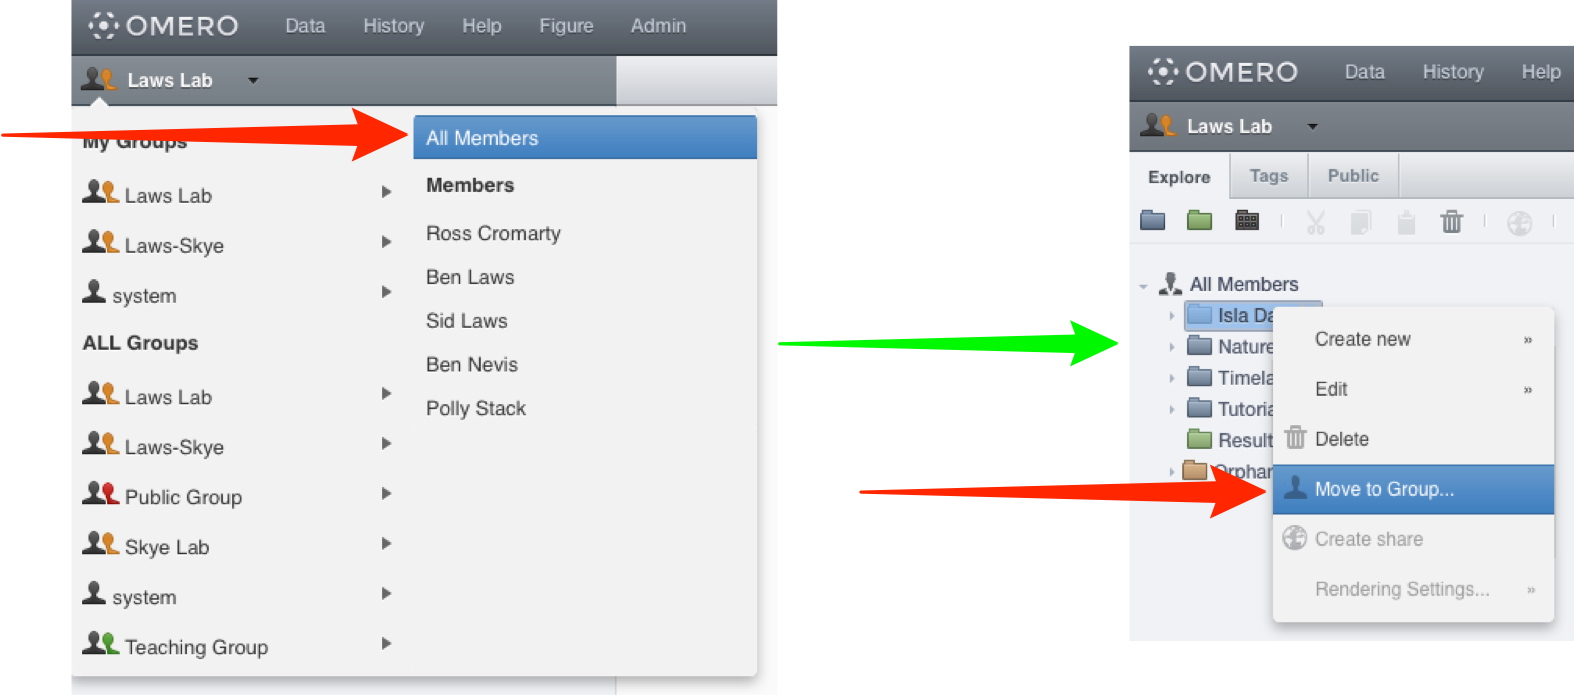
Select All Members from the group display menu to view data owned by a user who is no longer a member of the group.
Right-click on the data to be moved and select Move to Group ... .
Select the destination from the pop-up window.
Note
Using the Command Line Interface (CLI), group owners (for data in their groups) and administrators (who are members of the groups) can:
- view and move data owned by users no longer a member of a group - chgrp
- change ownership of data.
Importing data for another user
Any data imported by a user will be owned by them and will be in a group of which they are a member. For details on importing see Importing Data.
Group Owners and Administrators, who are members of the group, can import data for any user in the group i.e. the data will belong to that user.
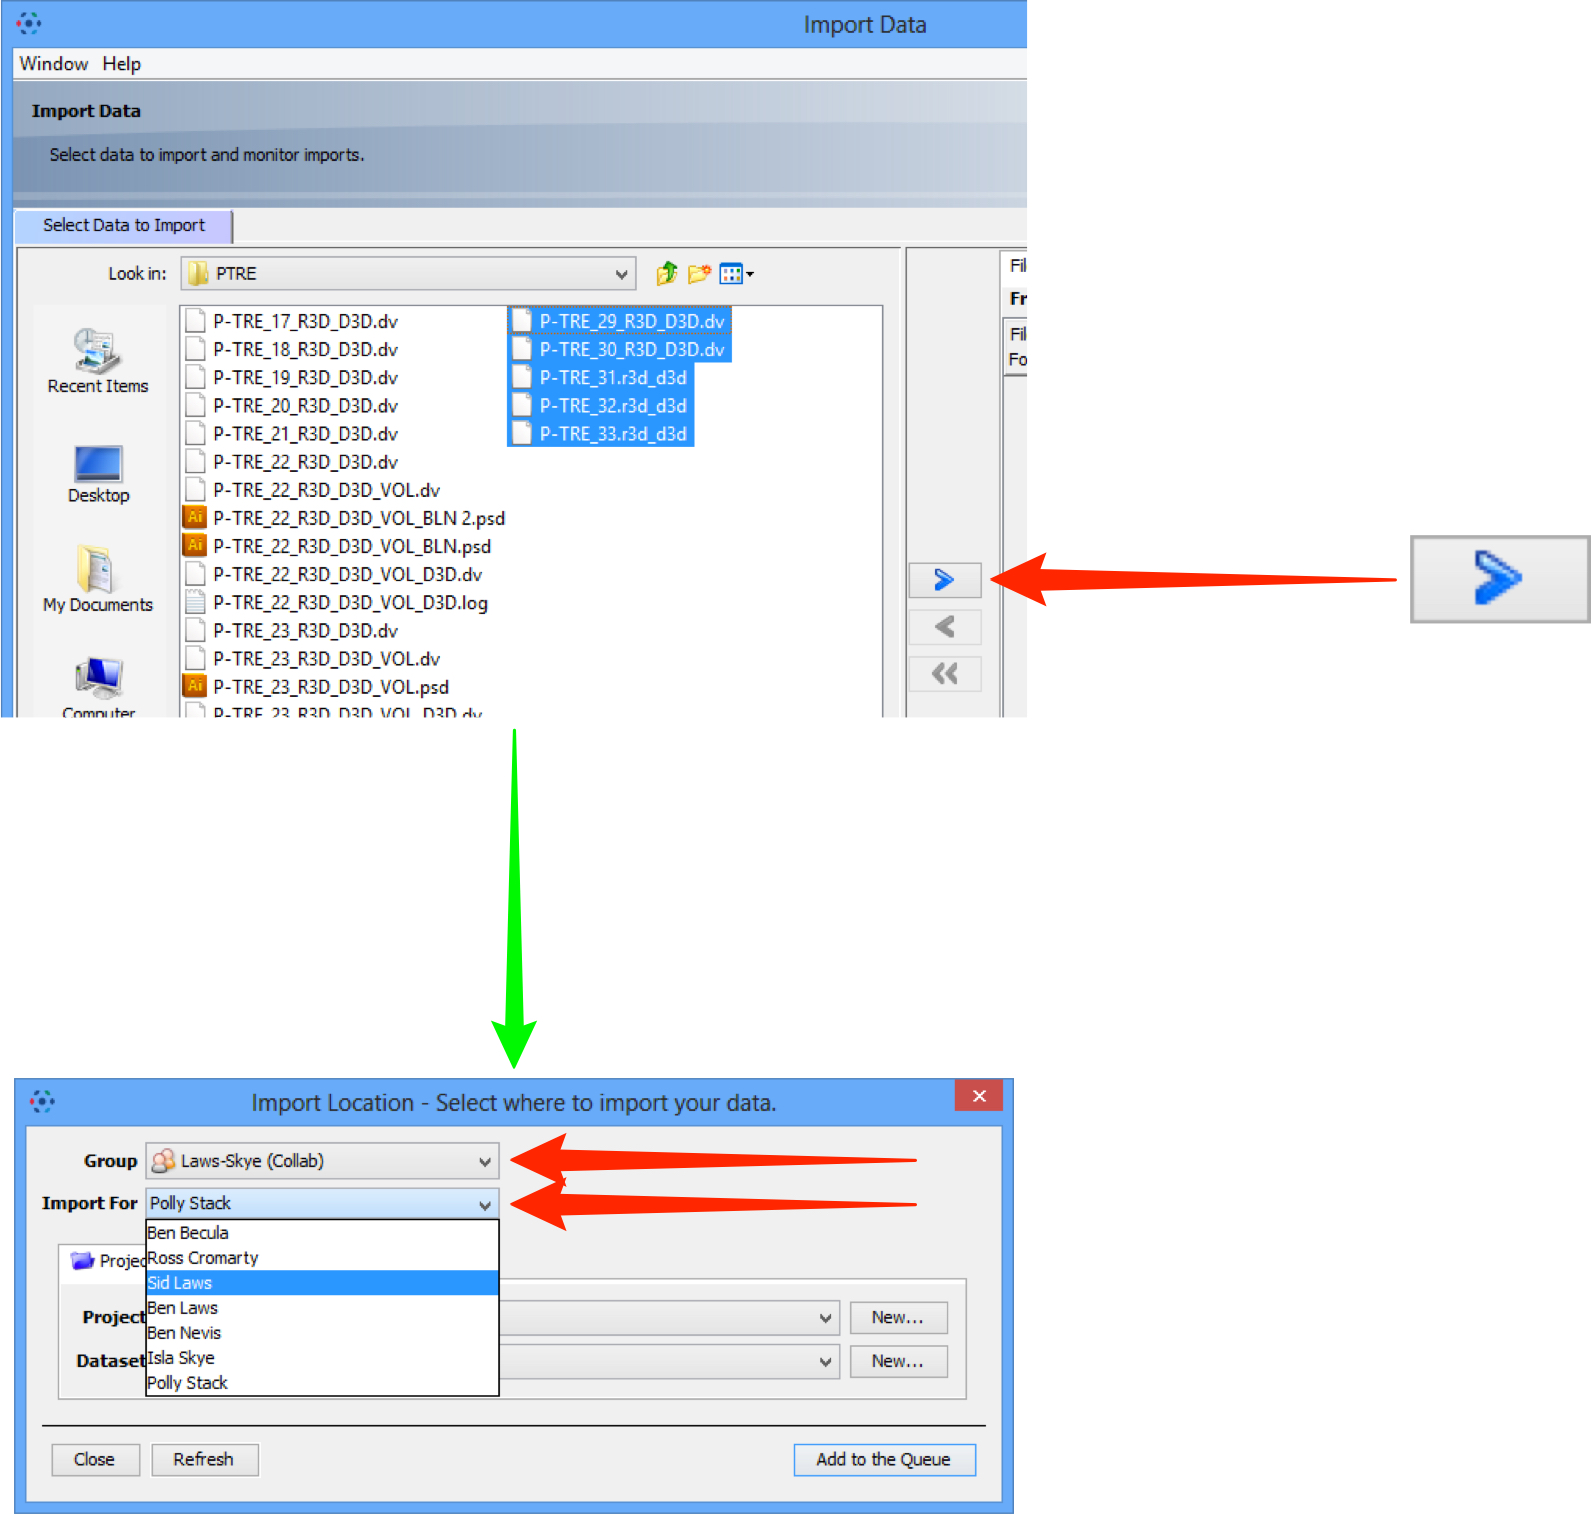
Select image data to be imported.
Click the right Add arrow.
In the Import Location window select from the Group drop-down box.
Select the user to import for from the Import For drop-down box.
The Project and Dataset drop-down boxes will list the projects and datasets the selected user is able to import into.
Any new projects and datasets created during the importing will belong to the user.
All Tutorial Material is available on line at: help.openmicroscopy.org
The Main OME website is at: www.openmicroscopy.org