![]()
User Help
- User Help Home Page
-
 Quickstart User Guides
-
 Data Workflow User Guides
-
More Workflow User Guides
-
Other OMERO Applications
-
More

Virtual Microscope - Getting Started
The Virtual Microscope is a University of Dundee facility that uses an OMERO based system to allow you to view and work with microscopy images using a web browser.
It is recommended you use Firefox, Chrome or Safari as these give the best experience when using the Virtual Microscope.
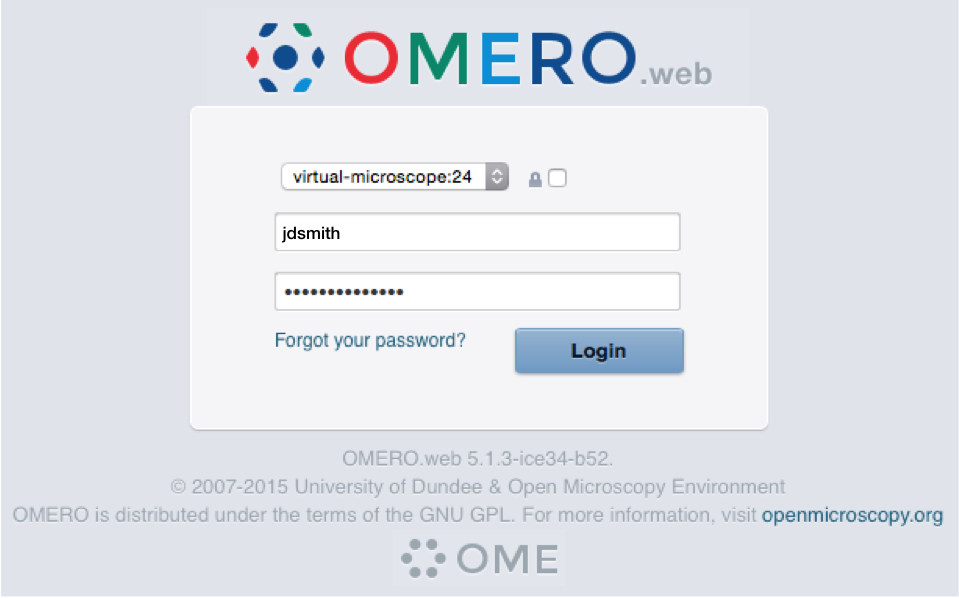
Click on, or enter the following URL in your browser:
https://learning.openmicroscopy.org/dundee/
-
Enter your University of Dundee username in the form:
jdsmith
Enter your University of Dundee password.
Click Login.
-
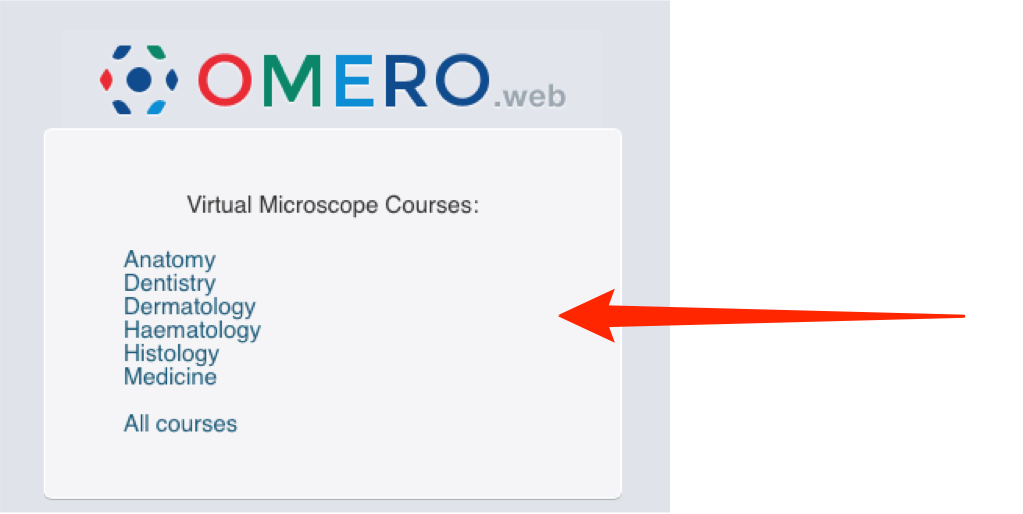
Select the course material you wish to view from the list of available courses.
You have access to all the available courses whether registered for them or not.
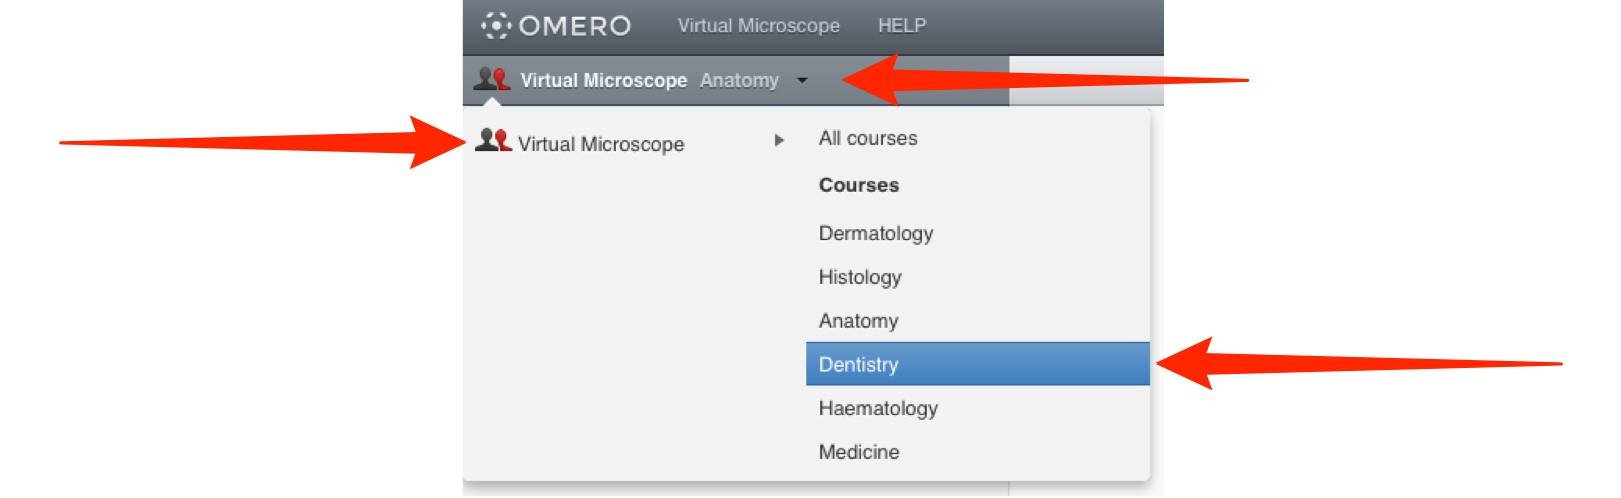
The material available for the chosen course is shown in the data tree in the left-hand panel.
To view material for another course, click on the Virtual Microscope drop-down menu.
In the Explore tab, expand the grey folder representing your Anatomy module. The green folder for each practical contains the microscopy images for that session.
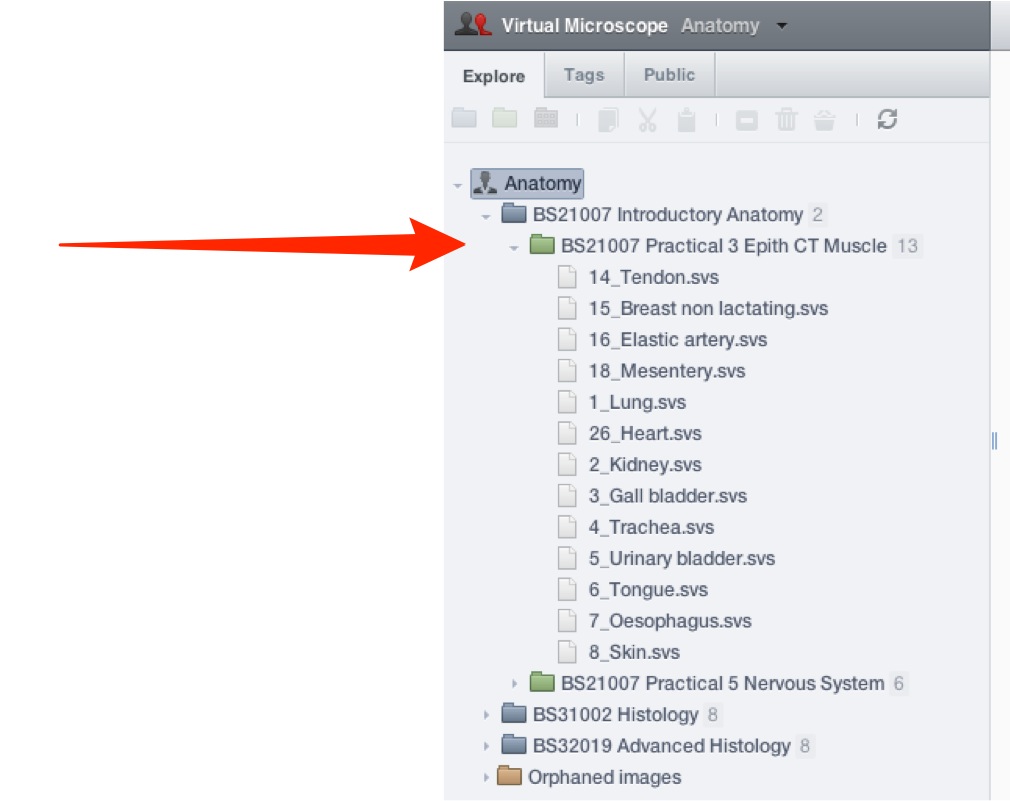
Double click on the image in the list, or thumbnail in the centre pane, to open an image in the full viewer.
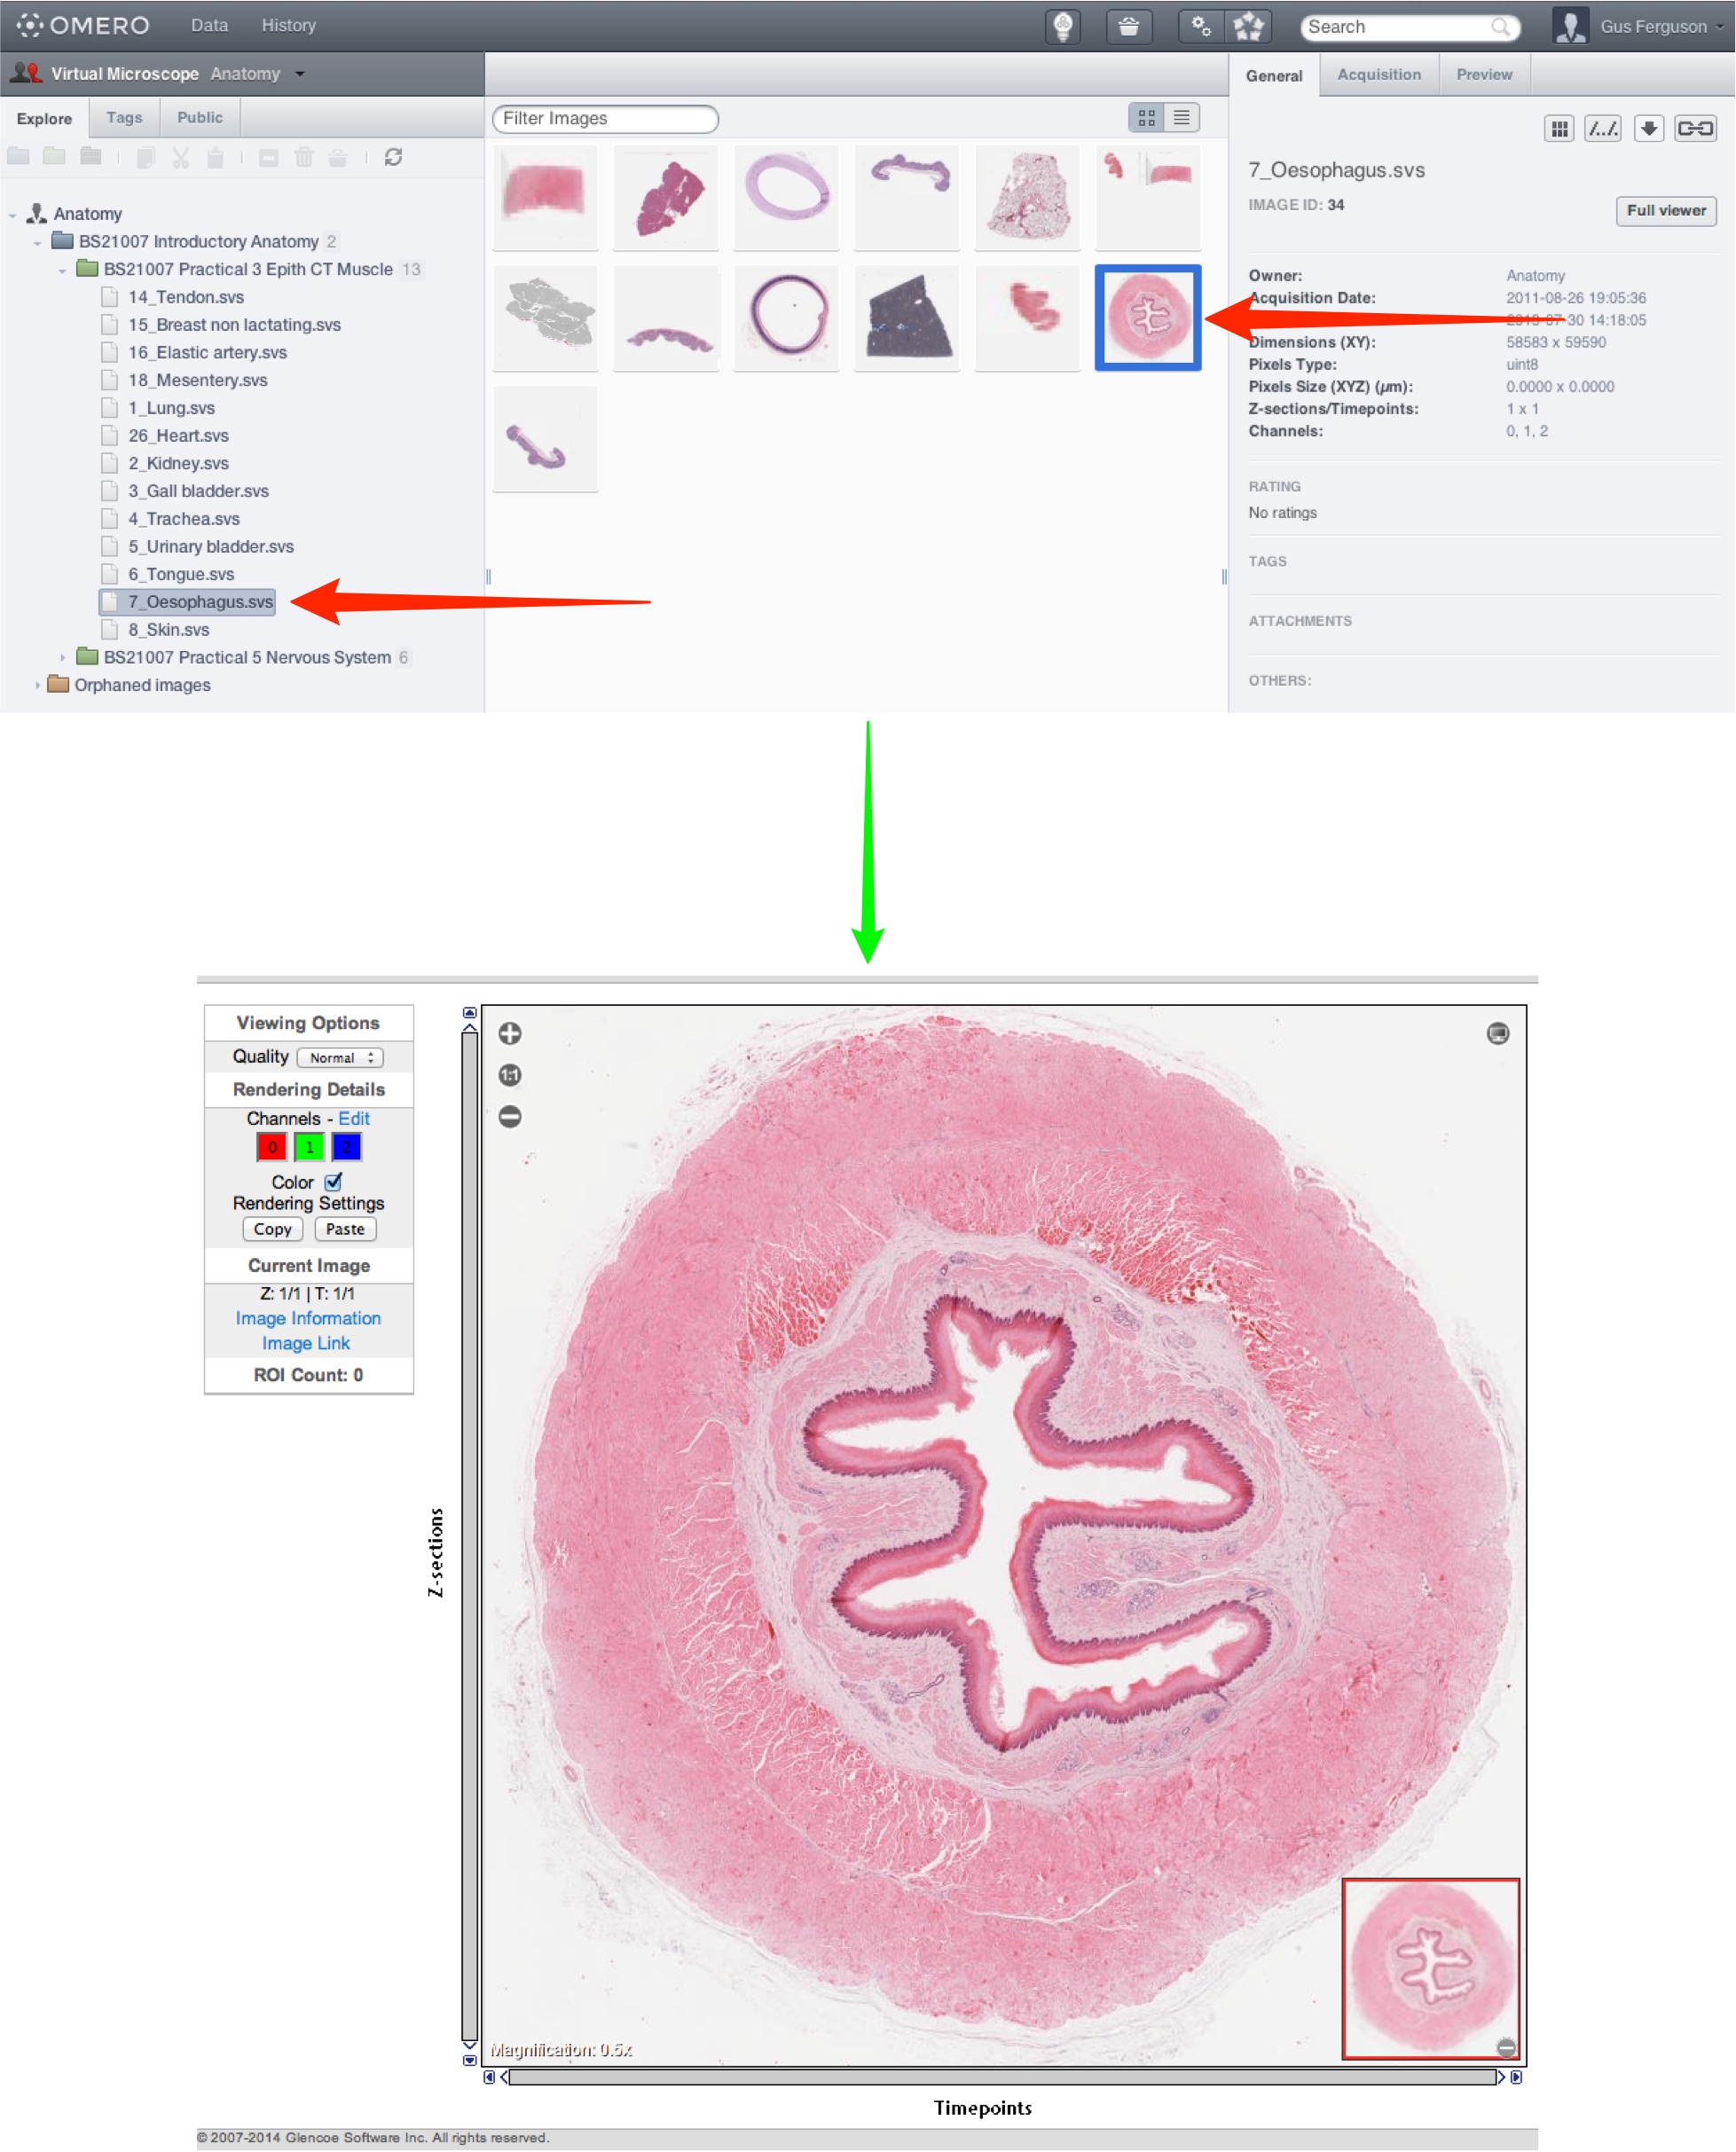
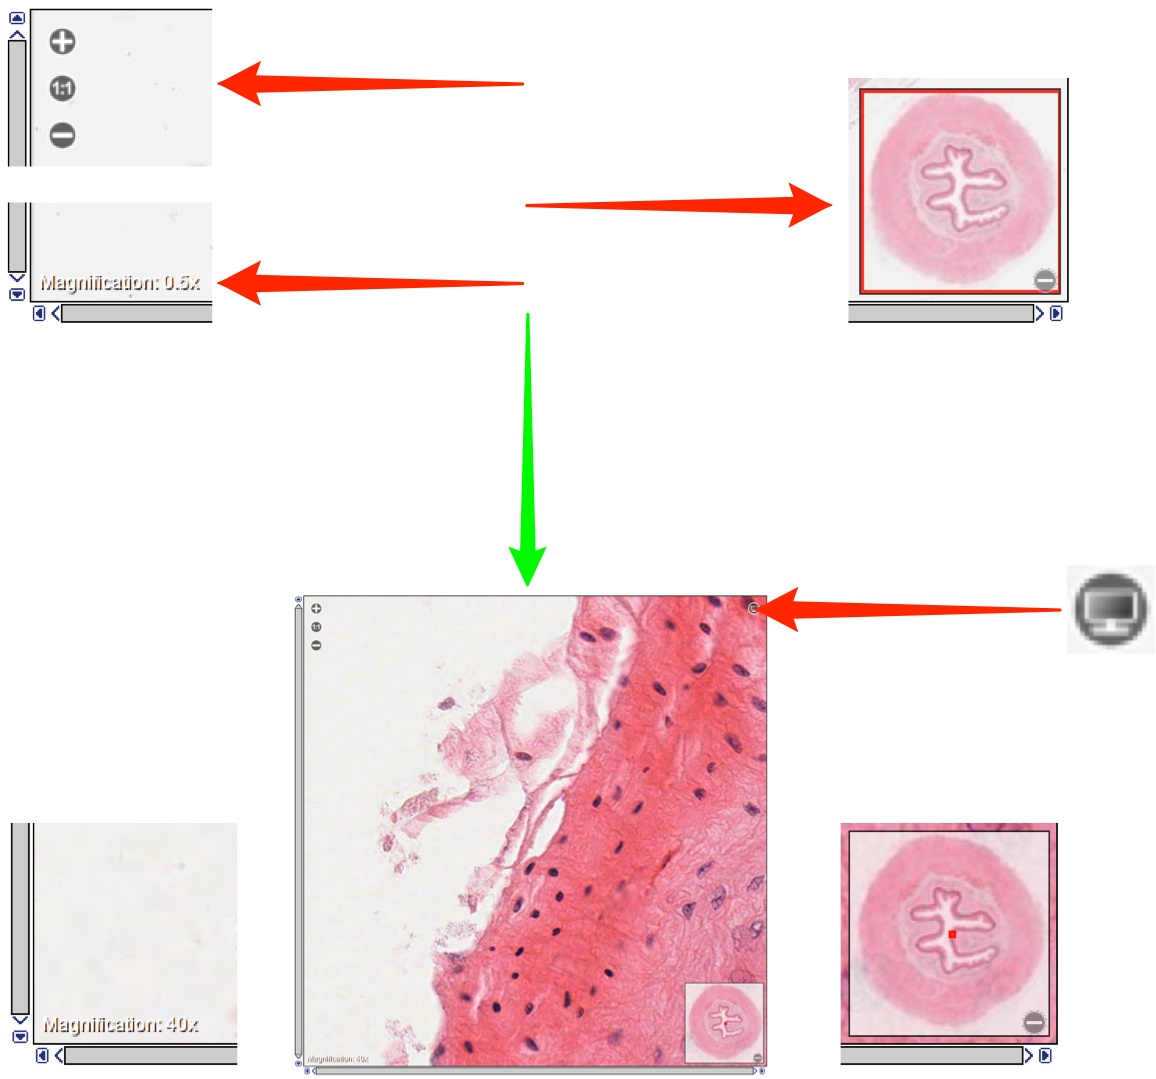
Use the + and - controls at the top-left to zoom into the image.
The magnification is shown at the bottom-left of the image.
The location of the zoomed view is shown by the red box on the thumbnail of the whole image at the bottom-right.
You can move around the image by:
- clicking on the red box in the thumbnail and dragging it,
or - clicking on the desired location within the thumbnail,
or - clicking and dragging the main image.
Click on the Full Screen icon in the top-right corner of the viewer to expand the window.
-
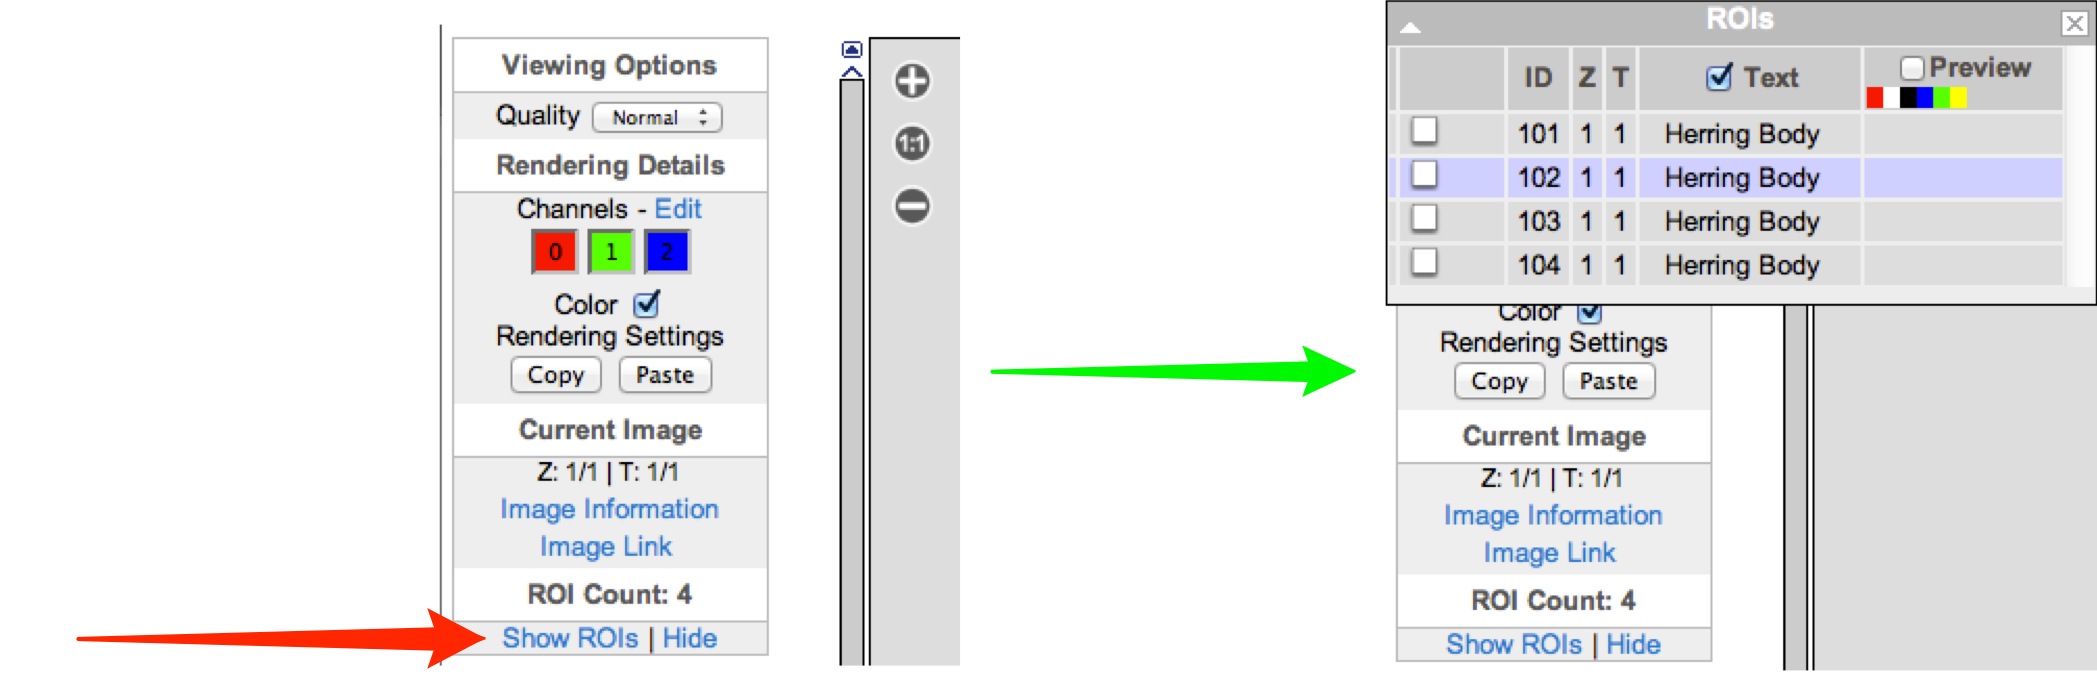
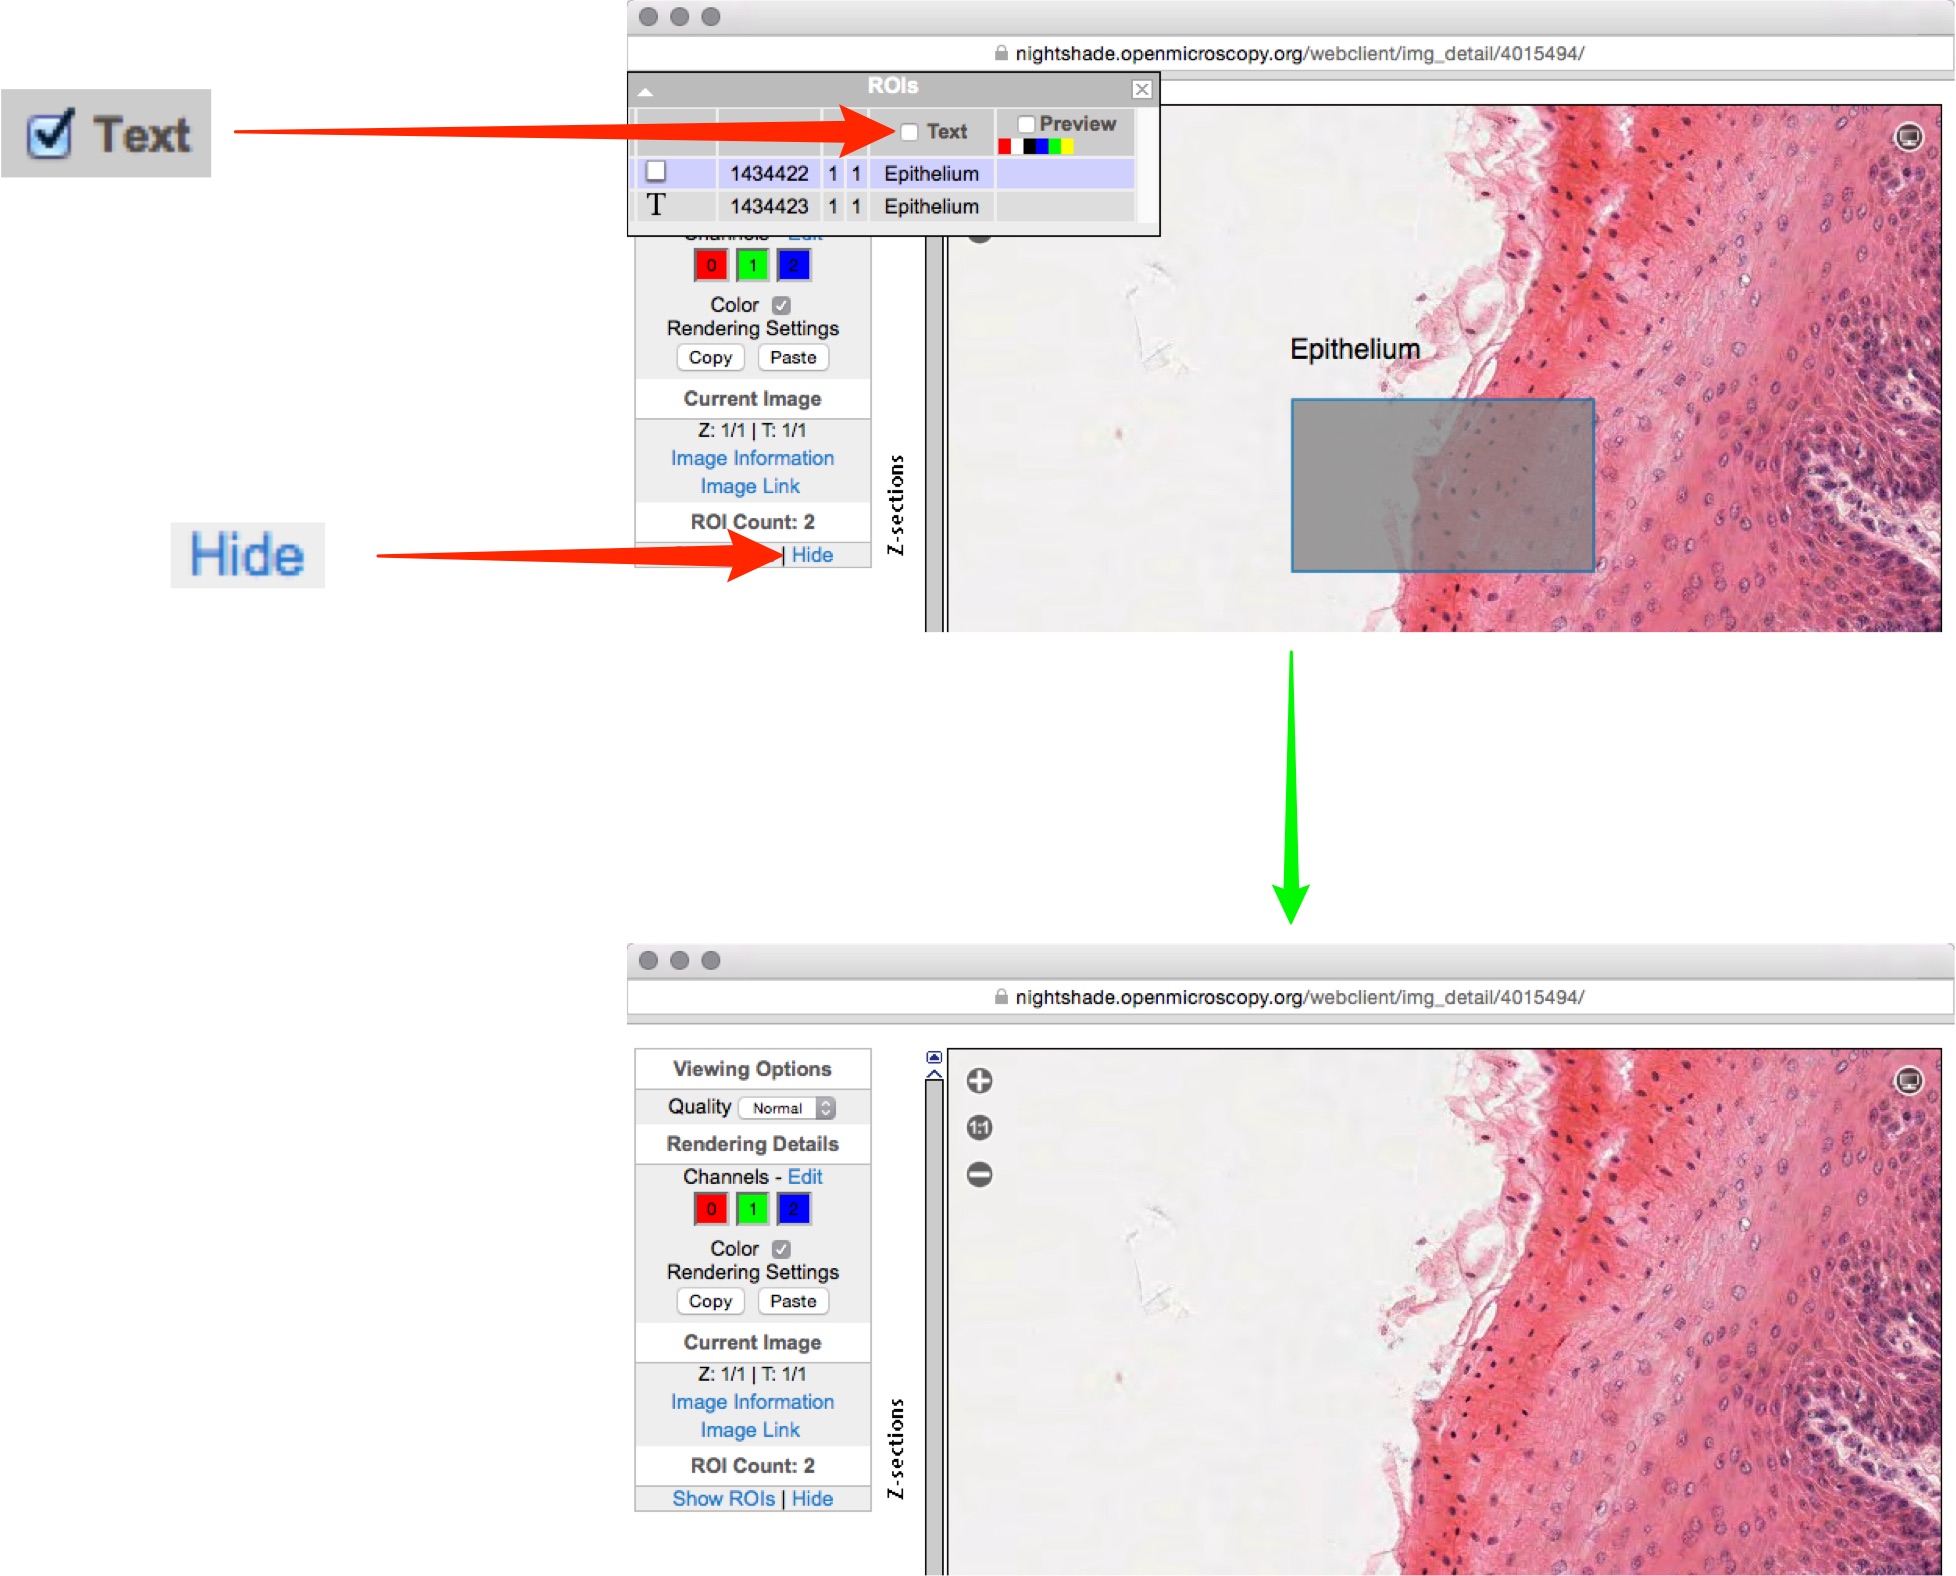
Some slides have Regions of Interest (ROIs) on them, highlighting or labelling interesting features.
This is indicated by the ROI Count at the bottom of the left-hand panel of the main viewer.
Click on Show ROIs to see the list of ROIs.
Select an ROI from the list, and the image will centre on that ROI.
-
Drag the ROIs palette out the way of the zoom controls.
Select an ROI from the list and use the zoom controls to zoom in on the ROI.
-
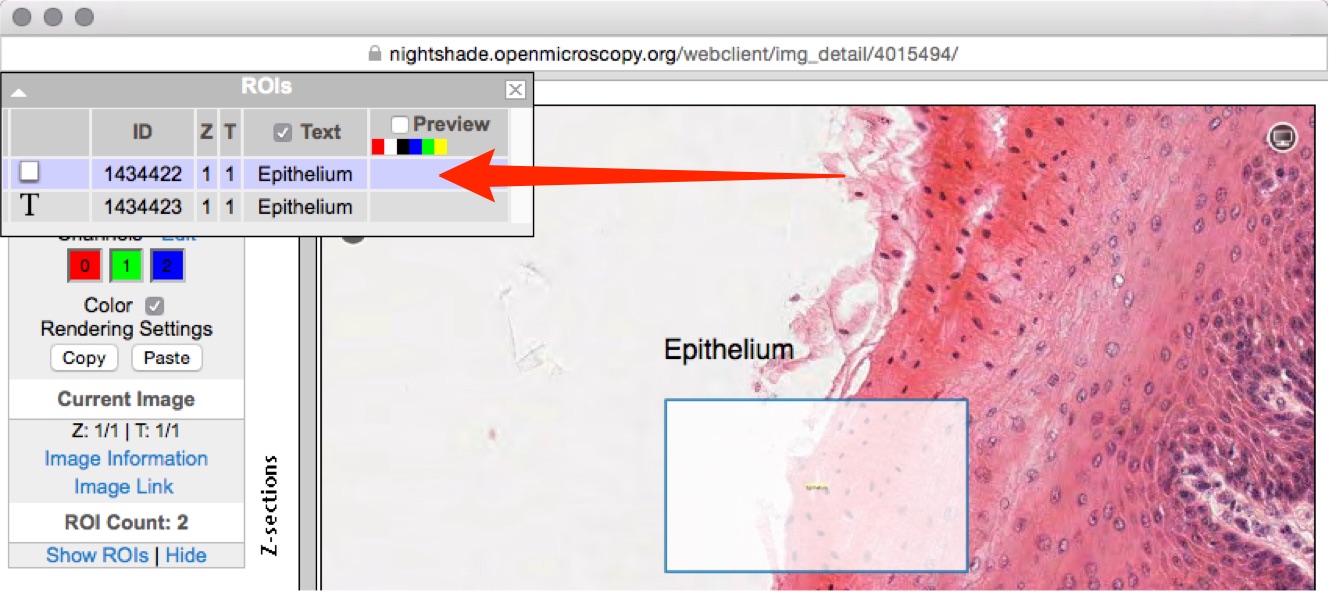
Uncheck the Text checkbox to hide the label.
If the ROI is obscuring the feature, click Hide in the left-hand panel to remove it.
To view other ROIs, click Show ROIs again and select a different ROI.
-
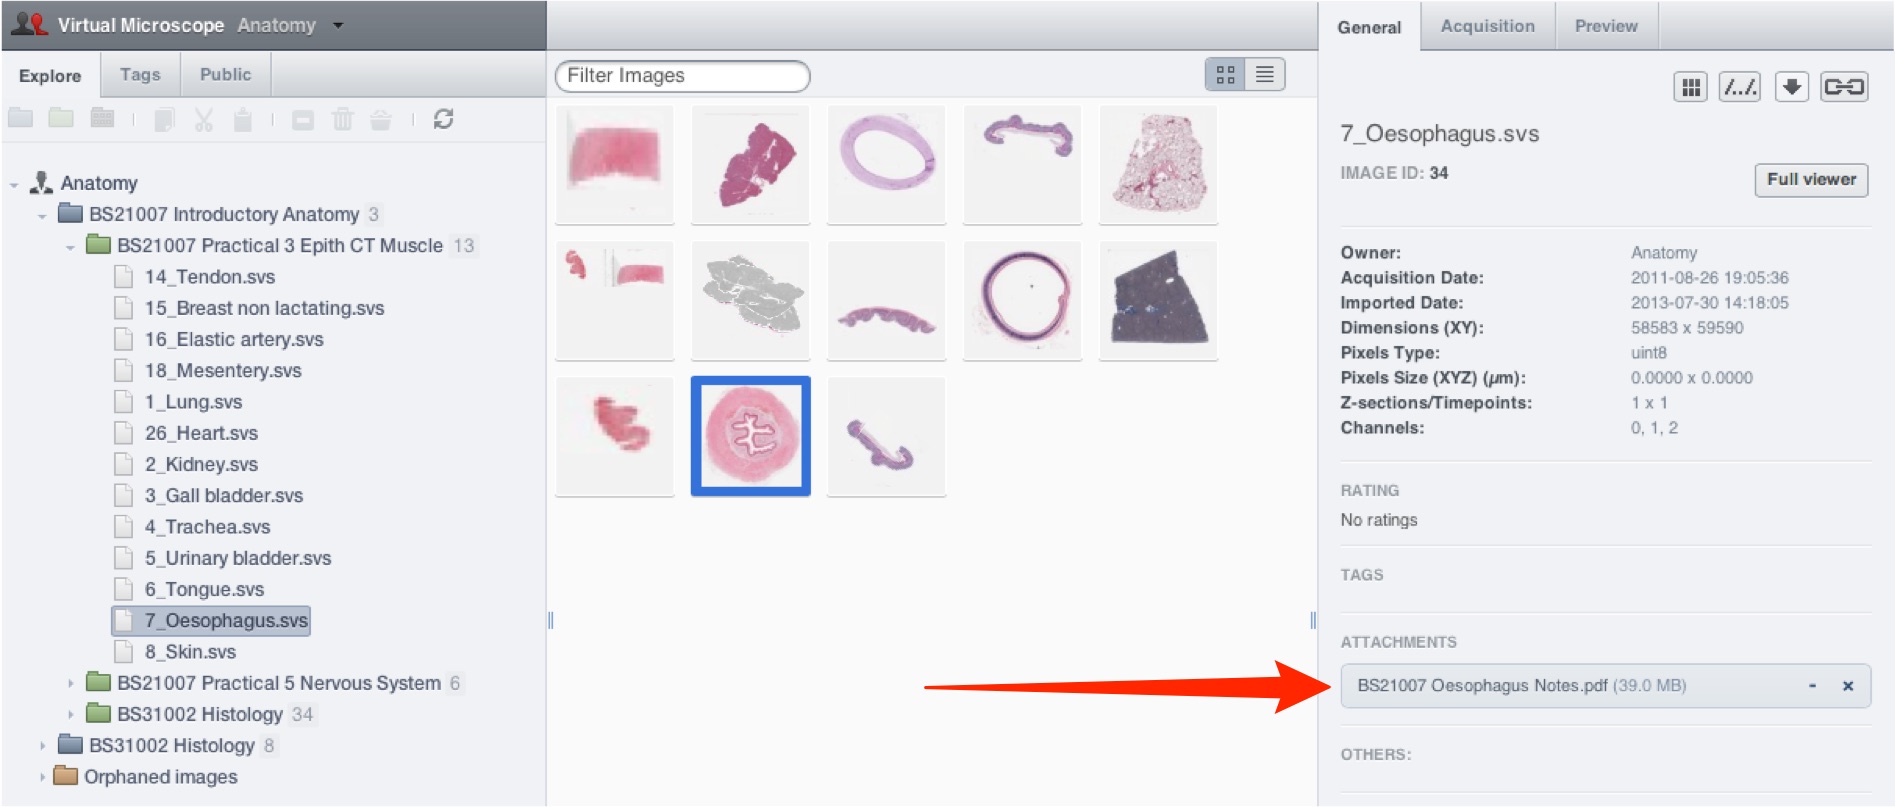
Some images or practical sessions have attachments such as notes or worksheets in PDF or other document formats.
These attachments are shown in the right hand panel.
Click the attachment to download and view it.
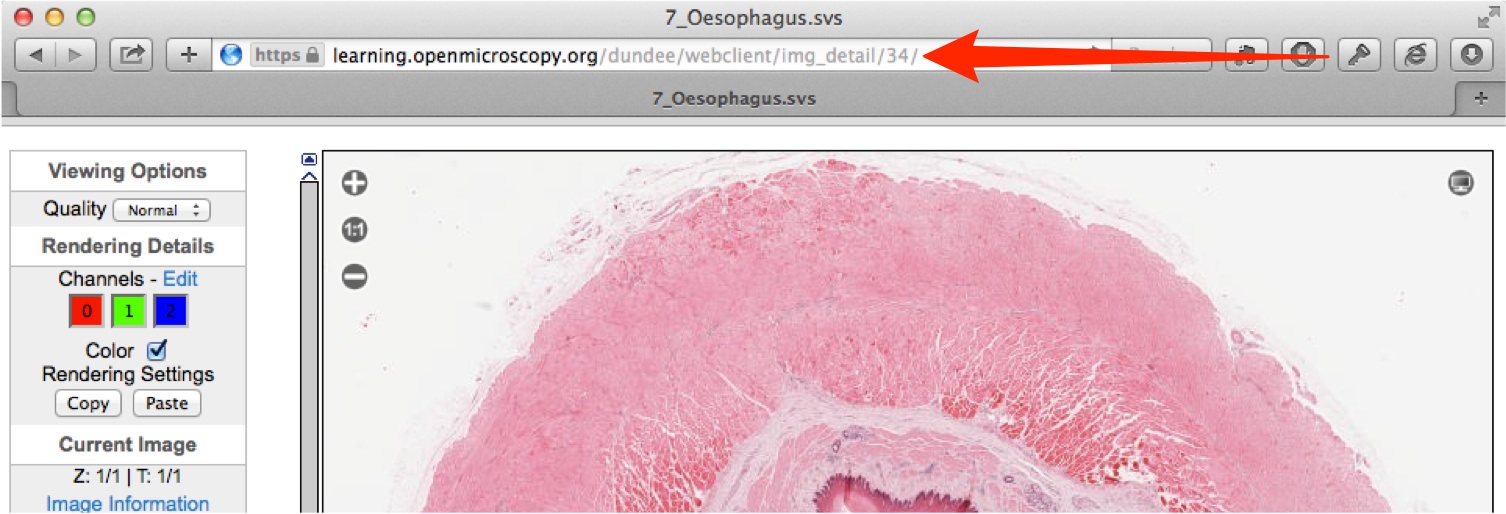
Links to specific images can be embedded in emails or other documents for sharing.
Open the image in the Viewer.
Select and copy the URL in the browser navigation box.
Paste this in as a hyperlink in the form:
https://learning.openmicroscopy.org/dundee/webclient/img_detail/34/
A login will still be required to view the image.
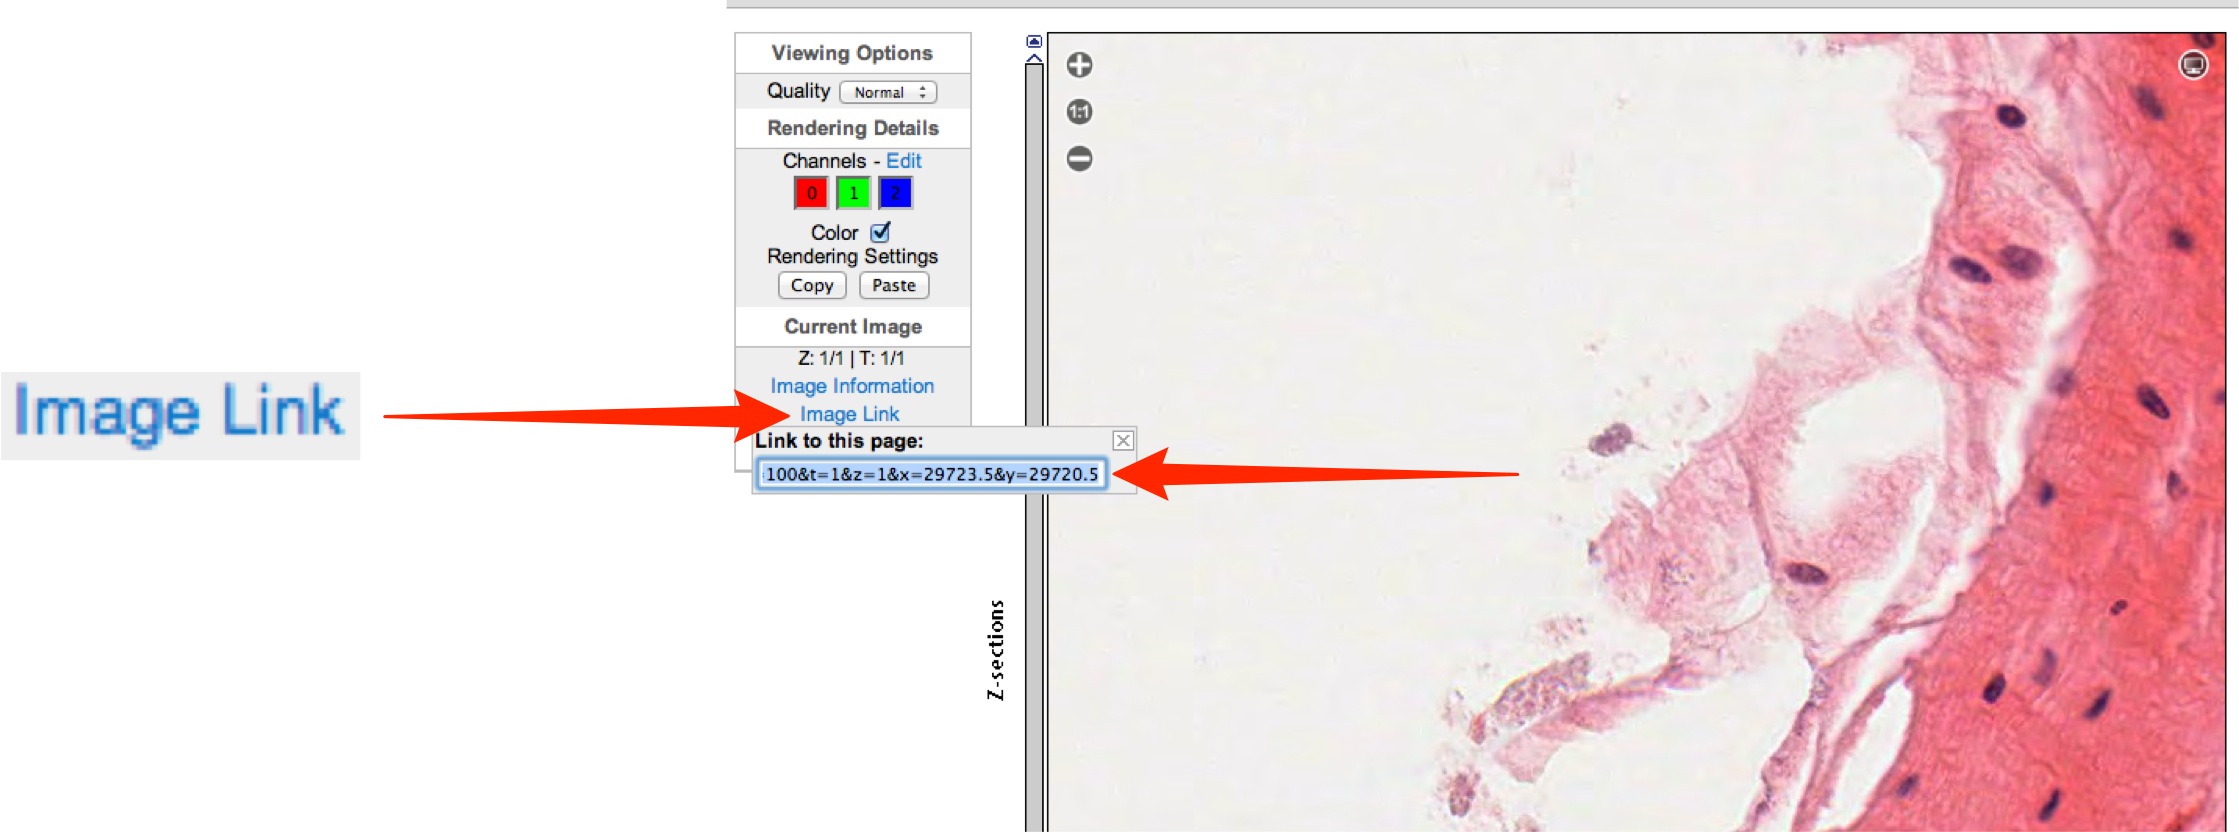
If you are zoomed in on a specific location in an image, click Image Link in the left-hand panel of the viewer and copy the URL.
This URL will take you, or another user, back to that magnification and location when pasted into a browser.
This can be used, for example, to bookmark the location of a feature, or indicate it to a colleague or tutor in an email.
Paste this in as a hyperlink in the form:
... /webclient/img_detail/34/?c=1|0:255$F ... y=29720.5
A login will still be required to view the image.

All Tutorial Material is available on line at: help.openmicroscopy.org
The Main OME website is at: www.openmicroscopy.org