![]()
User Help
- User Help Home Page
-
 Quickstart User Guides
-
 Data Workflow User Guides
-
More Workflow User Guides
-
Other OMERO Applications
-
More

Publishing with OMERO
Introduction
The principal tool for creating figures using images on OMERO is OMERO.figure. This is an optional installation, so may not be available on your server. Details can be found on the OMERO.figure page. If you would like to use OMERO.figure, speak to your OMERO system administrator.
Both OMERO.insight and OMERO.web also provide access to scripts that produce basic figures and movies from images on the OMERO server.
OMERO also offers a facility that allows public access to specified data on the server, provided this has been enabled by your OMERO server administrator. These are all described below.

Creating figures
Click on the Publish icon in the toolbar.
OMERO.insight
OMERO.web
Each script will open in a custom window.
Various parameters can be adjusted, and these values will be used by the script.
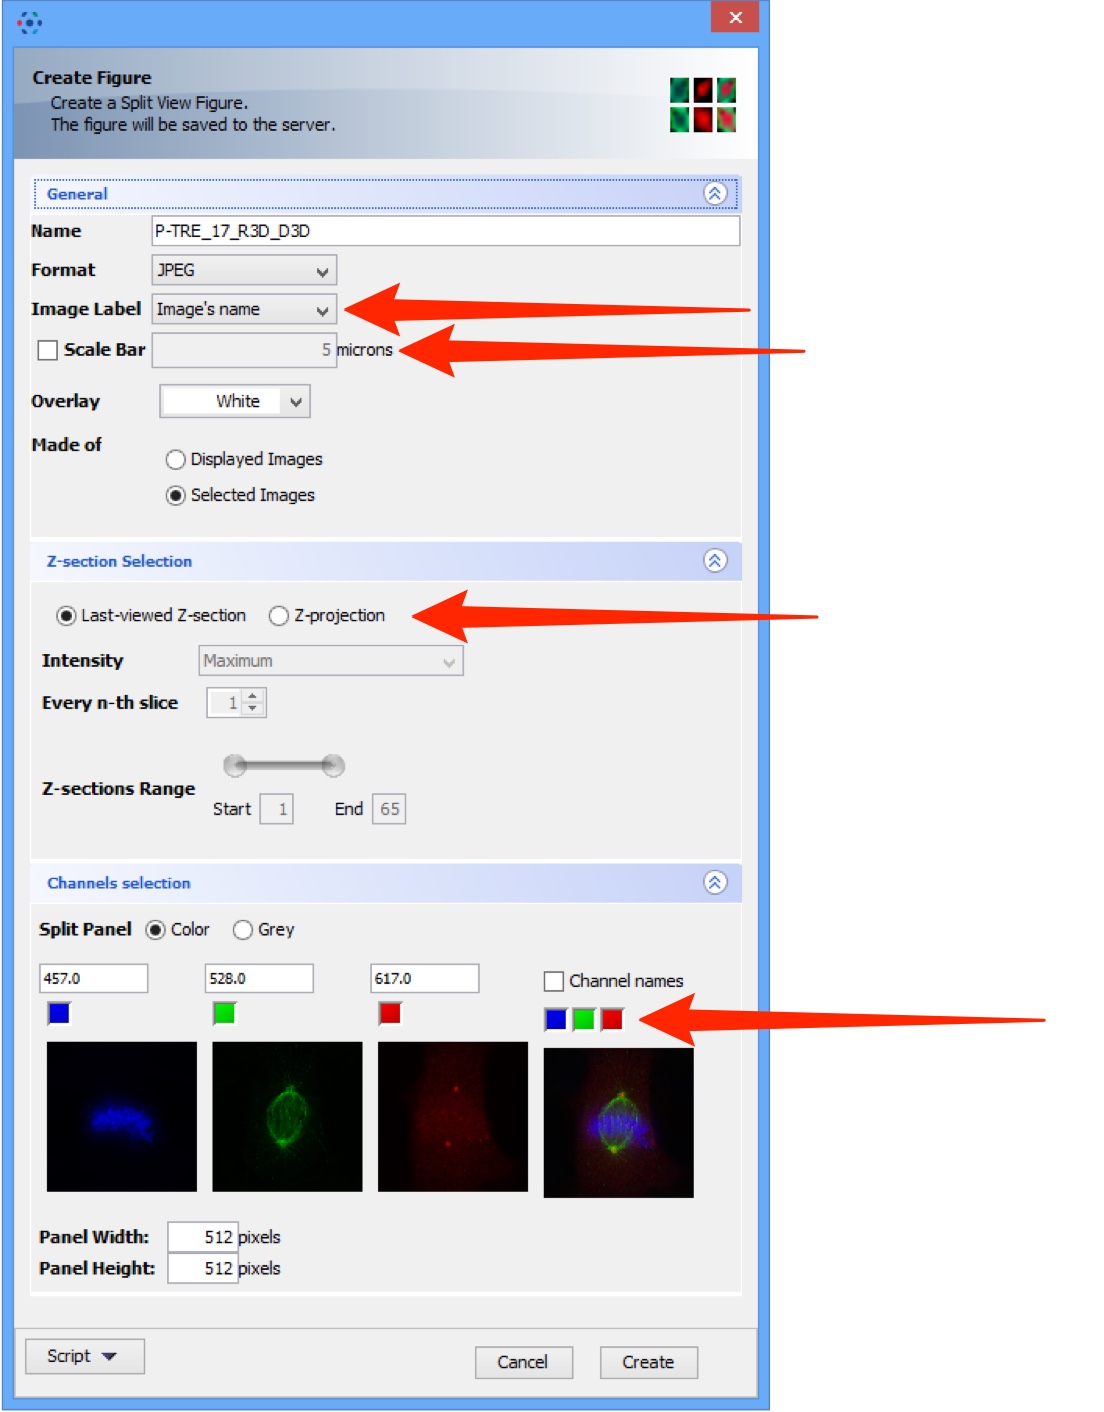
Edit the name of the figure or movie if desired.
Select the format of the figure from JPEG, PNG or TIFF.
Some of the script windows differ cosmetically between OMERO.insight and OMERO.web in terms of parameters available for setting and previews of the figures, but both OMERO.insight and OMERO.web use the same scripts, so the eventual output will be the same.
In OMERO.insight click on the Script button to download or view the script code.
In OMERO.web click on the View Script link to view the script code.
Use the slider to adjust the size of the previews in OMERO.web script windows.
Click the Create, Create Figure or Make Movie button to run the script.
Figures created by scripts are attached to the Images or the Dataset used in the figure.
Once created, figures can be viewed or downloaded from the activities menu.

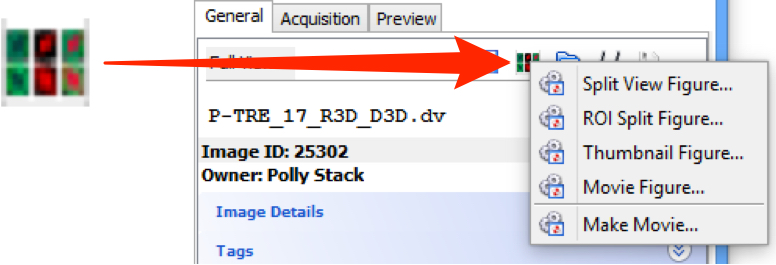
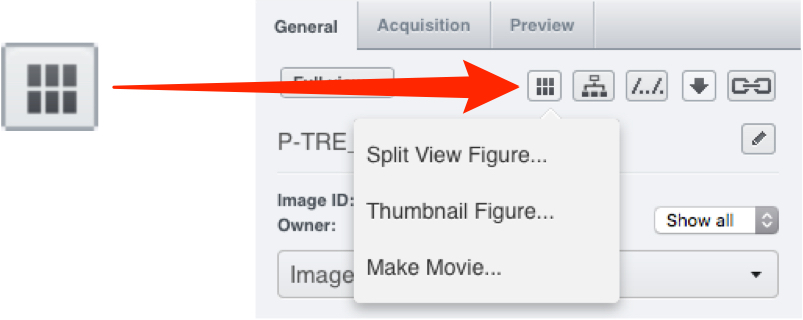
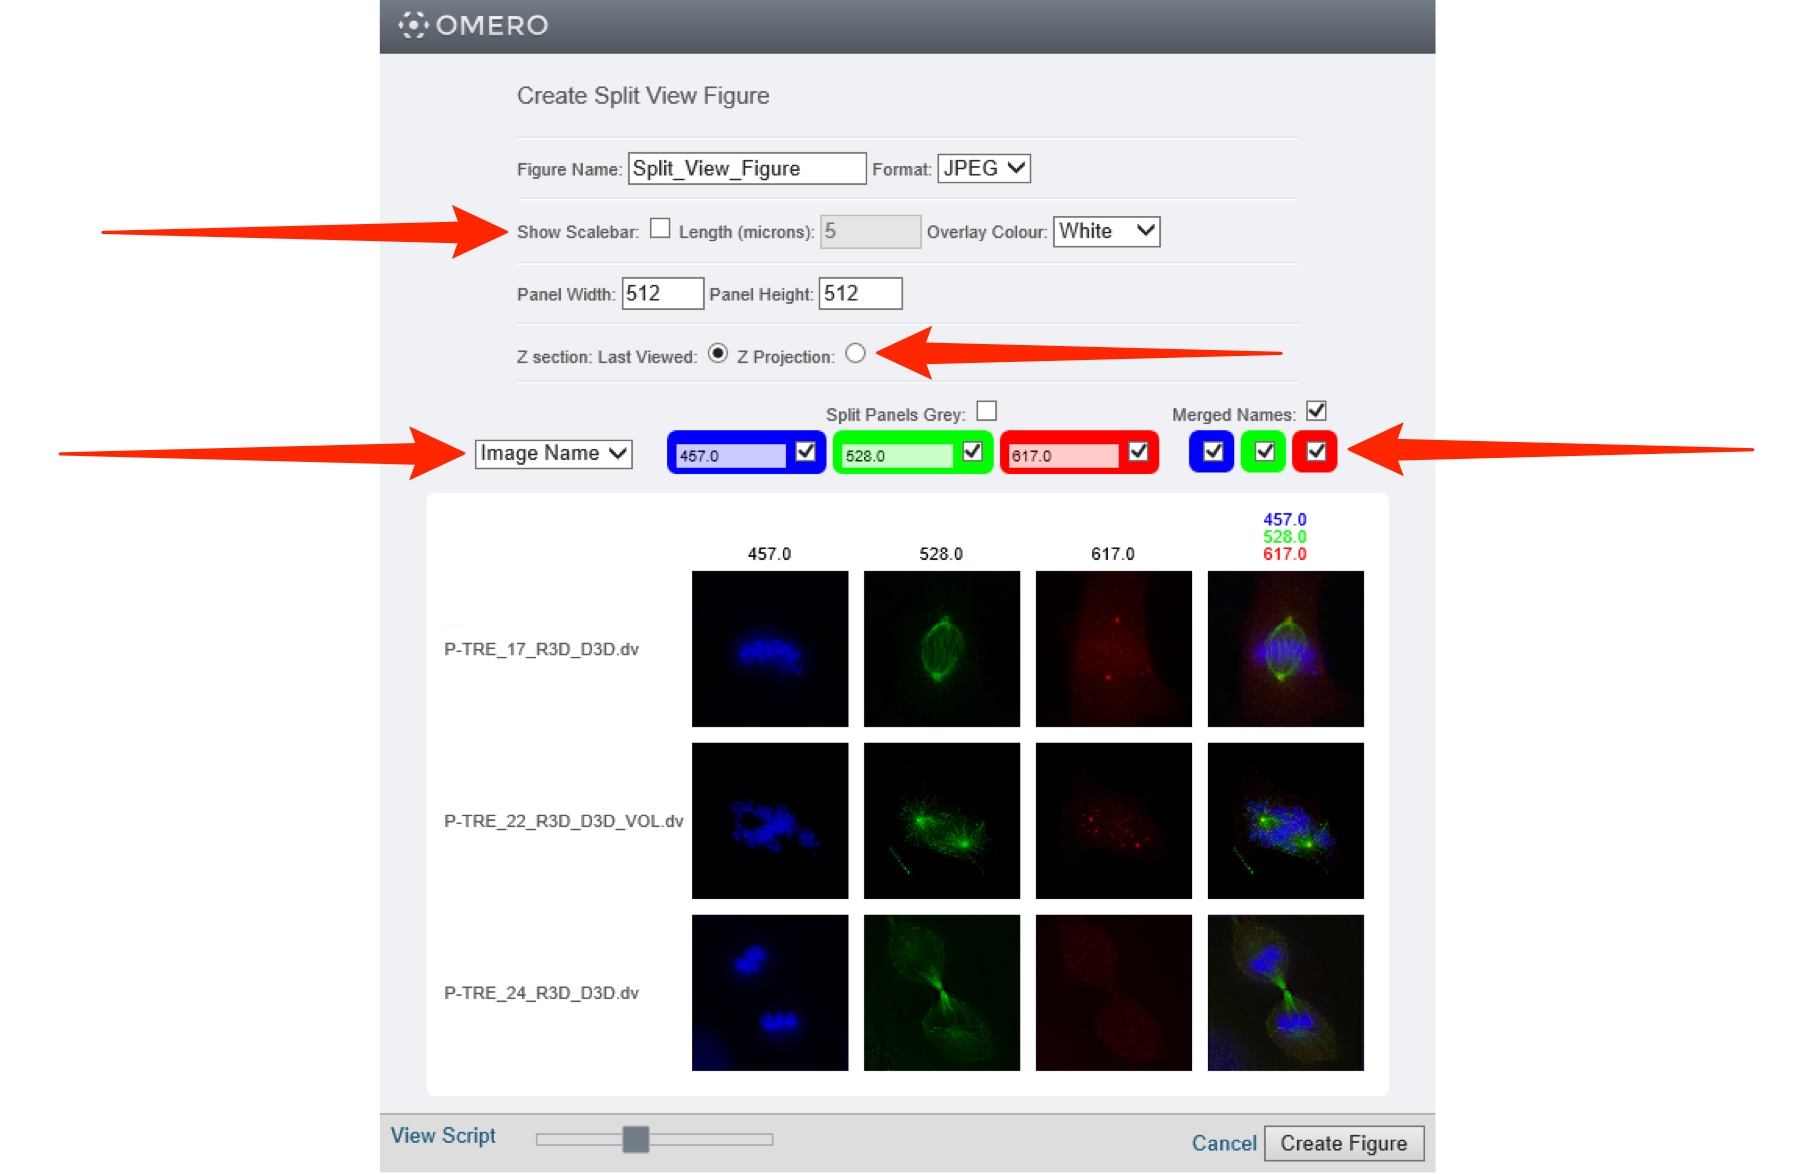
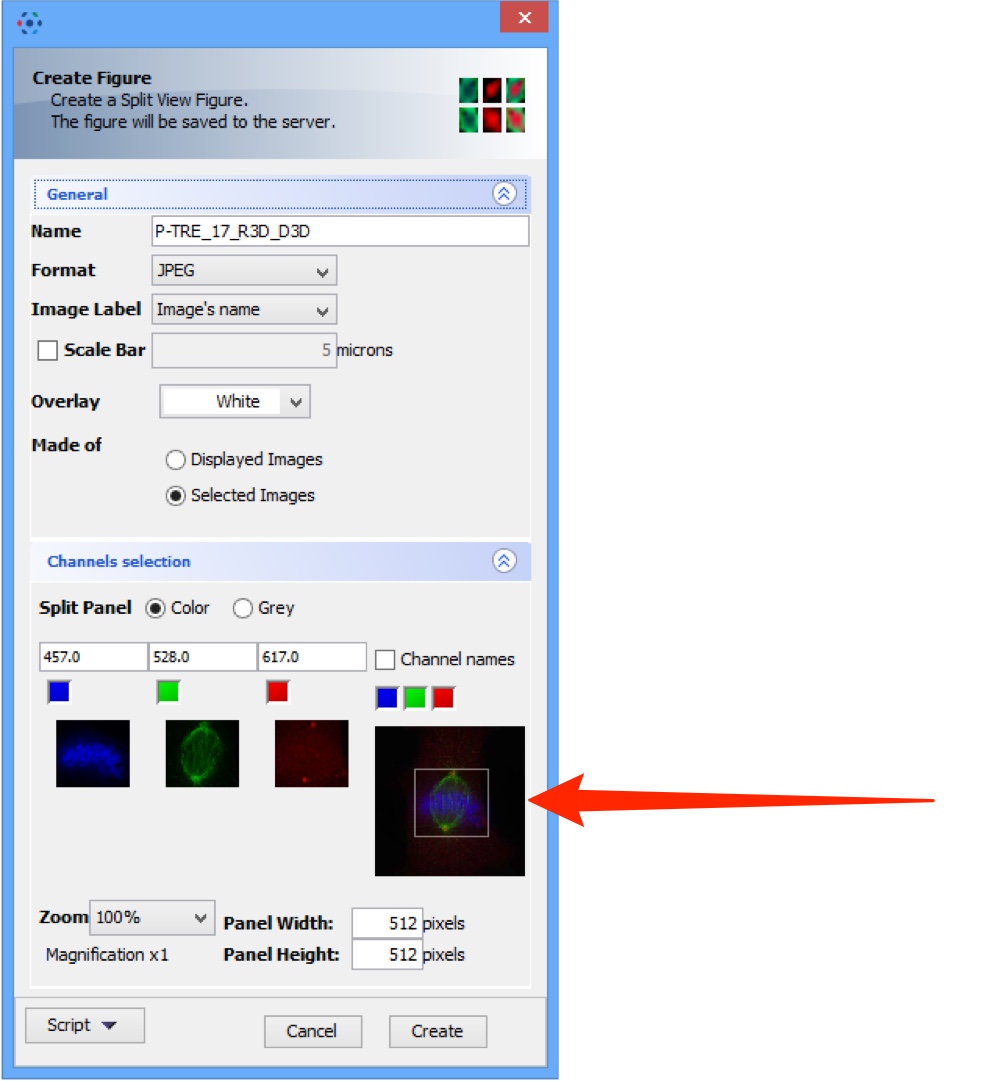
Select Split View Figure... from the drop-down menu to create a figure with a thumbnail for each channel and one for the full image.
Select the source of labelling from the Image Label drop-down.
Toggle the Scale Bar on and off and set size and colour.
Select Z-sections to be included.
Toggle channels on or off and edit channel colours as required.
OMERO.insight
OMERO.web
Select ROI Split Figure... to create a split figure of the area of an image marked by a rectangular ROI.
The full image thumbnail indicates the area of the image selected by the ROI.
OMERO.insight
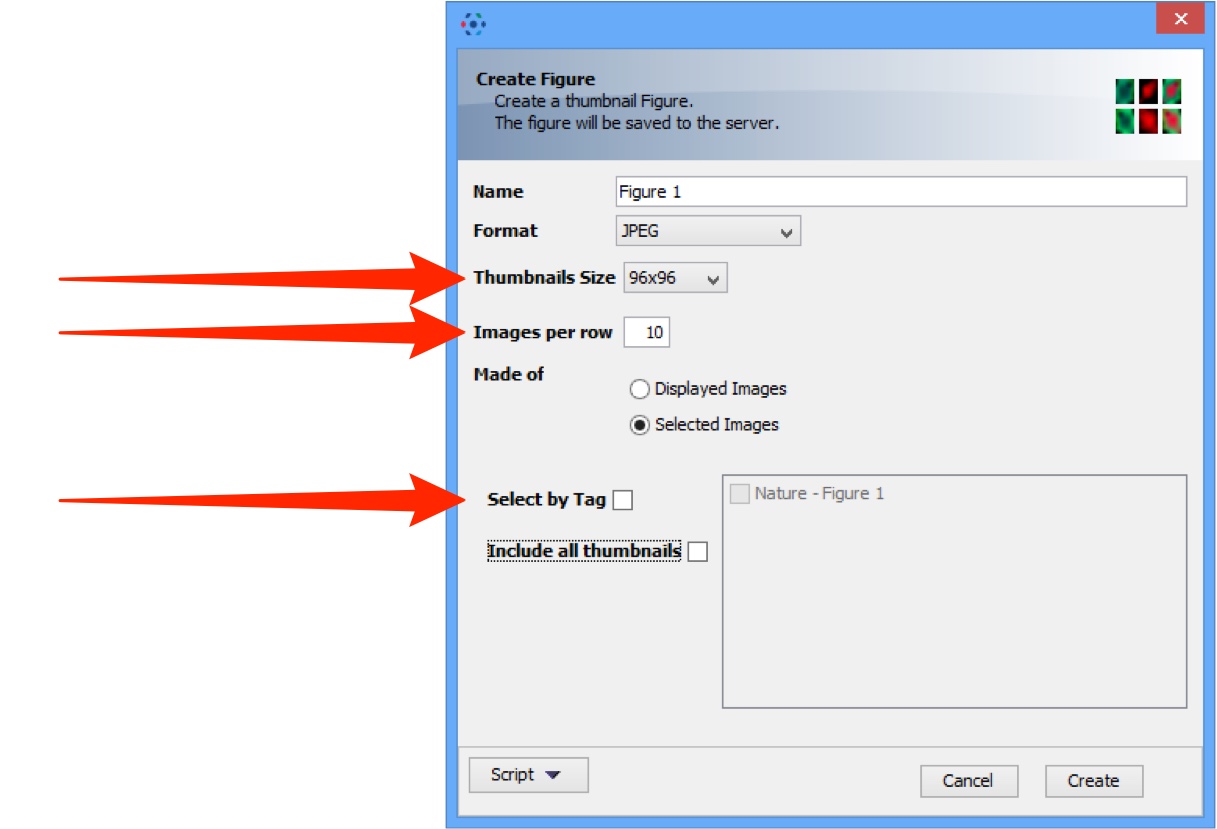
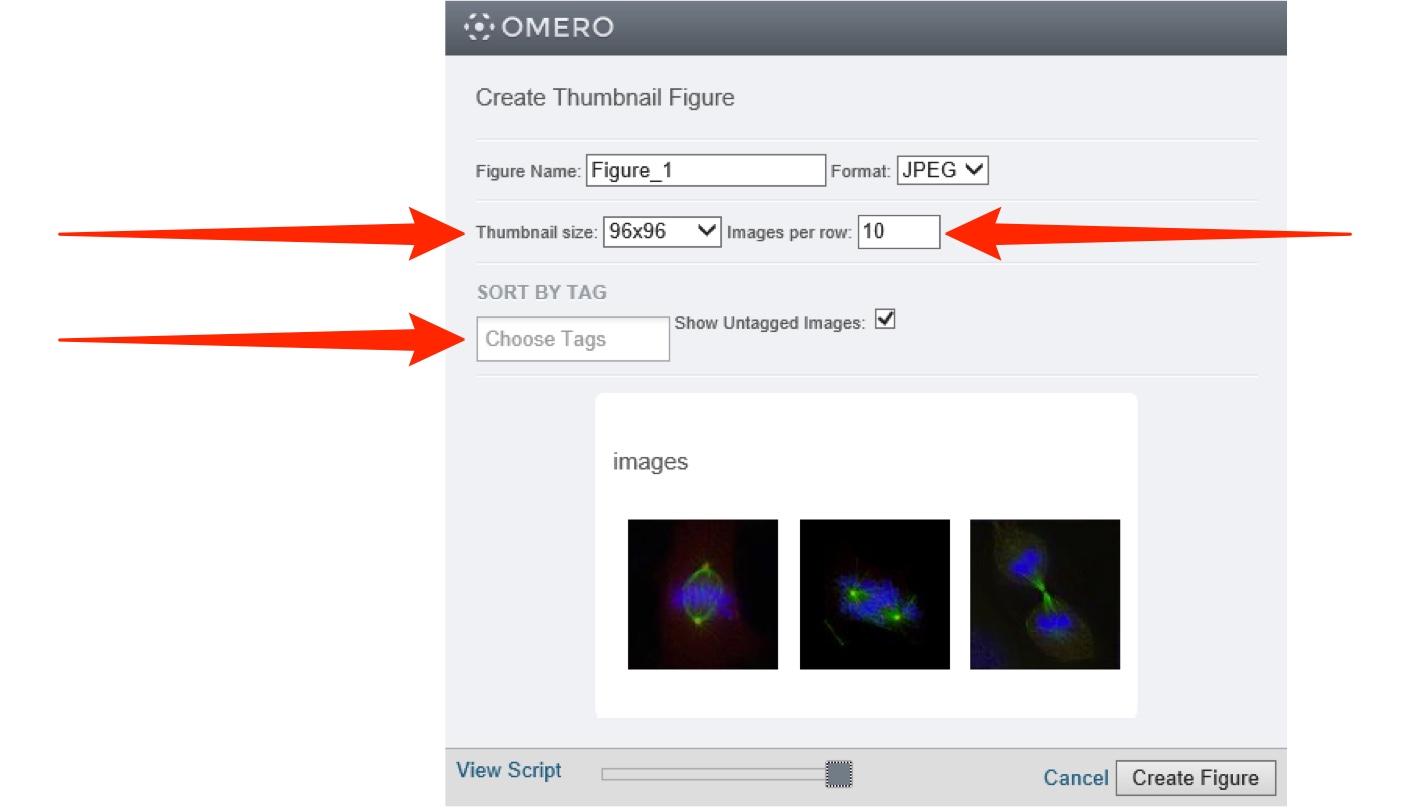
Select Thumbnail Figure... from the drop-down menu to create a figure with a thumbnail for each image.
Select the size from the Thumbnail Size drop-down.
Enter the number of thumbnails in a row.
Images to be included can be selected according to tags linked to them.
OMERO.insight
OMERO.web
Creating movies
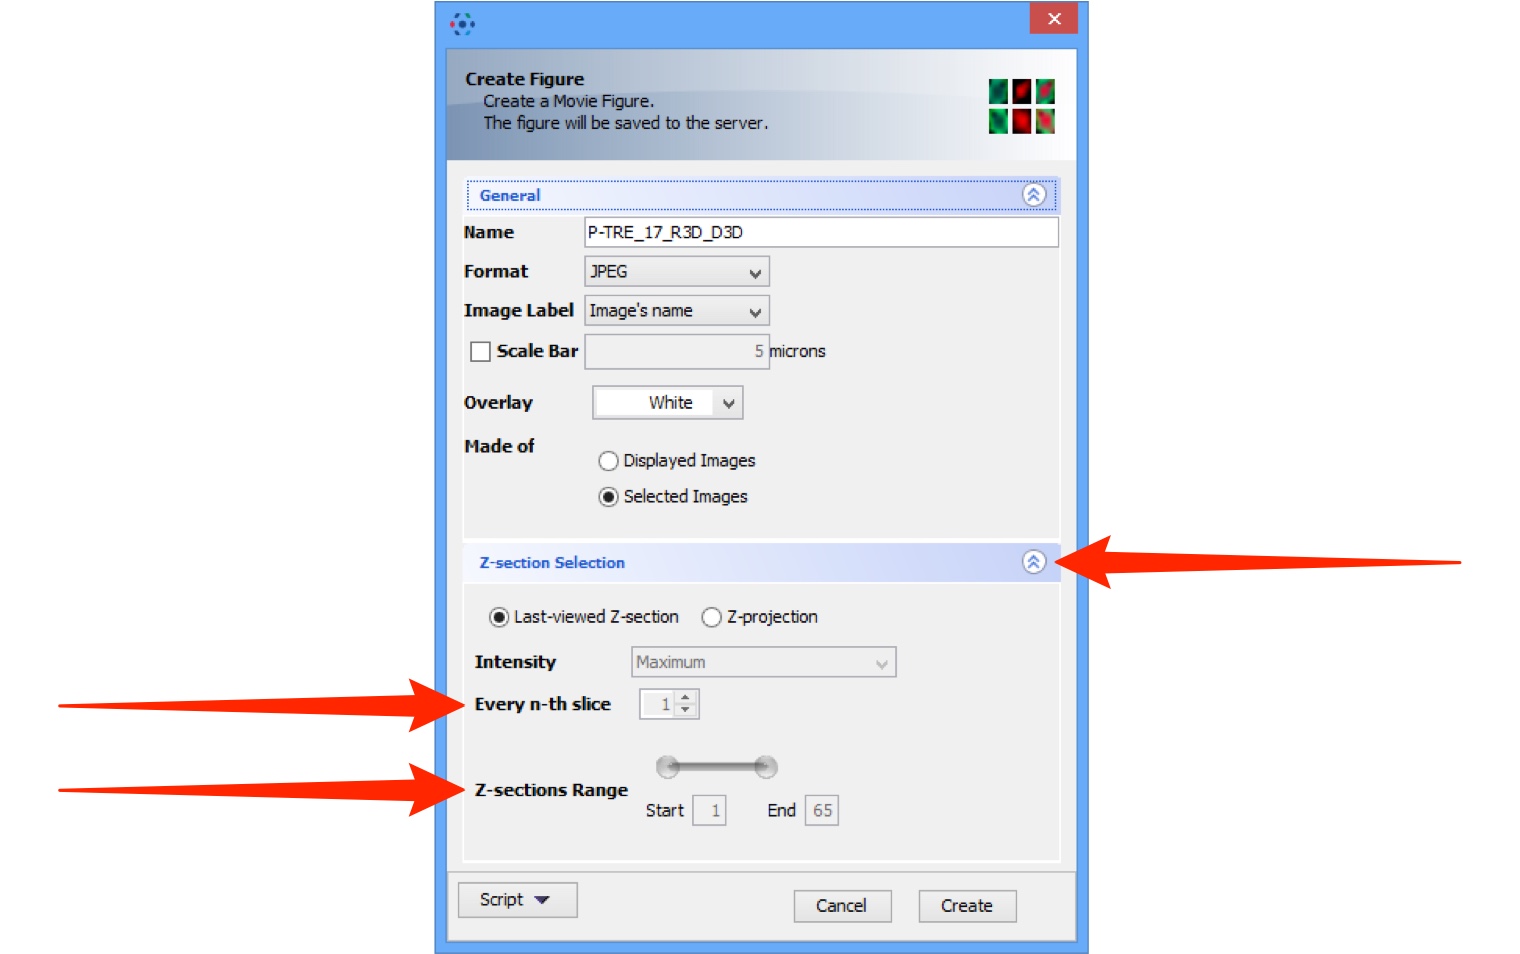
Select Movie Figure... to create a figure with a thumbnail for each frame of the movie.
Click to open the Z-section Selection tab to show options.
Select the proportion of slices to use.
Set the Z-section range as required.
OMERO.insight
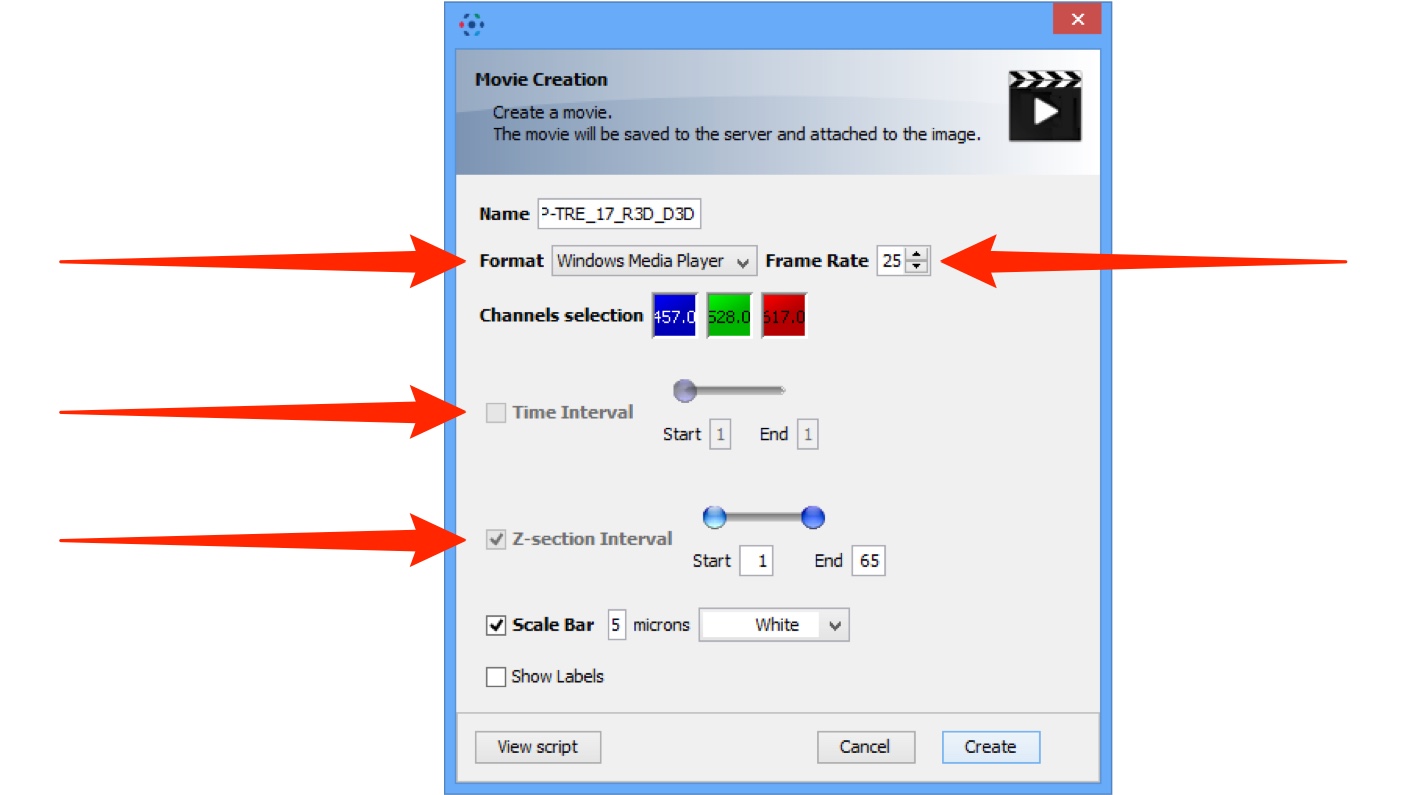
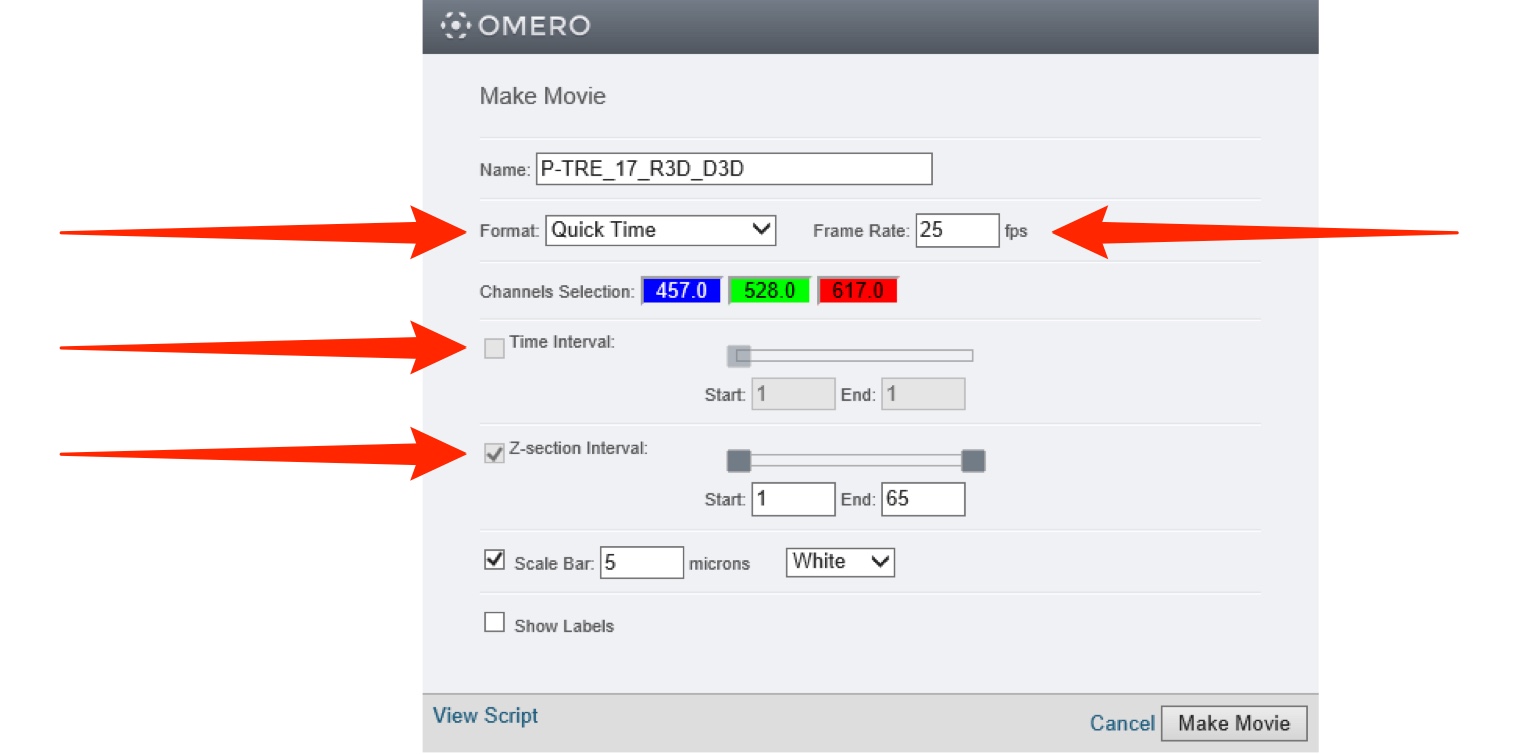
Select Make Movie... from the drop-down menu to create a movie from an image.
Select the format from the Format drop-down.
Use the Frame Rate drop-down to select the frame rate.
Set the desired time interval if appropriate.
Set the desired Z-section interval if appropriate.
OMERO.insight
OMERO.web
Using a public group
OMERO.web has the facility to allow public access to selected data without the need to log in. This functionality allows images to be made publicly accessible for embedding in web pages or use in other publishing modalities.
A group is made publicly accessible by the addition of a Public User to the group by the OMERO system admininistrator. Any group can therefore be made public, but it is usual to create groups specifically and give them the desired level of permissions, which is usually read-only.
Any data which is moved into a group that Public User is also a member of, can then be viewed by anybody without any need to log in.
This is not a default configuration of OMERO, so the OMERO system administrator must enable it for it to be available on your server.
Note
There are a number of safeguards to avoid inadvertent publication of data:
- the OMERO server must be specifically configured to create the Public User
- the OMERO system administrator must add the Public User to a group
- any OMERO user must request to be added to a public group to be able to make data publicly accessible
- a user who is a member of a public group must deliberately move or import any data they want to make accessible into a group that is public.
Once in a public group, selected images can then be made accessible to non-OMERO users, via a web URL
Before you proceed with using a public group, please note the following points:
- Once your data is placed in a public group it is effectively visible to the whole world without any log-in required to view it.
- As usually configured, only ROIs associated with data in a public group will be visible to the Public User, tags, attachments, comments or ratings will not be visible.
- Public Users will be able to download a JPEG version of your images via their web browser but will not have access to the data in the original format.
- Public Users will be able to alter the rendering settings while viewing, but any changes will not be saved.
- Other registered OMERO users who are also members of the public group will be able to access your data and annotations in a public group according to the permissions of the group.
- Data moved from other groups into a public group will no longer be visible in the original group. You will be able to move it back at any stage, but you should consider importing a new copy of the data into a public group if you wish to retain the original copy in its original group.
You need to be made a member of a public group by the system administrator of your OMERO server before you can share data.
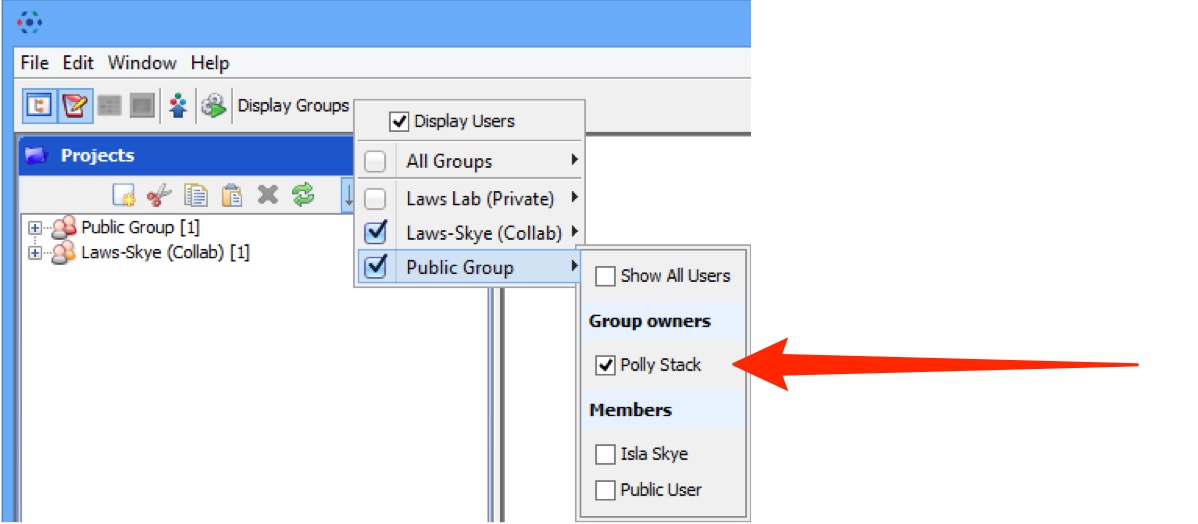
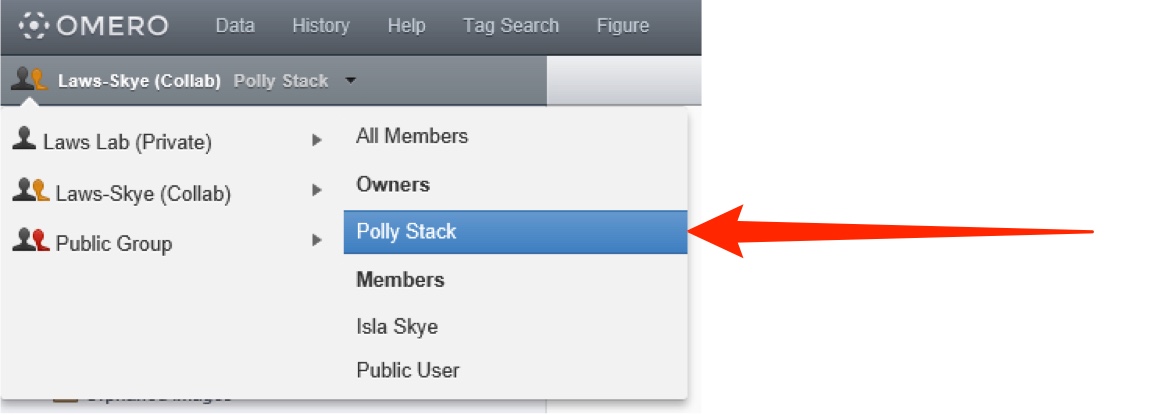
Once you are a member of the public group, log into your OMERO account as usual via OMERO.insight or OMERO.web.
Select the public group in the Display Groups menu.
Ensure your name is checked.
OMERO.insight
OMERO.web
For images to be visible to the public, the data must be in the public group.
You remain the owner of any images in the public group, and can still change rendering settings, add ROIs or annotate them.
You can either move data from an existing group into the public group, or you can import data directly into the public group.
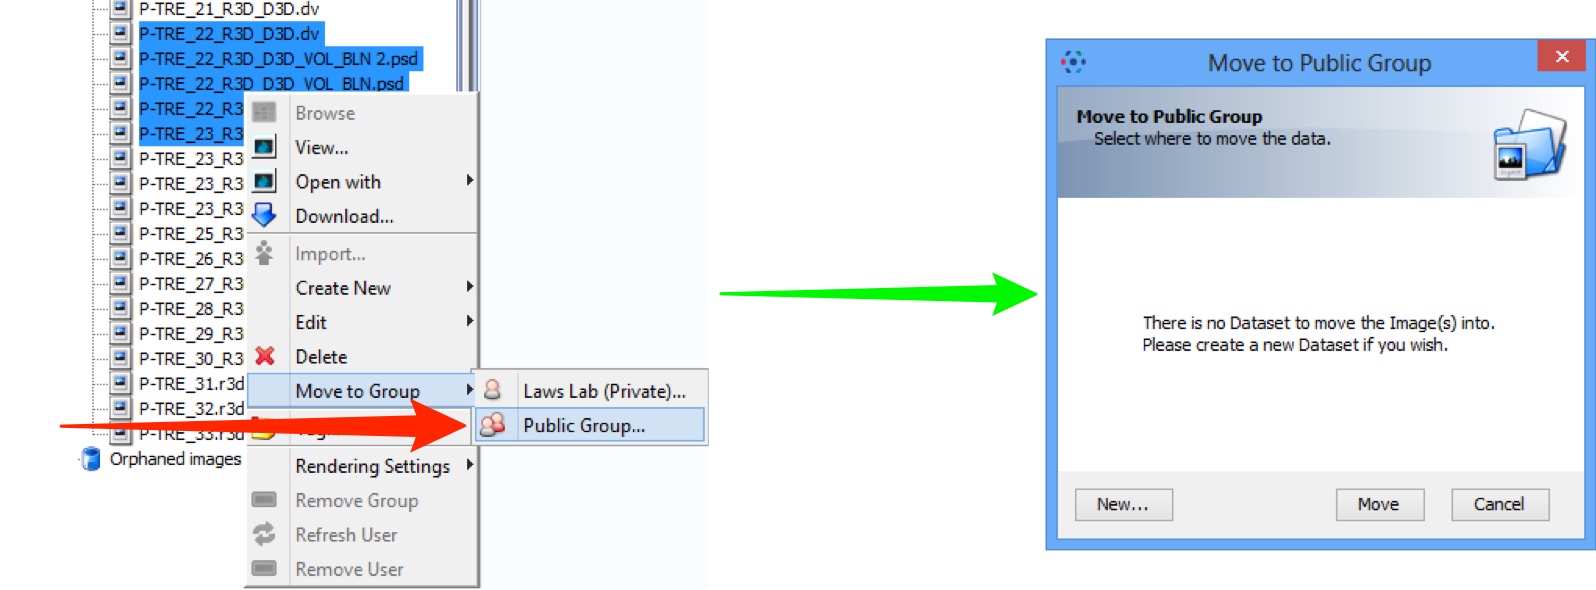
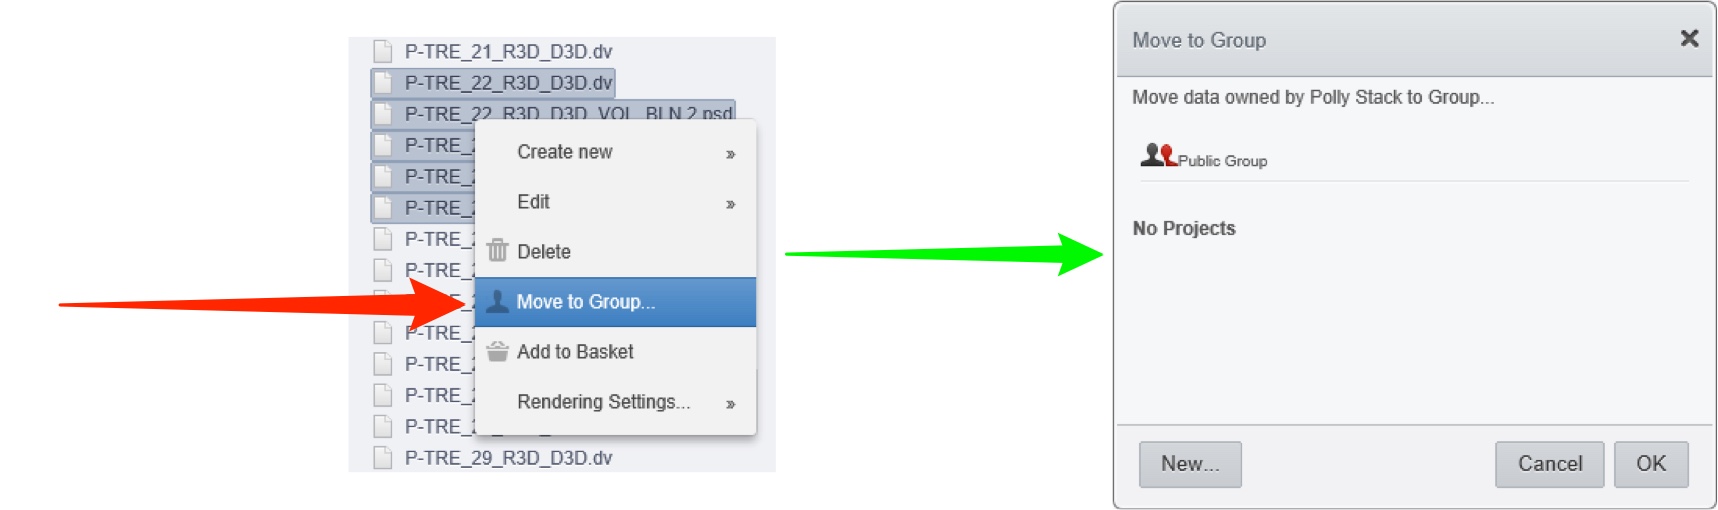
Select the project, dataset or images to be moved to the public group in the data tree in left hand pane.
Right-click and select Move to Group ... in the menu.
Select a destination for the data in terms of Group, Project and Dataset.
The progress of the move will show in the Activities window.
OMERO.insight
OMERO.web
To import data directly into the public group, in the Import Location window choose the public group from the Group drop-down menu.
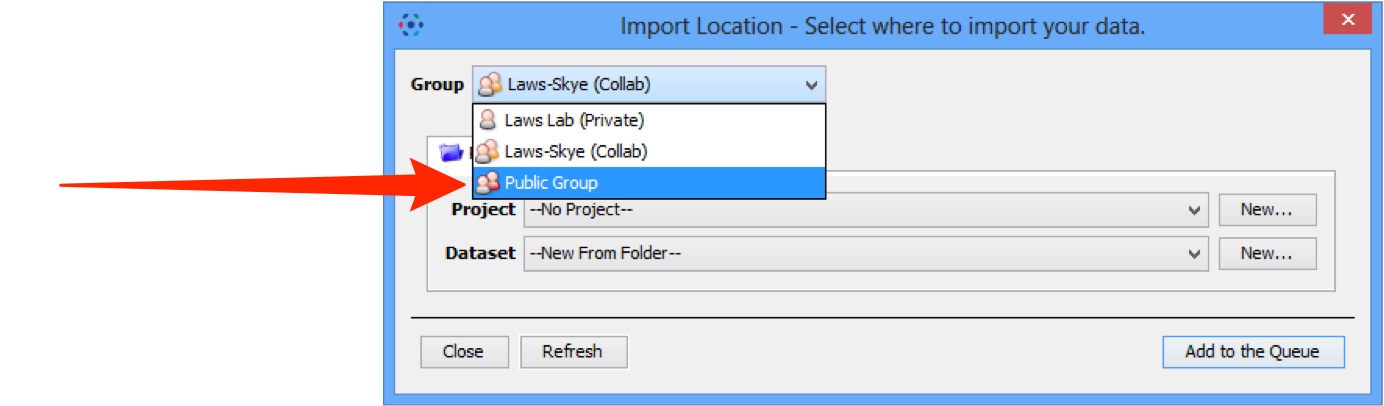
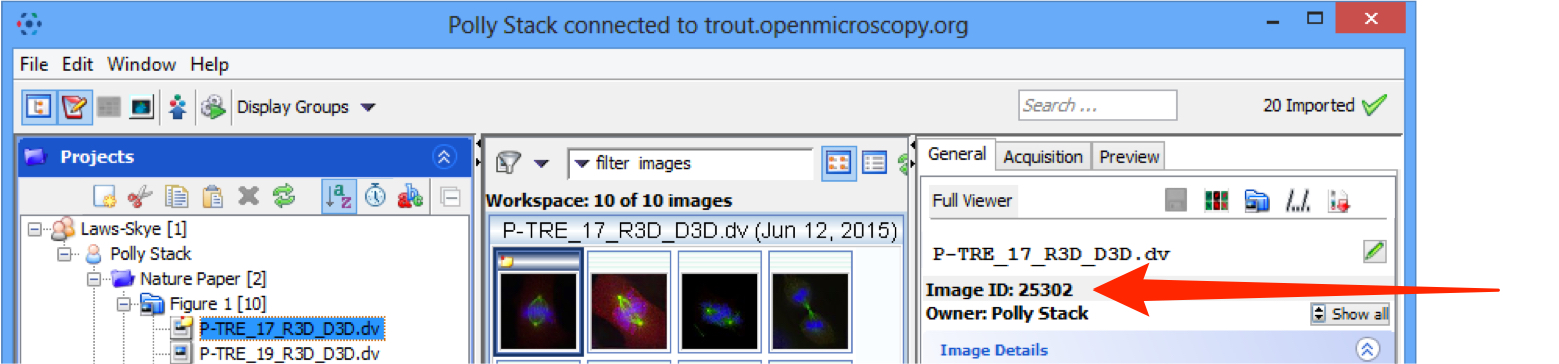
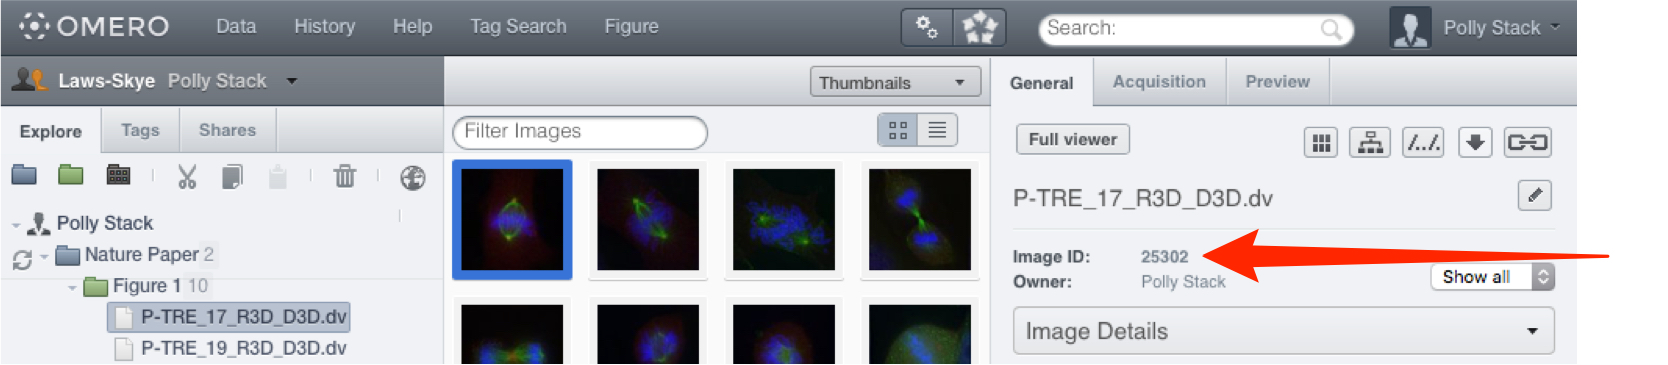
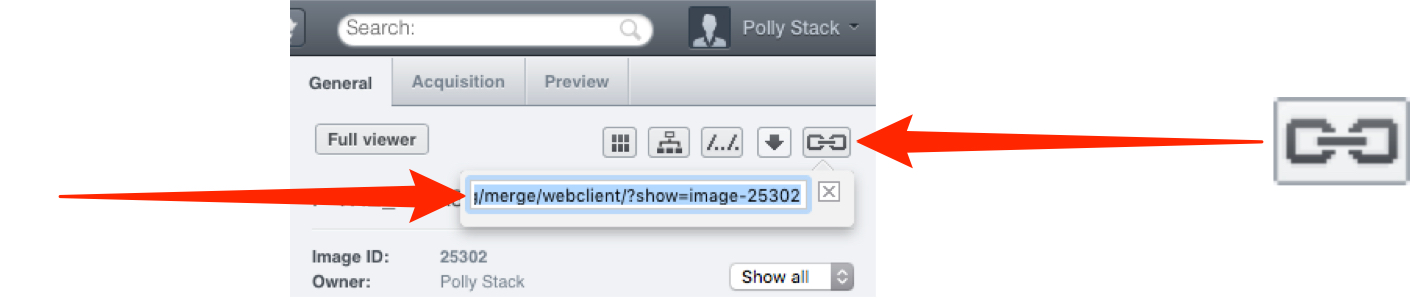
Image IDs, shown in the right pane, are used to link to images in the public group.
These can be copied and pasted into an HTML link as described below.
In OMERO.web click on the Link button and copy the the URL.
or open the image in the full viewer and copy the URL in the browser address field
or click the Image Link text and copy the URL from the pop-up.
This URL can then be emailed or used as a permanent link to the image.
OMERO.insight
OMERO.web
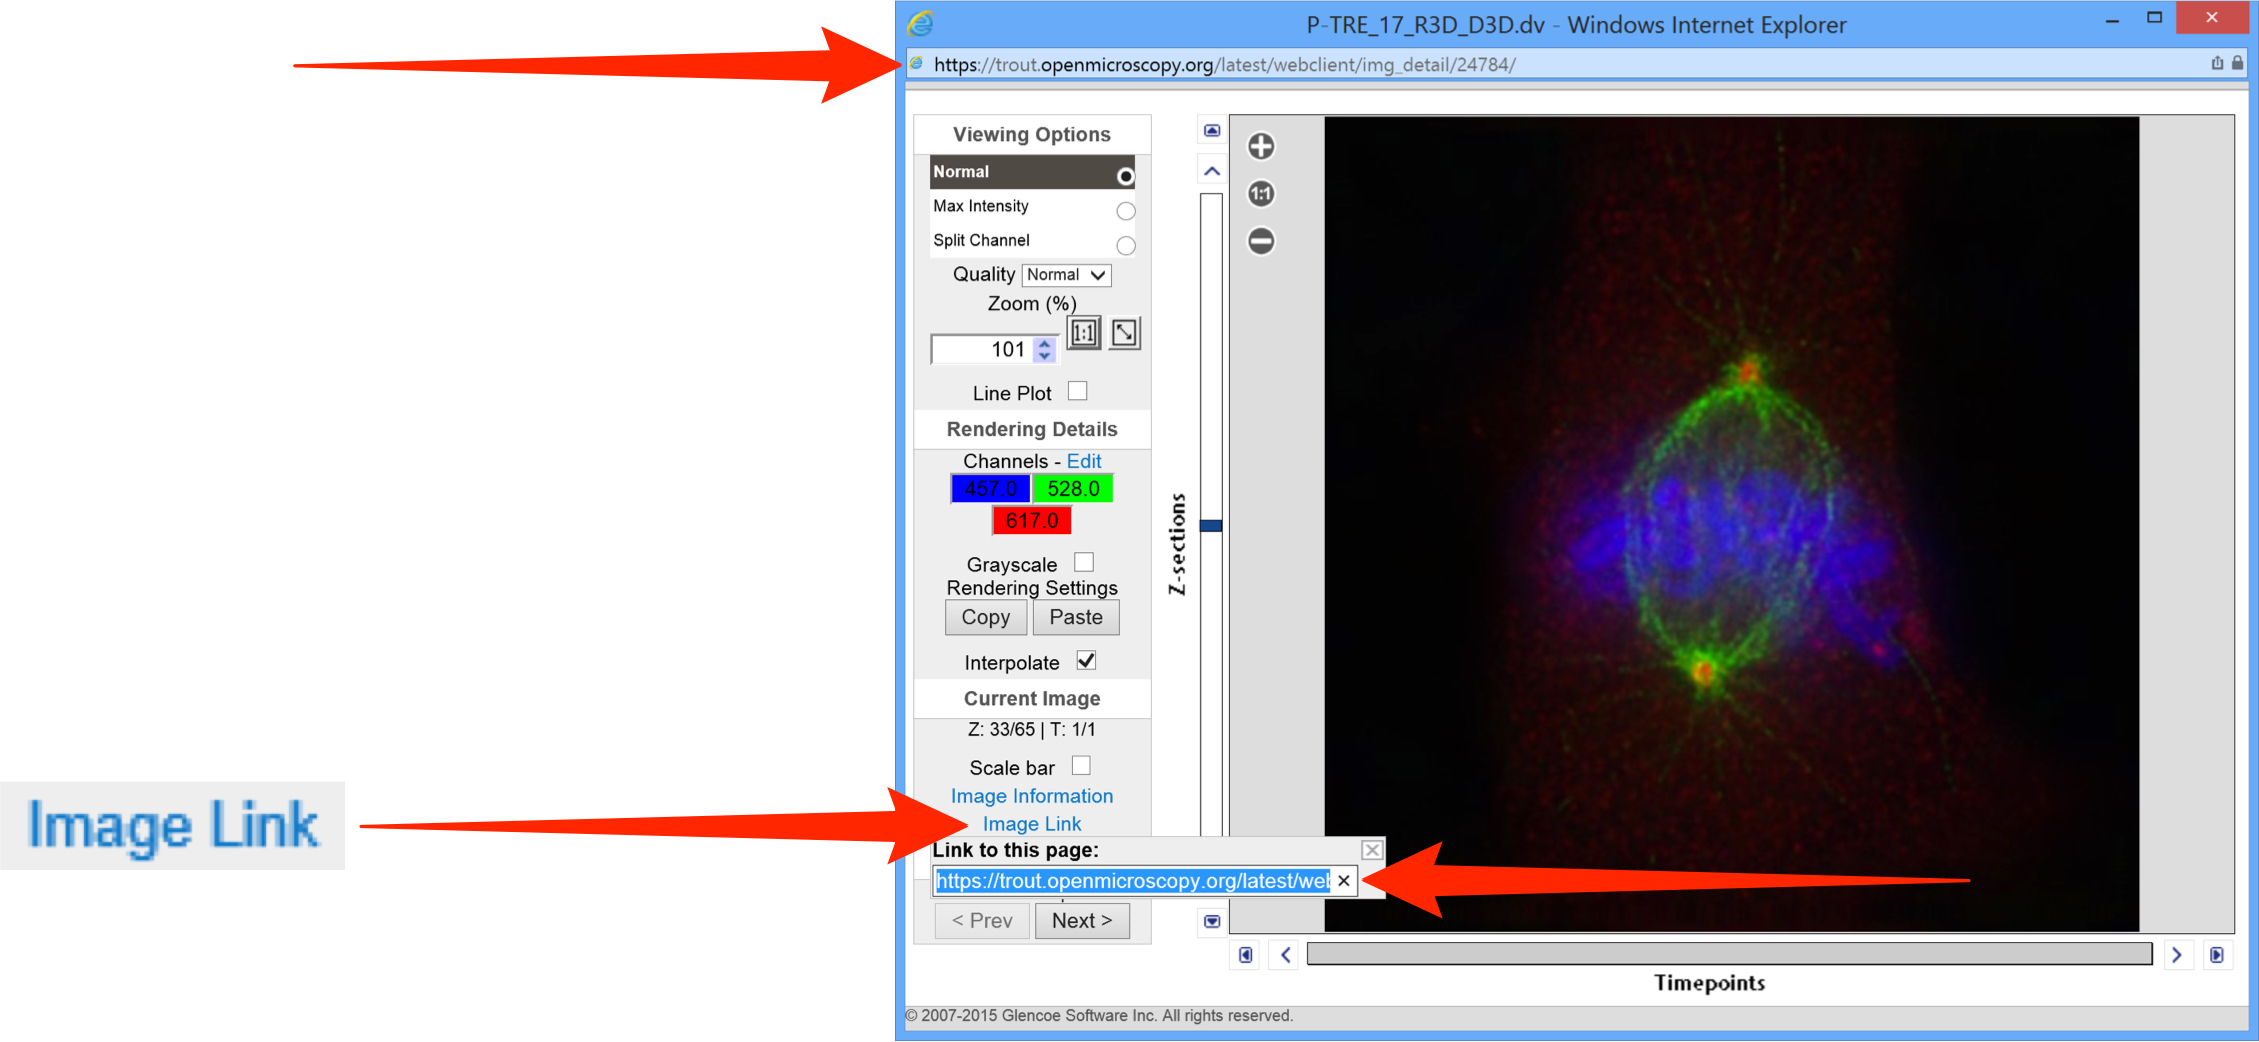
To create an HTML link to the thumbnail or the full viewer display of the image, use the following syntax where 1234 represents the image ID:
thumbnail (default size - 96px wide):
https://nightshade.openmicroscopy.org/webgateway/render_thumbnail/1234/
thumbnail (size 200px wide):
https://nightshade.openmicroscopy.org/webgateway/render_thumbnail/1234/200/
image viewer:
https://nightshade.openmicroscopy.org/webgateway/img_detail/1234/
The following example HTML code gives the page shown.
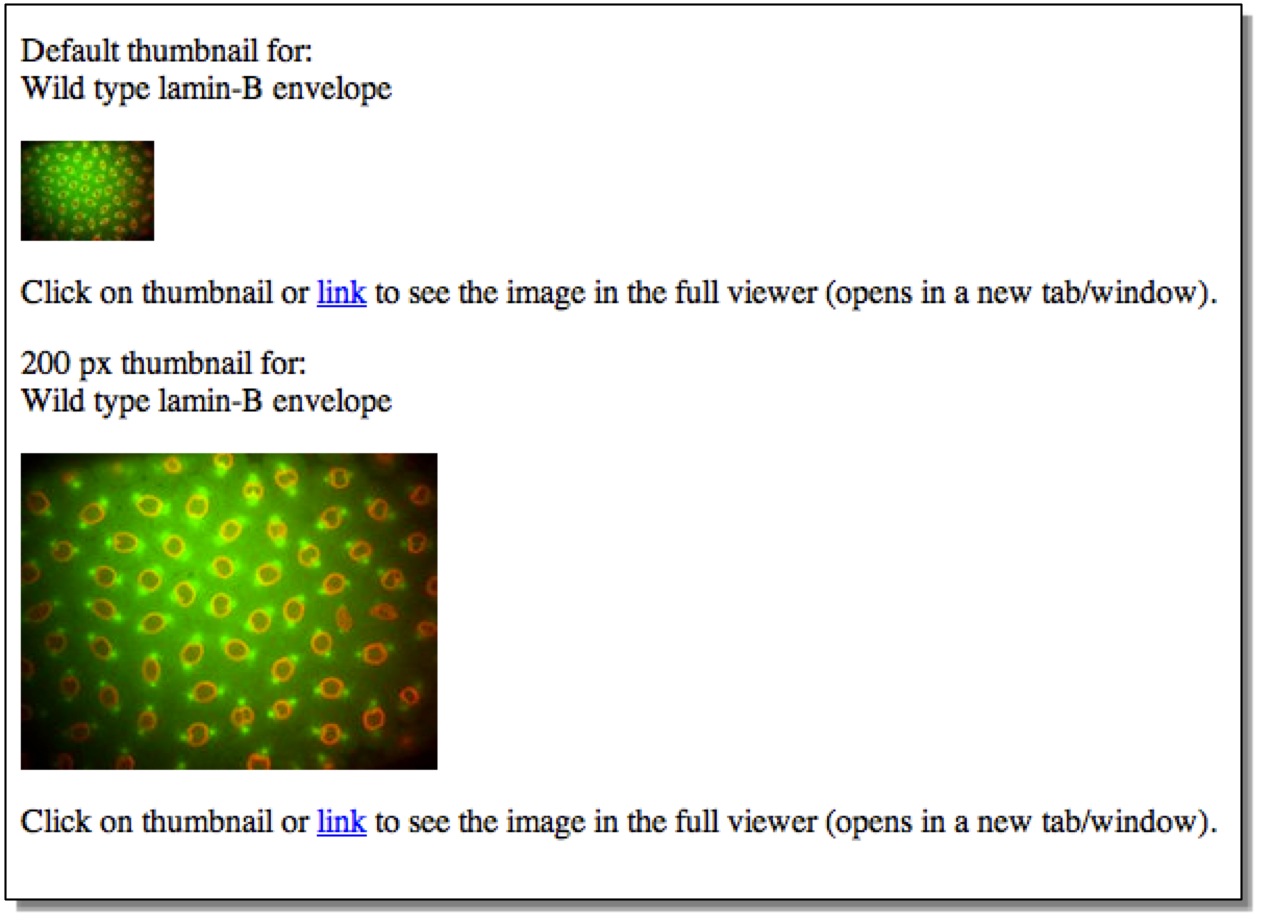
Data from JCB: Civelekoglu-Scholey et al., JCB, doi: 10.1083/jcb.200908150
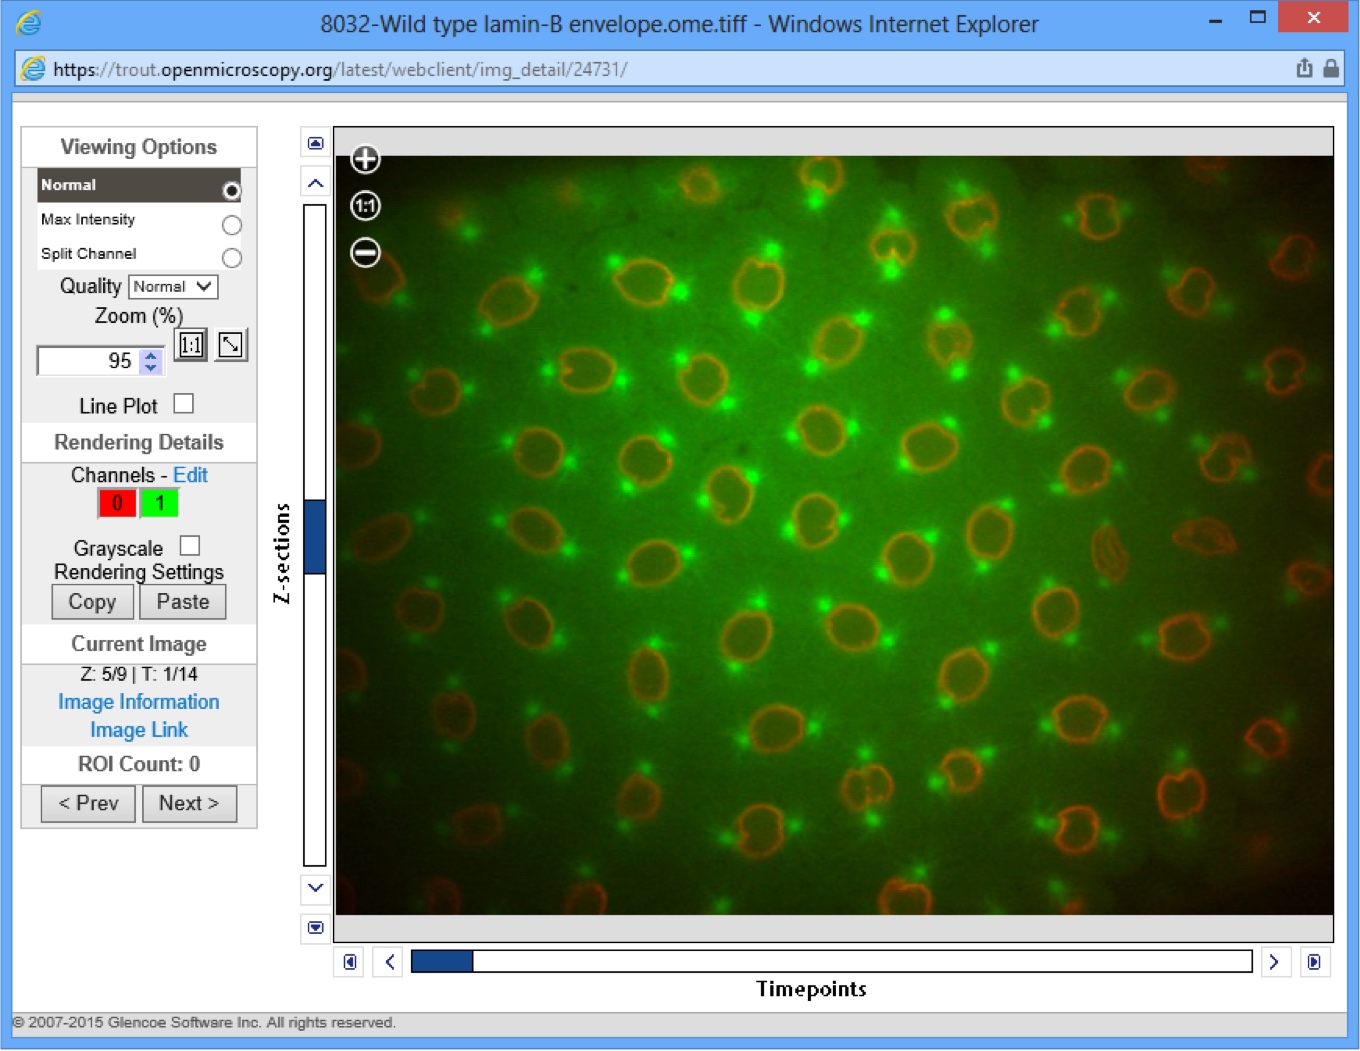
Viewing an image in the full viewer, the Public User can zoom, scroll, step through Z or T sections, adjust rendering settings and view ROIs and basic image details.
Any changes made by Public User will not be saved.
Data from JCB: Civelekoglu-Scholey et al., JCB, doi: 10.1083/jcb.200908150
The OMERO WebGateway is a Django app that enables images in a public group to be viewed in a number of other ways.
Details can be found at: WebGateway
Using OMERO as a Public Repository
In addition to adding the Public User to allow access to your data, the appearance of OMERO.web can be customised or you can use a separate custom app to tailor the front end of your OMERO installation to your target audience.
There are a number of repositories based on OMERO with bespoke front ends, including:
OMERO.gallery provides a basic gallery front end based on the Group-Project-Dataset-Image, and is a good starting point to develop a bespoke front end.
An example of this can be seen at:
Full documentation on how to set up OMERO as a public repository and details of customisation options can be found in the OMERO Repository documentation.
All Tutorial Material is available on line at: help.openmicroscopy.org
The Main OME website is at: www.openmicroscopy.org