![]()
User Help
- User Help Home Page
-
 Quickstart User Guides
-
Data Workflow User Guides
-
 More Workflow User Guides
-
Other OMERO Applications
-
More

Importing Data with OMERO.insight Version 5
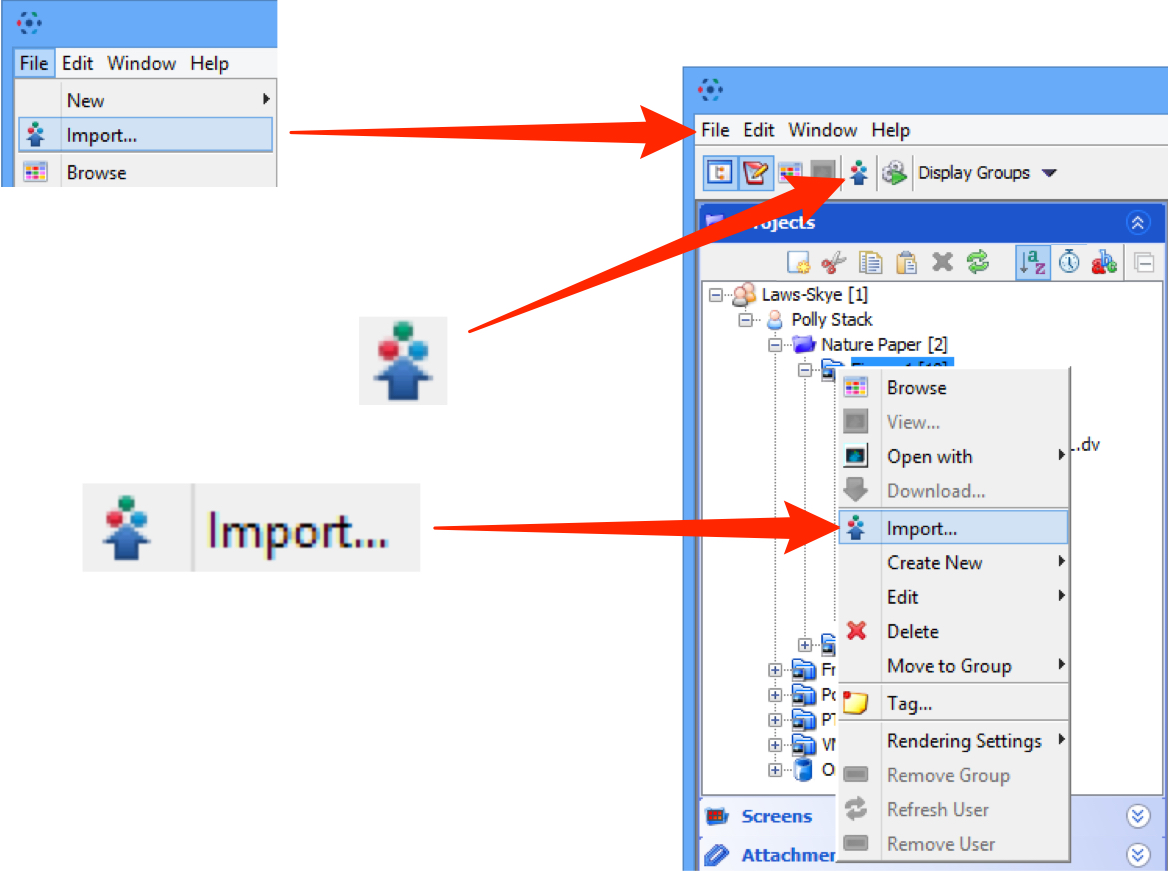
Importing data
Select Import from the File menu;
or click on the Import icon in the toolbar;
or select a destination Project or Dataset for the imported data and right click then select Import.
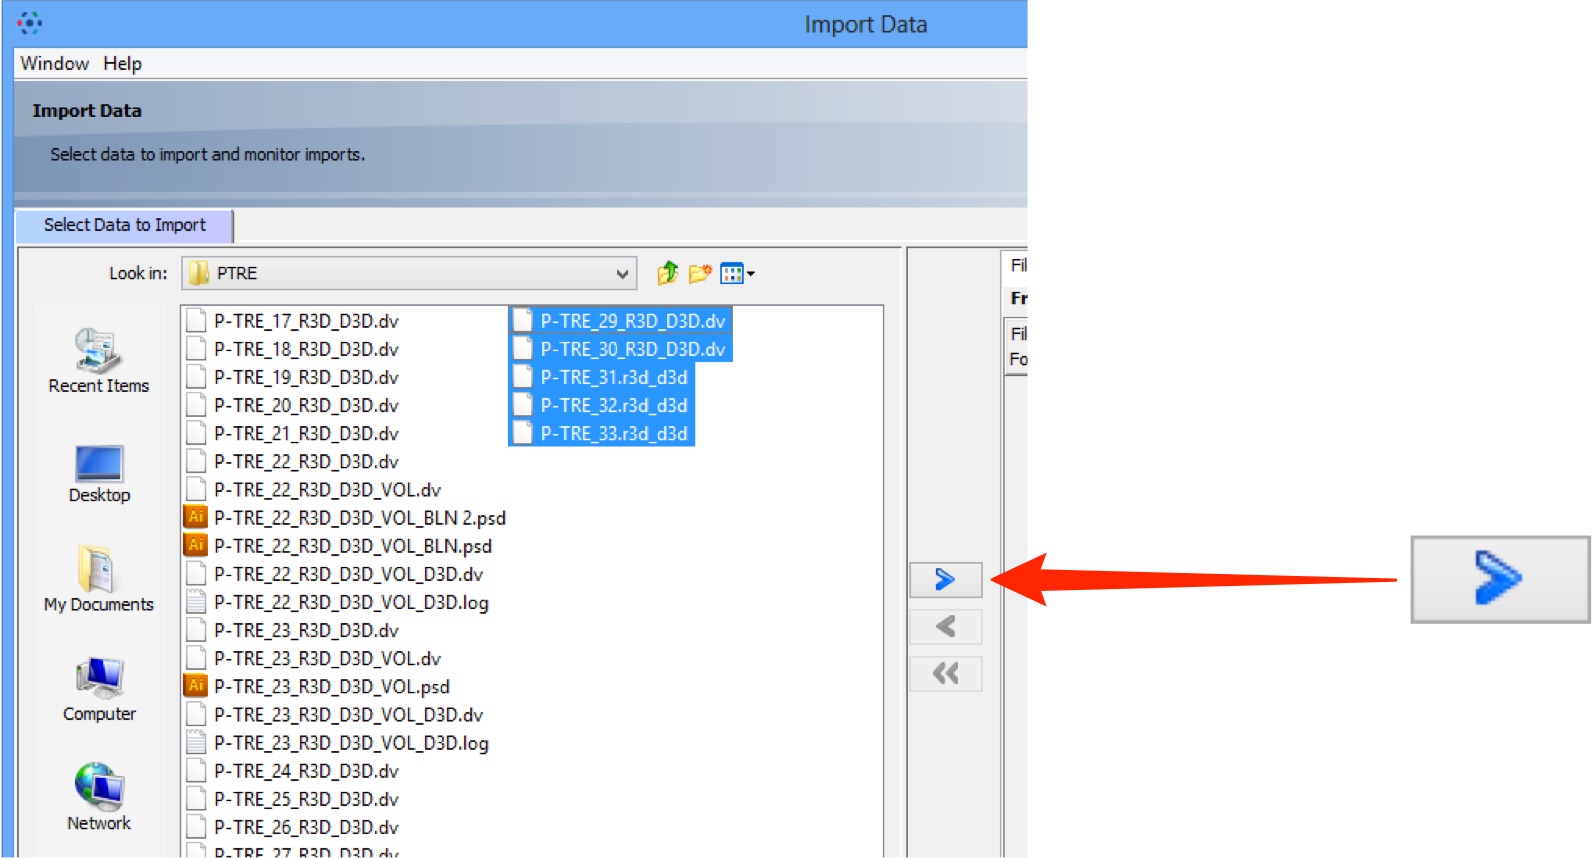
Use the File Chooser to locate data to be imported on local or networked drives.
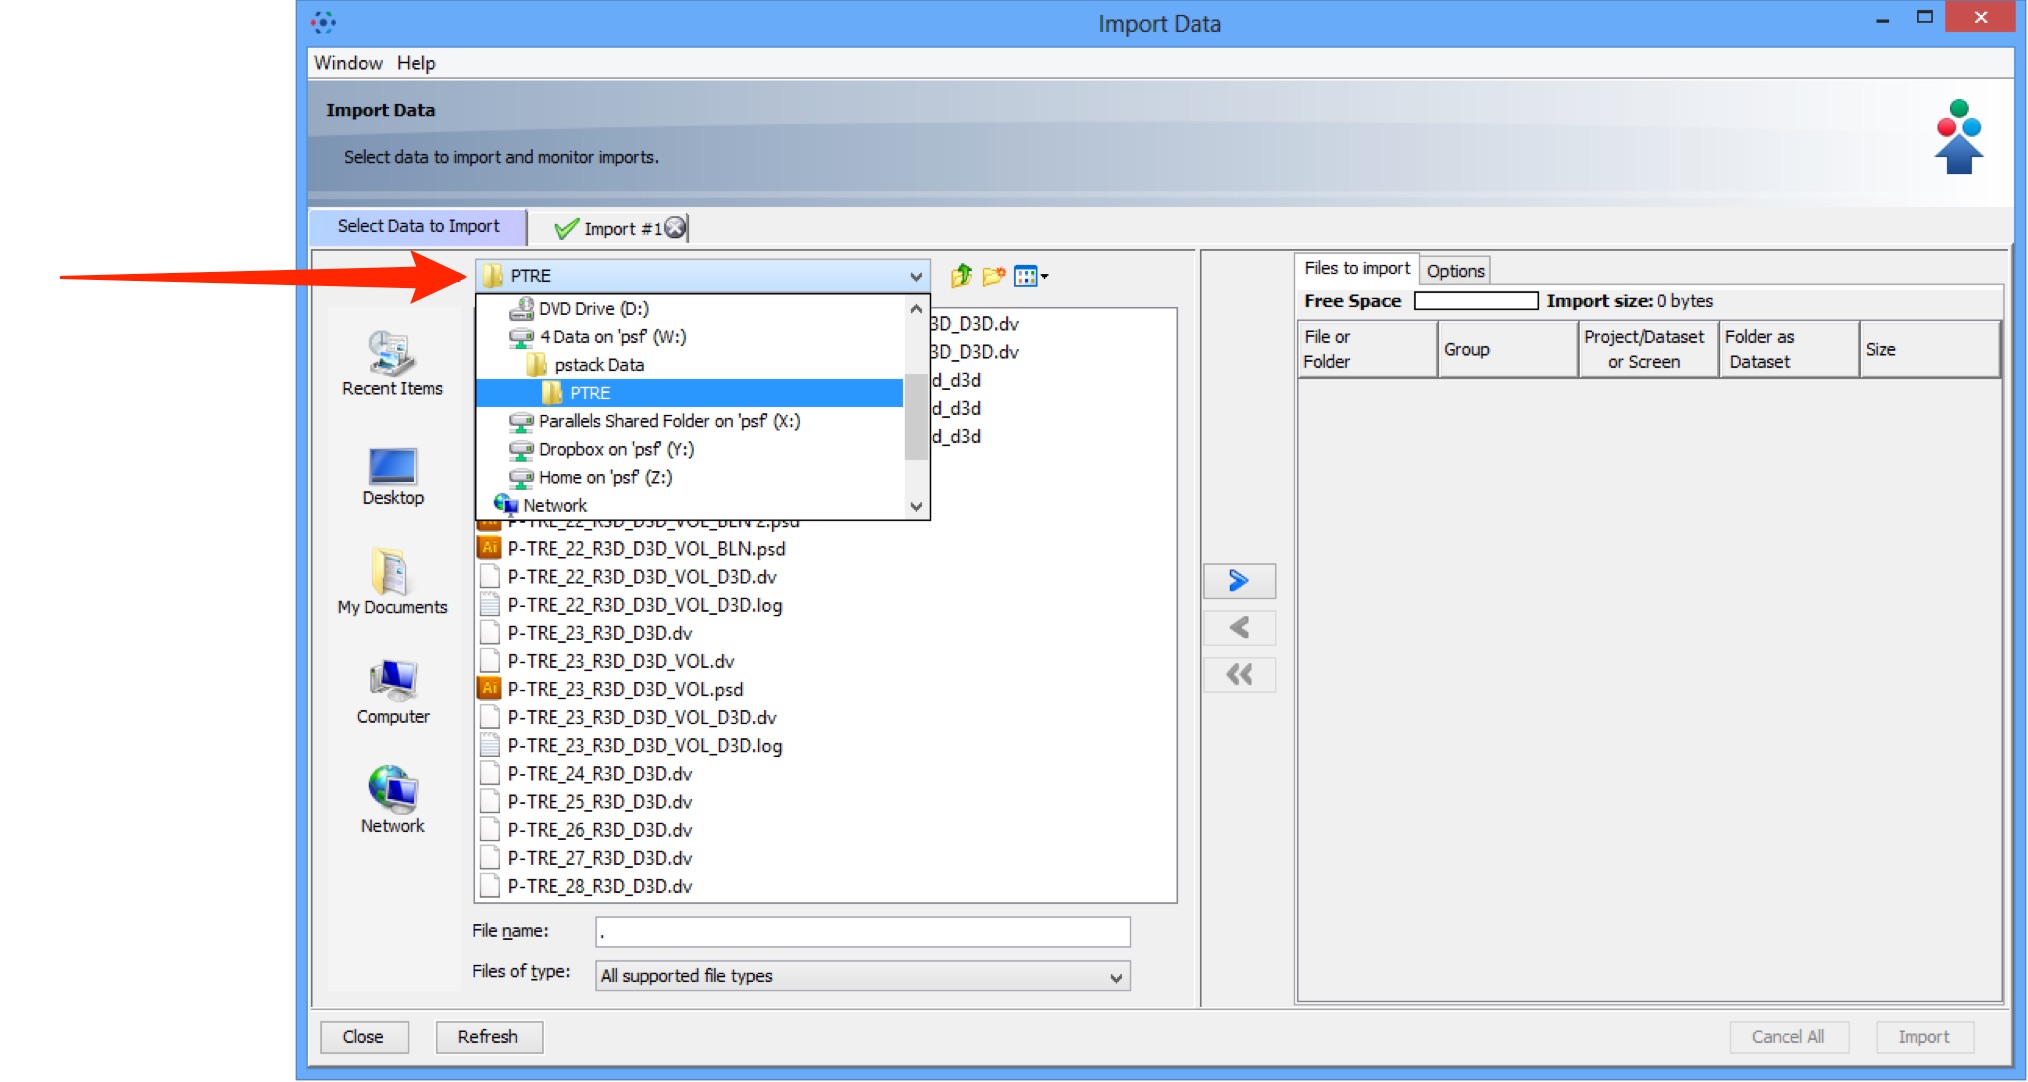
Select image data to be imported.
Click the right Add arrow.
Specify a location for saving imported data:
- select a group if you are a member of more than one
- a new project and/or dataset can be created
- an existing project and/or dataset can be selected from the drop-downs
- a new dataset can be automatically created from the source folder
- click Add to the Queue

Data to be imported appears in the queue pane.
When ready click on Import.

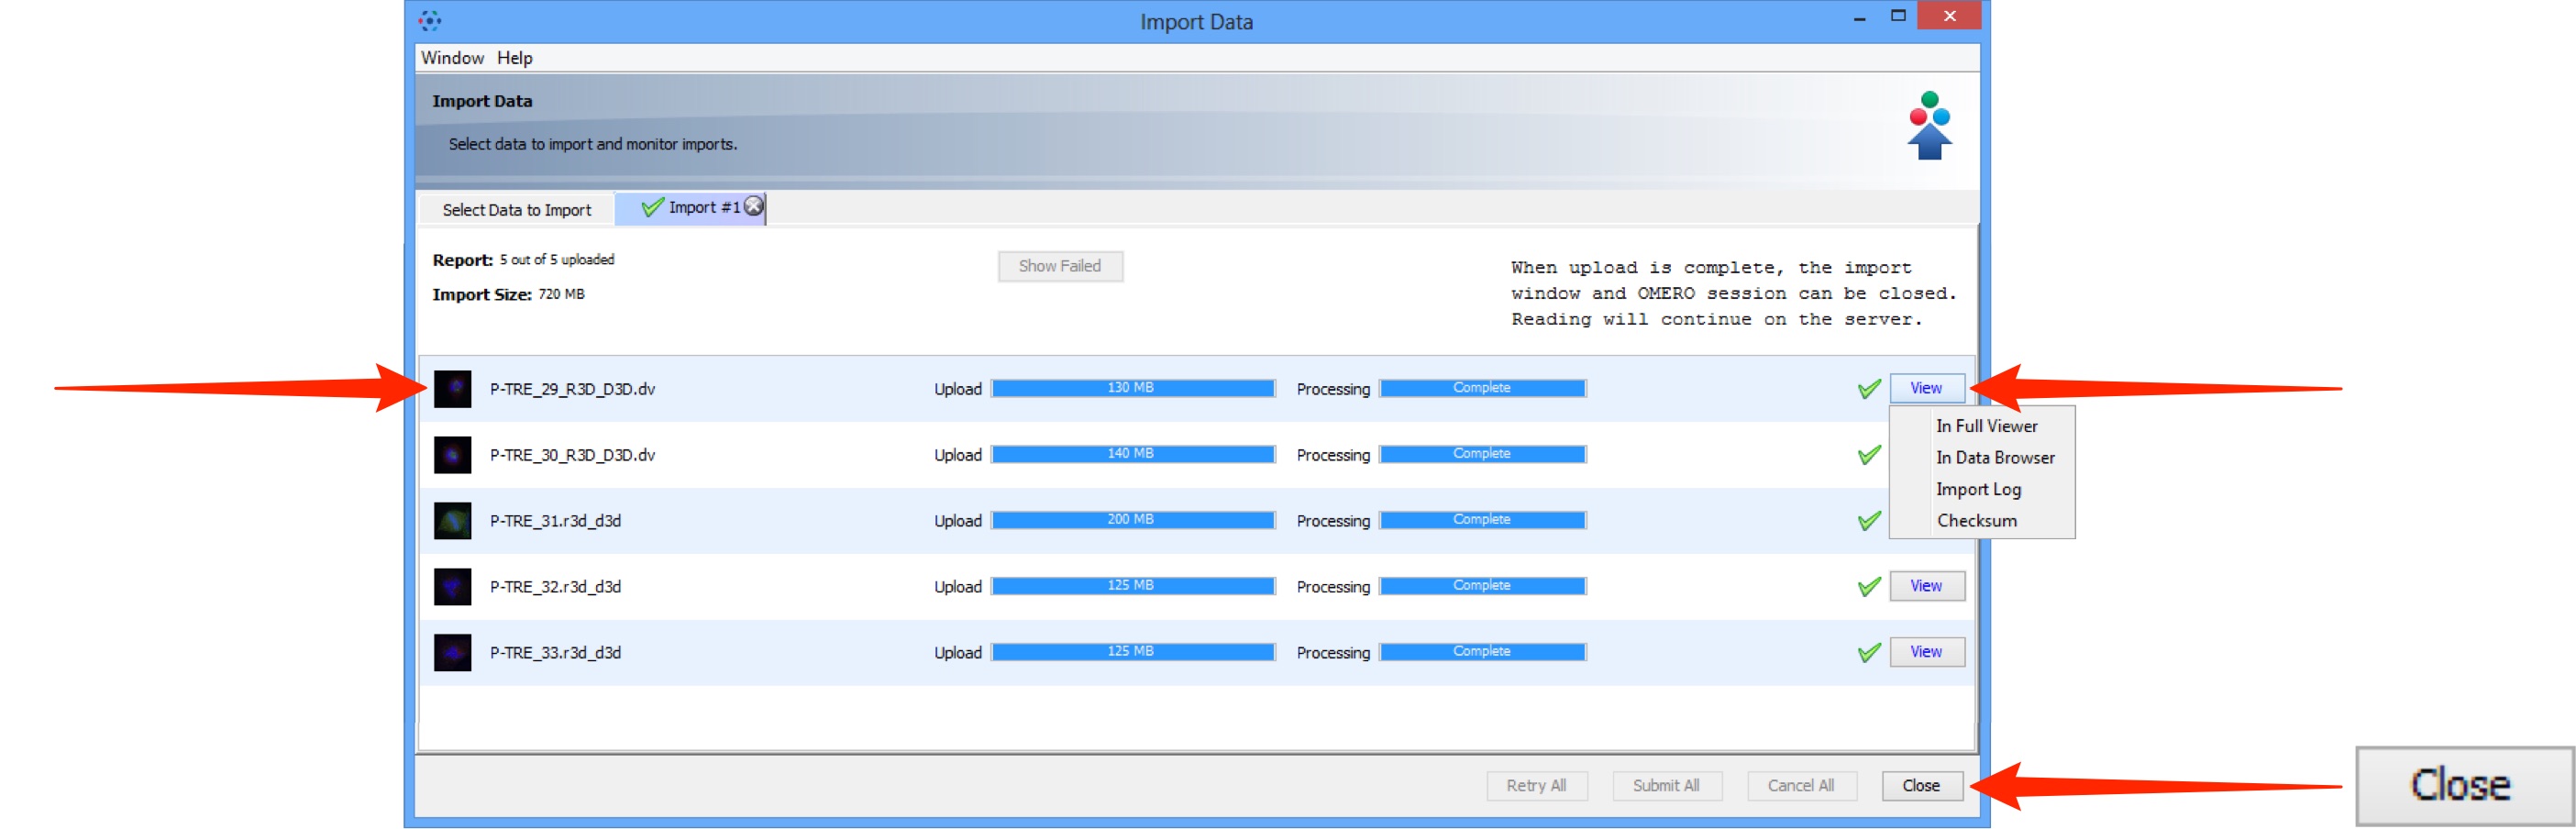
Import progress will be shown in the Import #1 tab.
Further data can be queued and imported using the Select Data to Import tab.
Multiple queues can be run simultaneously.
A green check is shown in the import tab and in the top right corner of the main Data Manager window when the queue is successfully imported.
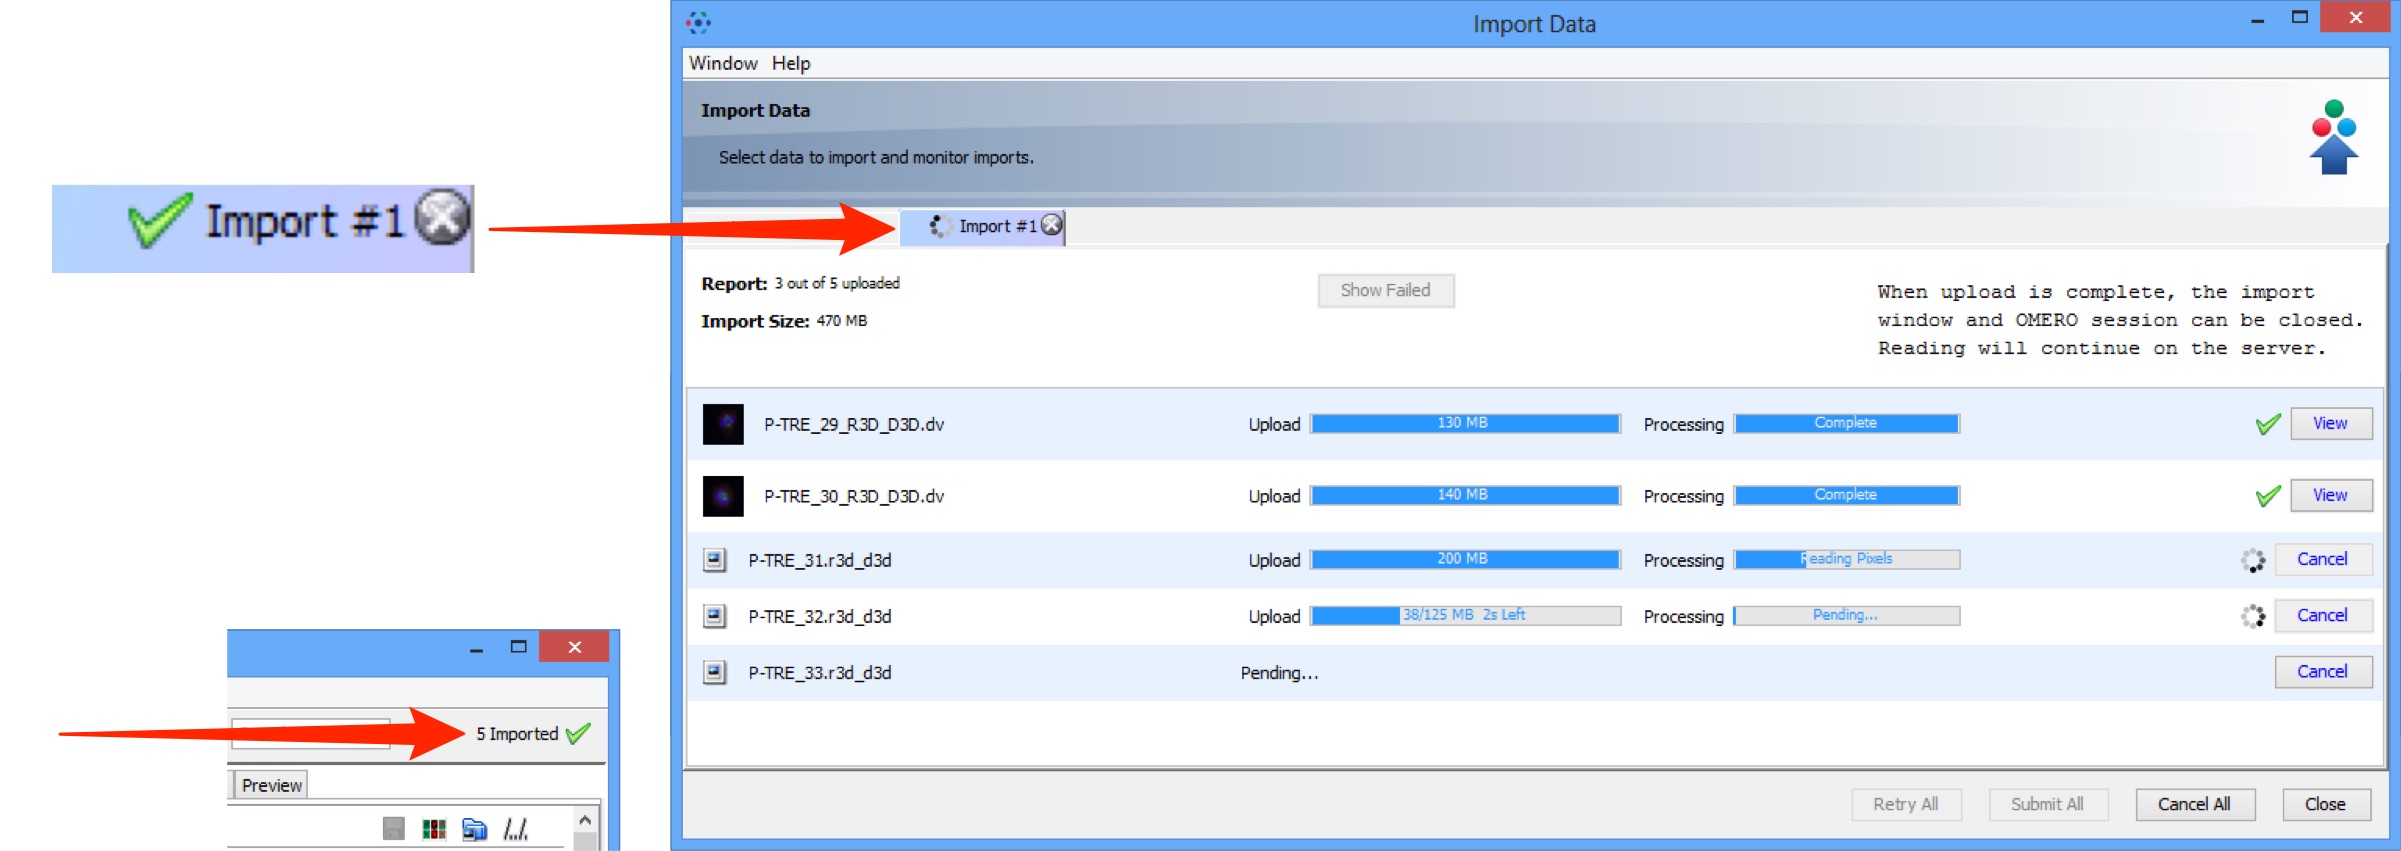
Double-click on the thumbnail or select from the View menu to open the image in the full viewer or close the Import Data window to return to the Data Manager window.
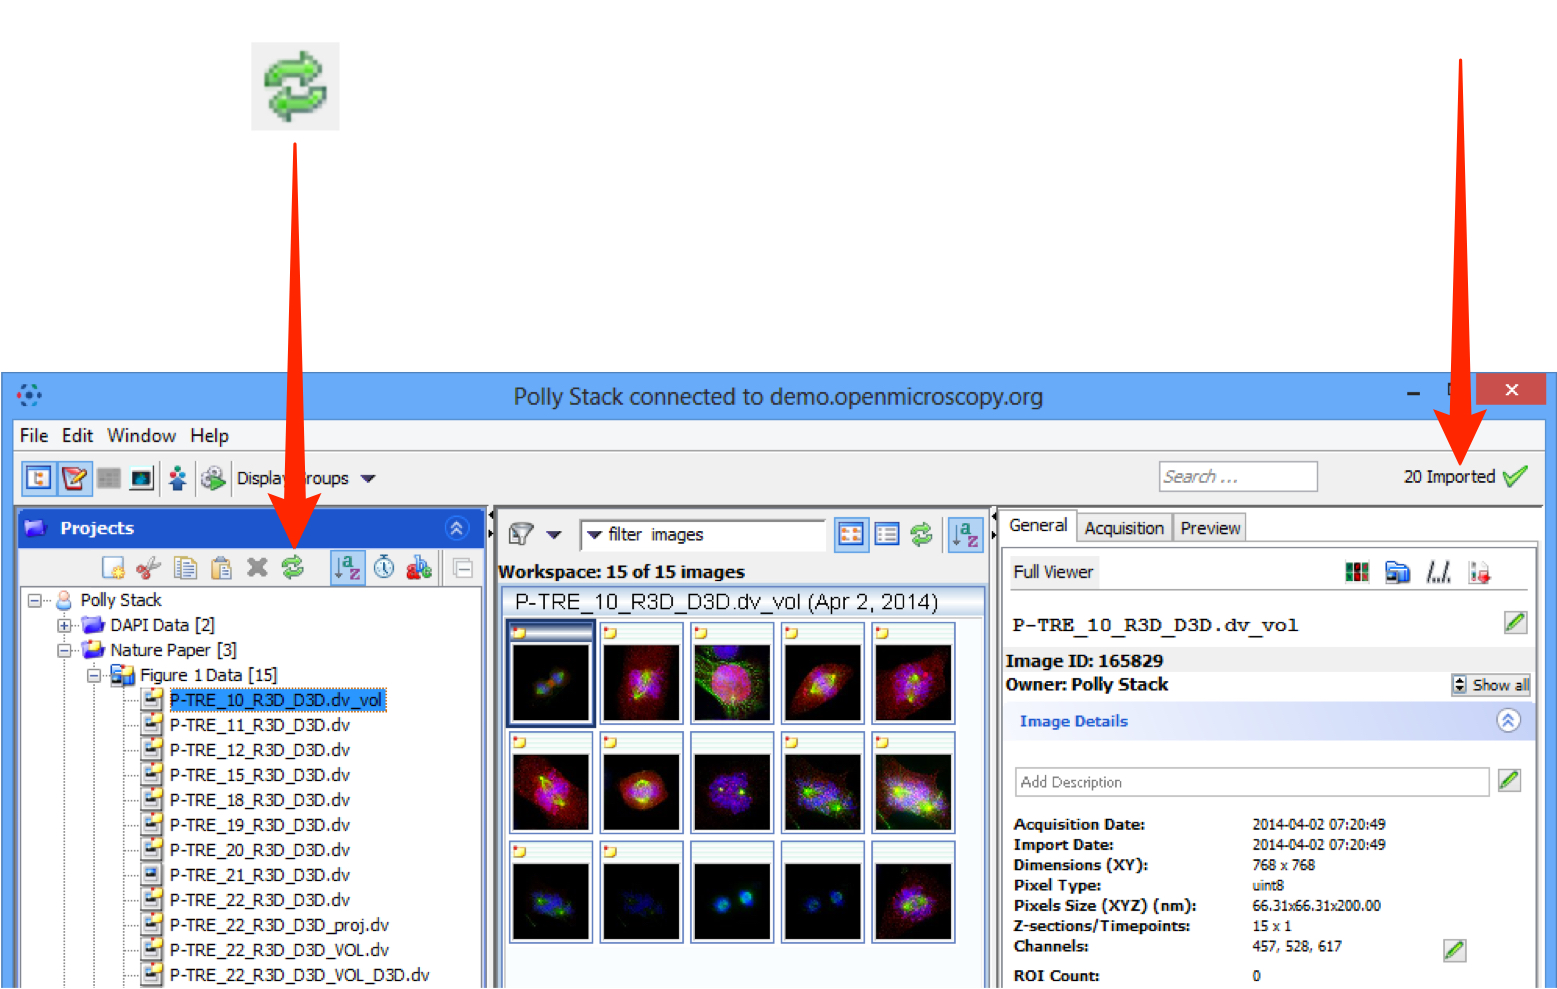
Click the Refresh button to see the imported data in the Data Manager window.
Import progress is shown by a green tick on the top right-hand side of the Data Manager window toolbar.
Notifications of any import failure will also appear there with a red X.
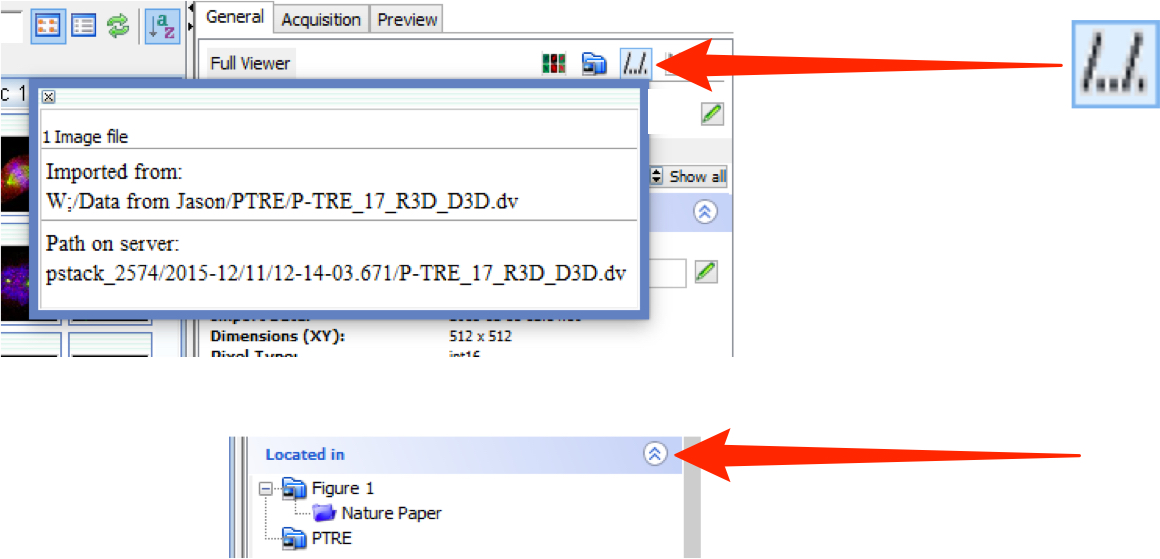
Select an image and click on the File Path button to see the file path for where the data was imported from and its path in the OMERO data repository.
Click on the Located in tab to see the location of the data in the data tree.
Note
From Version 5, OMERO imports and stores image files unchanged, in their original format. Therefore there is no longer any need to archive files on import.
Importing options
The following points illustrate some options that can be used when importing.

Adding tags at import
Click the Options tab then Add Tags to batch-add tags to the data as it is imported.
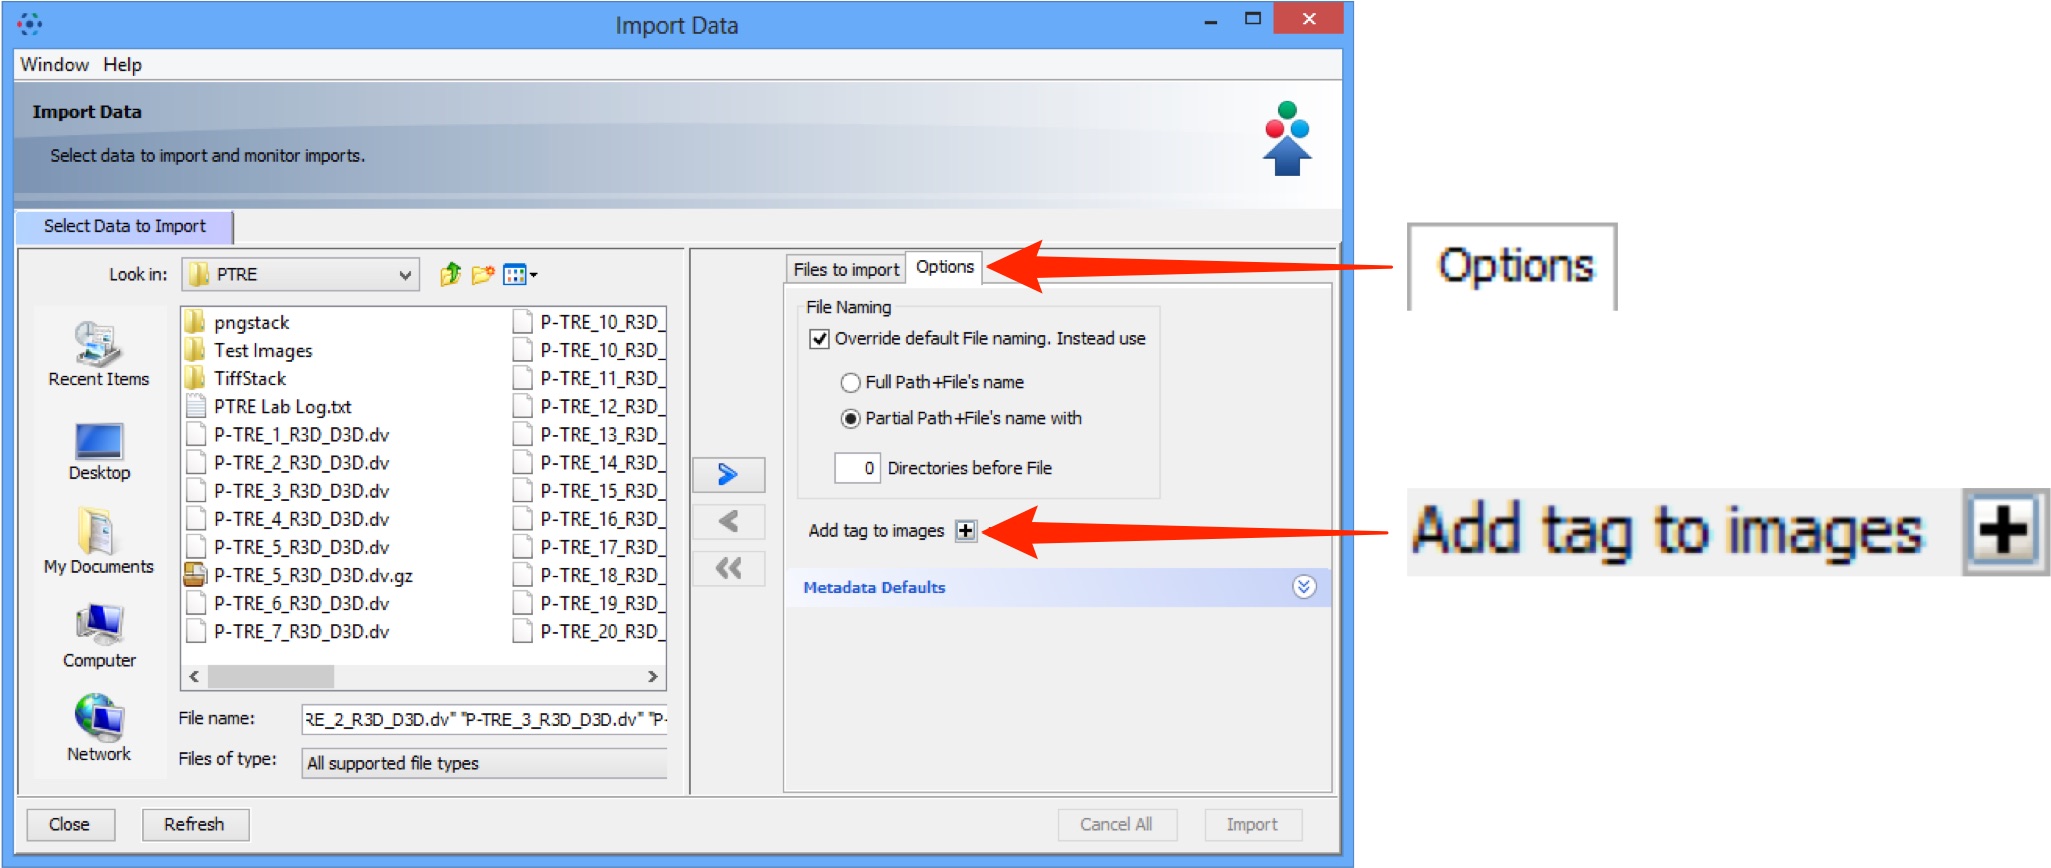
Select an existing tag in the left hand pane and click the right arrow;
or enter the name of a new tag and click Add.
Click Save to add these tags to the data at import.
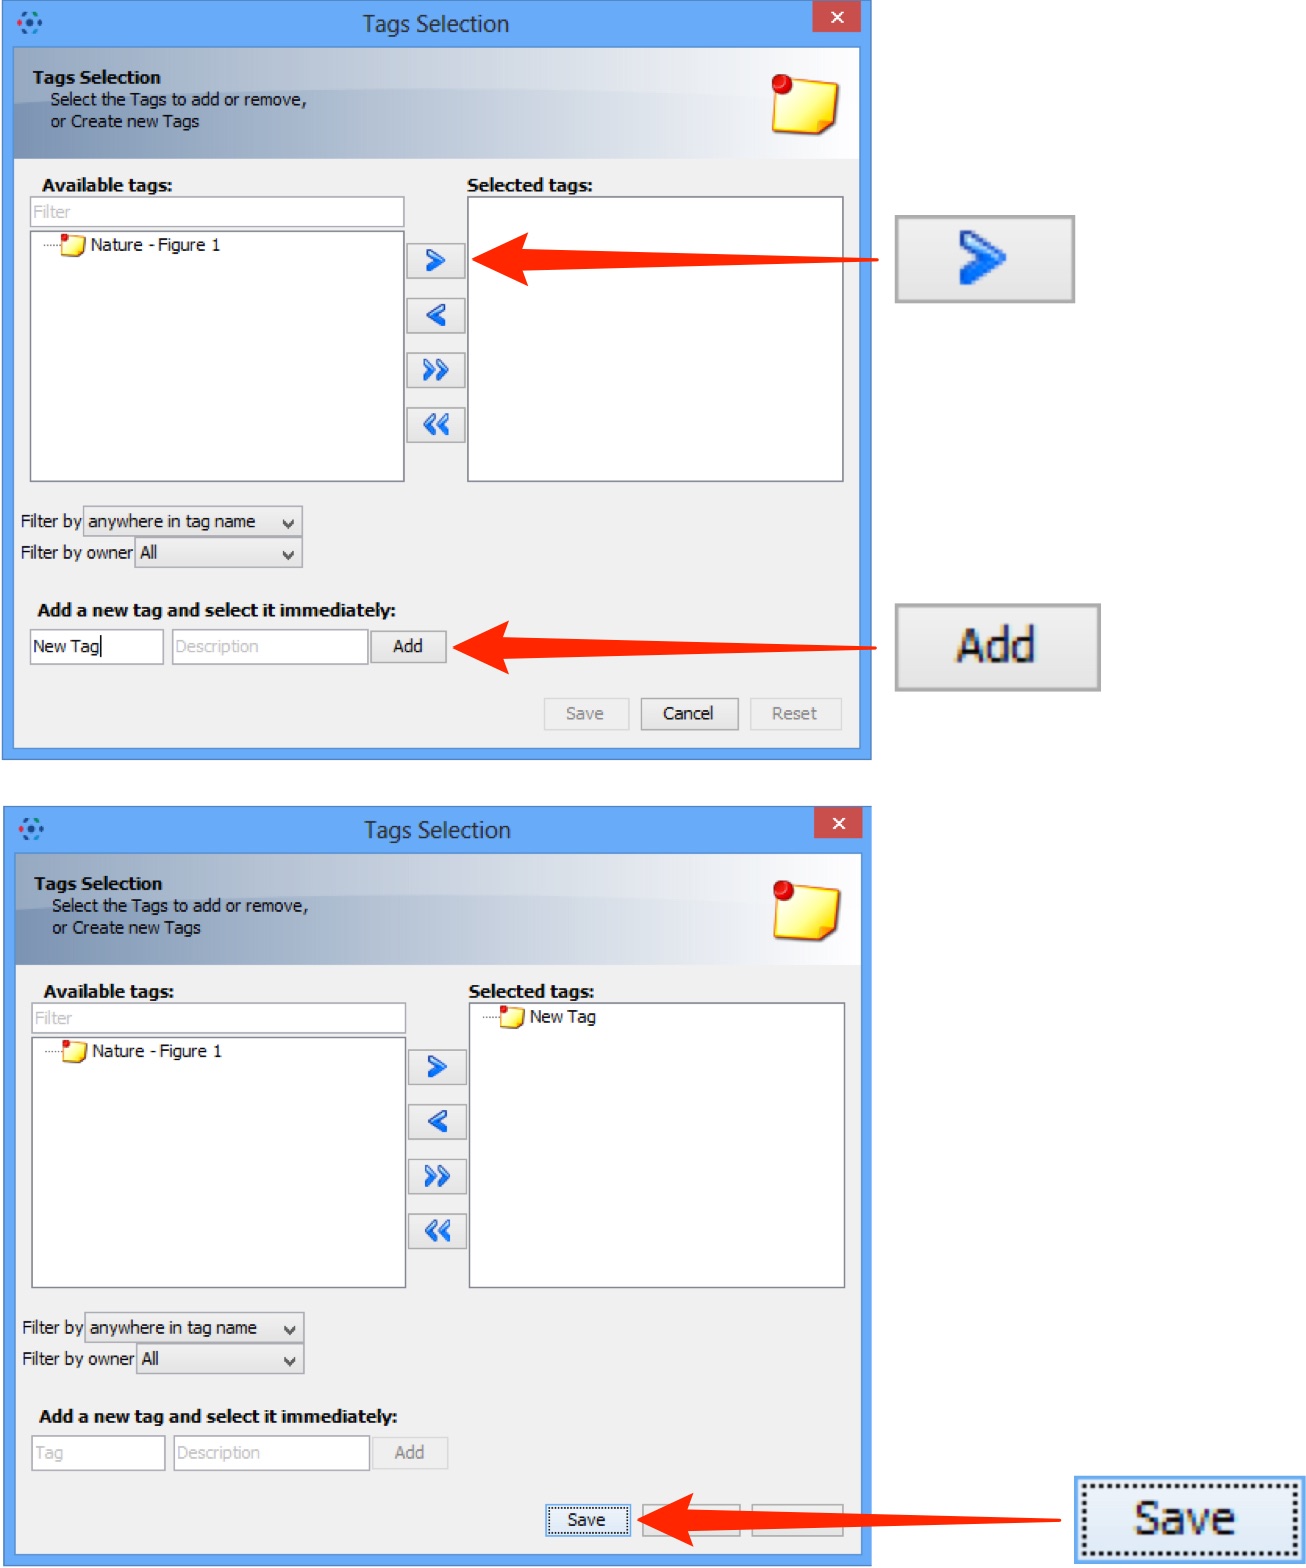
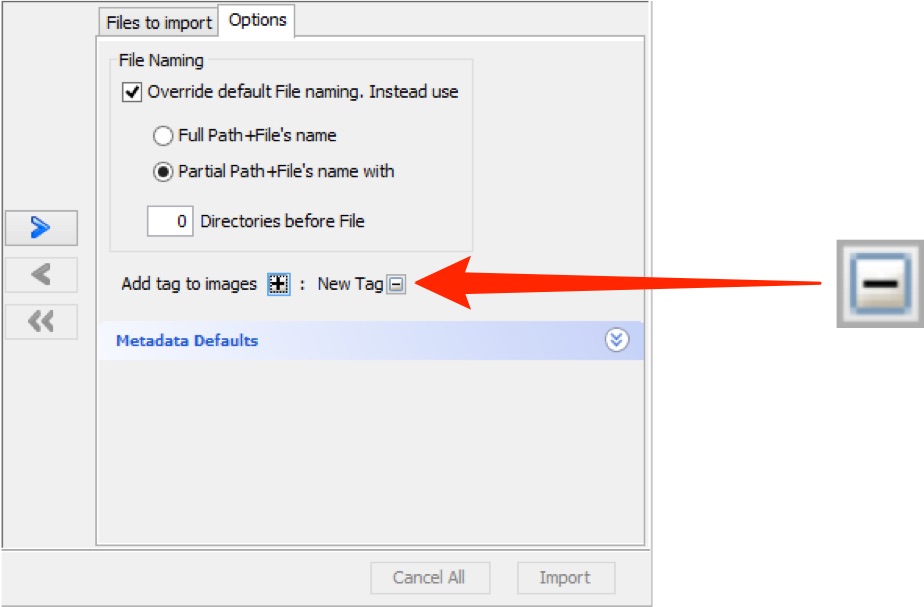
After saving, tags can be seen in the Options tab and can be removed by clicking the - button.
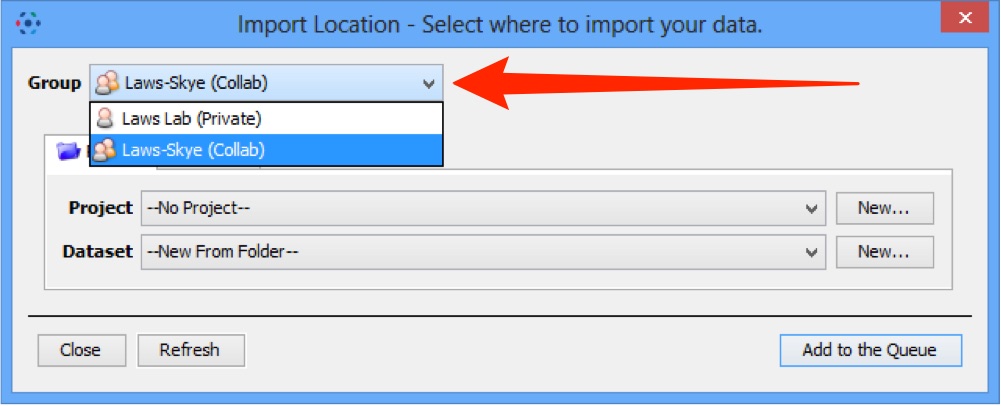
Selecting a group to import into
If you are a member of more than one group, use the Group drop down box to select the group to import the data into.
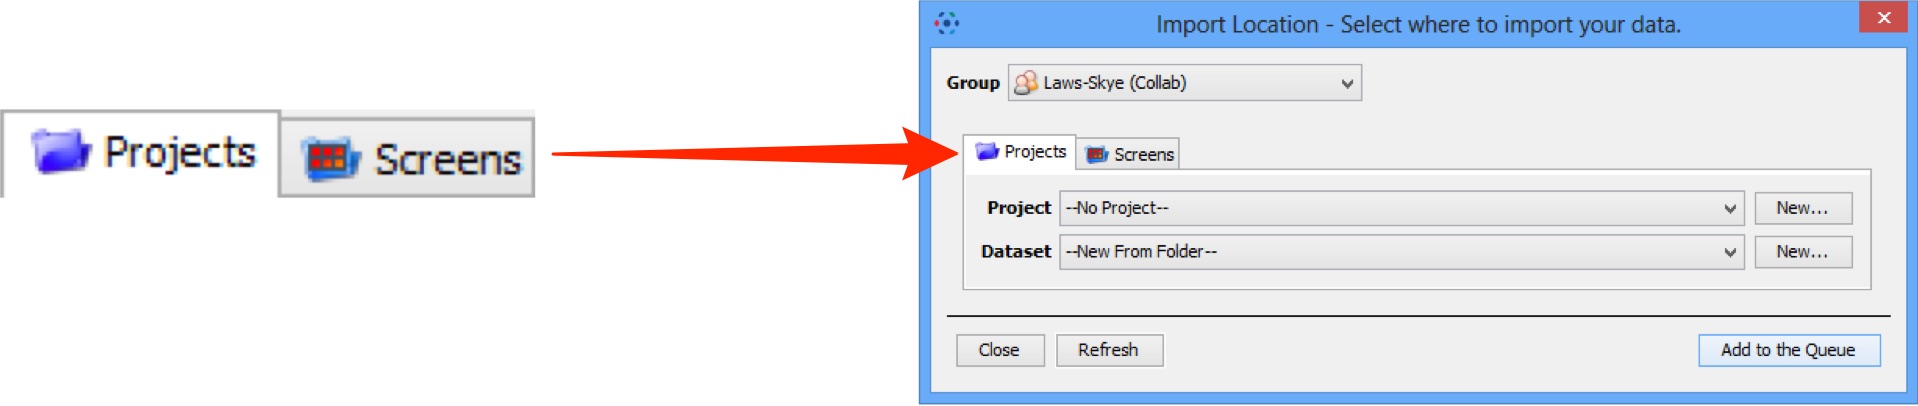
Toggle between project and screen
If you are importing screening data, click the Projects or Screens tabs to change between image and screen data.
The File Finder window changes to reflect available file types, according to the selection.
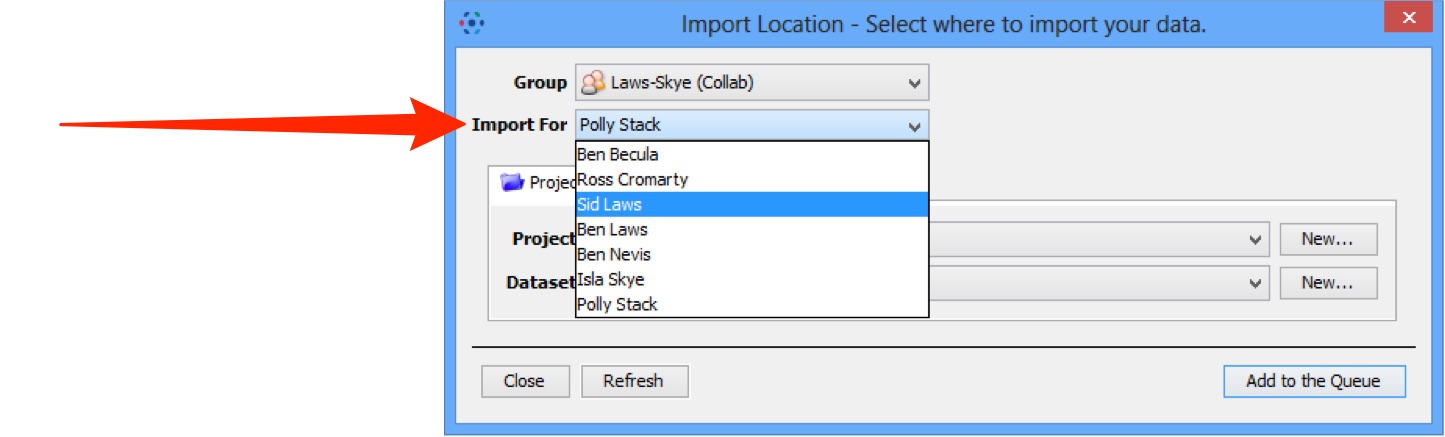
Importing for another user
If you are an OMERO Administrator, use the Import For drop down box to select another user to import the data as. The chosen user will then own this data.
The Project and Dataset drop-down boxes list the projects and datasets available for the selected user to import into.
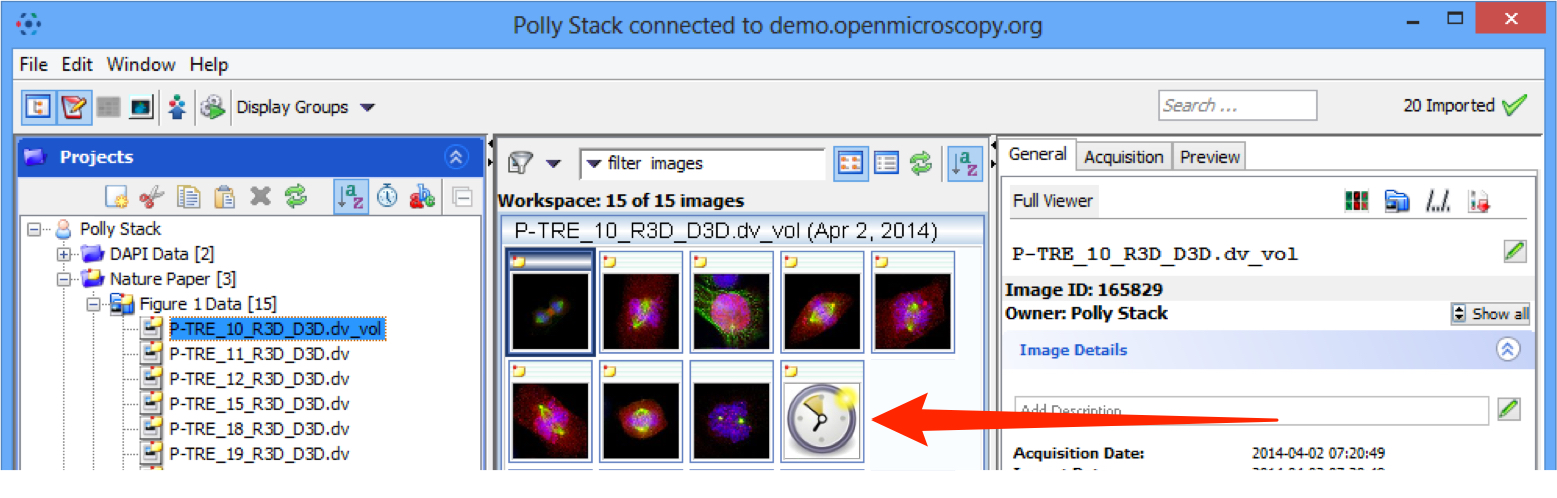
Generation of pyramid files after import
OMERO will generate a pyramid of image tiles for certain big images, depending on file format and various other factors.
Pyramid generation takes place on the server after the data has been uploaded and processed by the importer.
OMERO.insight and OMERO.web display a clock icon in place of the thumbnail in the centre pane of the data manager until the pyramid generation has been completed by the server.
The image will not be available for viewing in OMERO.insight or OMERO.web until the process is complete. For images that are very large or have a number of resolution levels, this can take some time.
Some formats such as .svs contain a pre-calculated pyramid so should not incur any additional processing overhead.
Note
If you regularly have problems with the time taken to generate pyramids for your imported images, speak to your OMERO system administrator as they may be able to adjust the OMERO server configuration to optimise the processing.
All Tutorial Material is available on line at: help.openmicroscopy.org
The Main OME website is at: www.openmicroscopy.org