Using OMERO.web to view and work with image data via a web browser.
You need to use the URL provided by your institute’s OMERO administrator to access the OMERO.web client.
Logging in, you do not have to enter a server name, but otherwise it is the same as for OMERO.insight, using the same username and password.
The default screen shows your data tree in the left-hand panel.
When data is selected in the tree, the thumbnails are displayed in the center panel, and the metadata and other information in the right-hand panel.
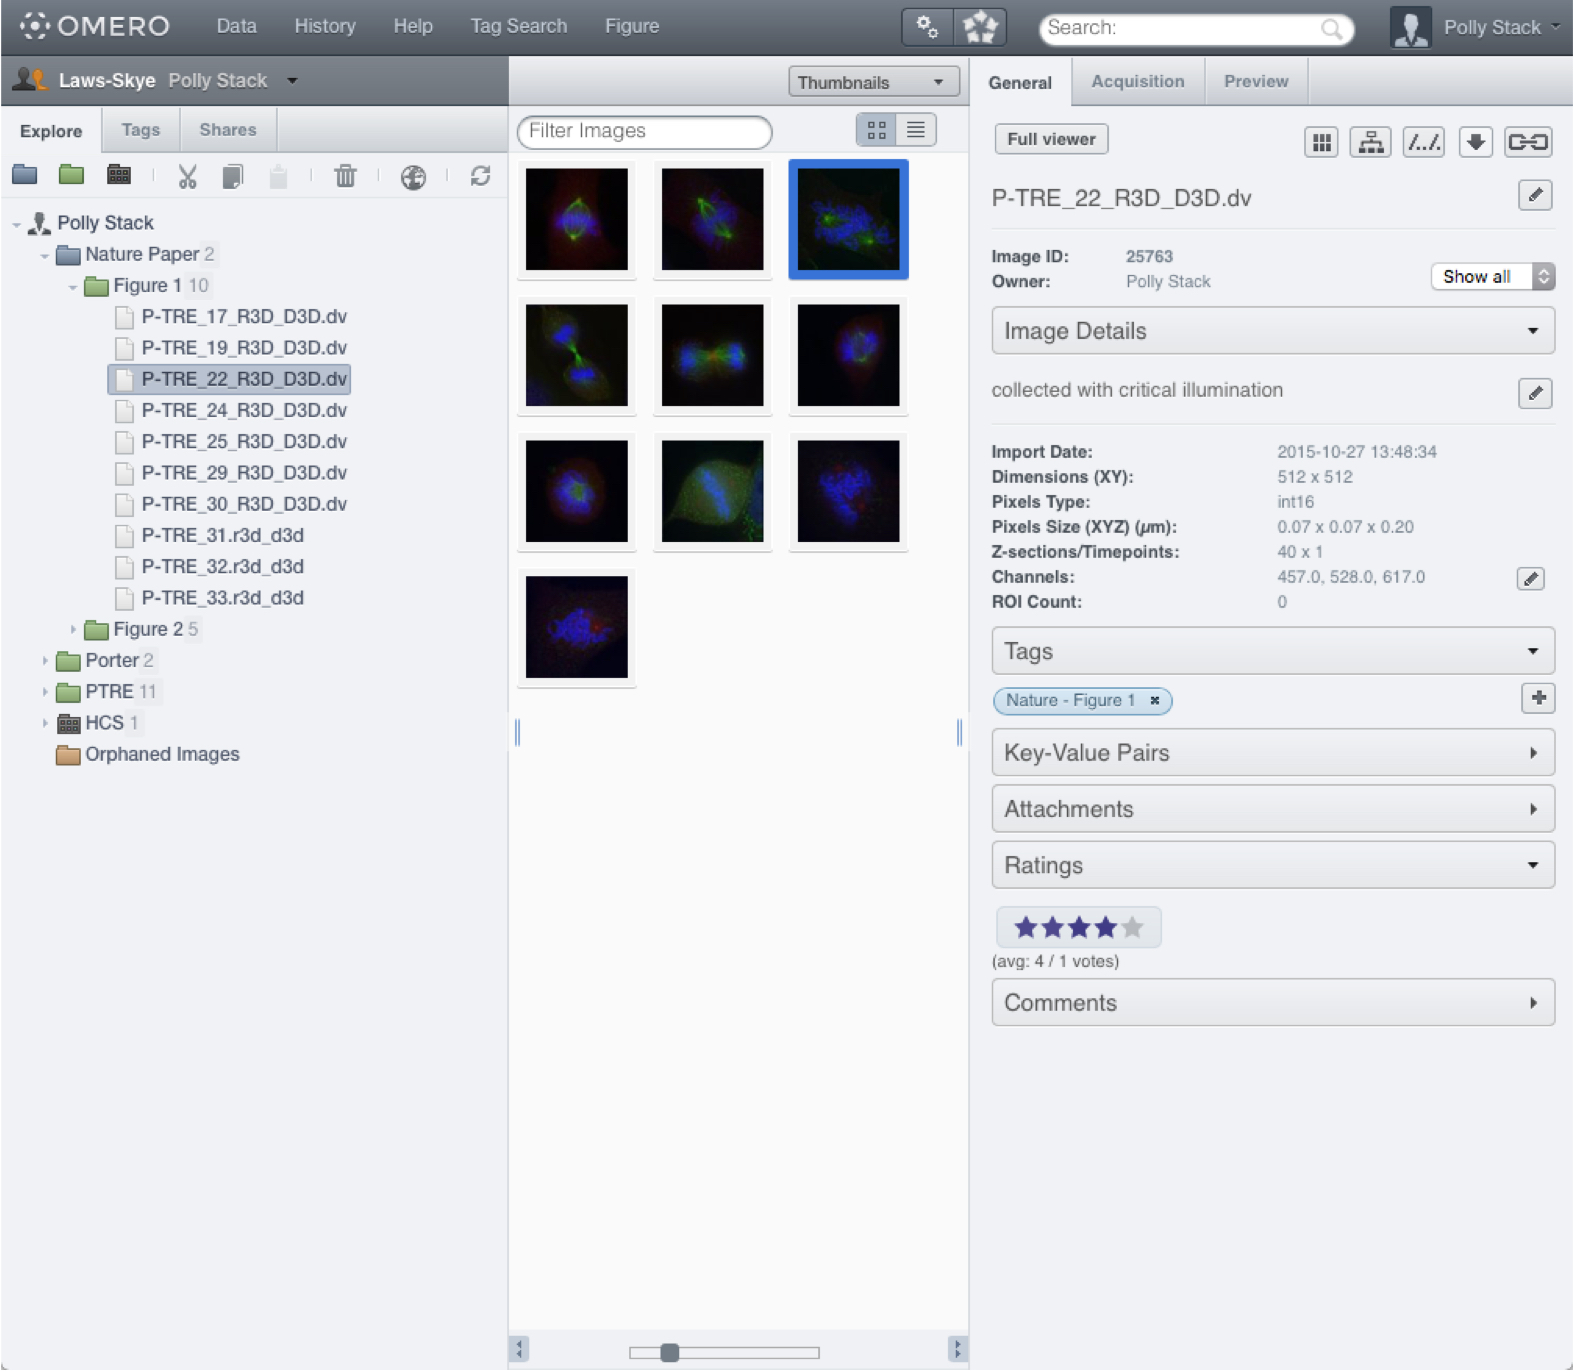
To view an image in the Image Viewer, select the image in the data tree and click on the Launch Full Viewer button.
or double click on the image or thumbnail.

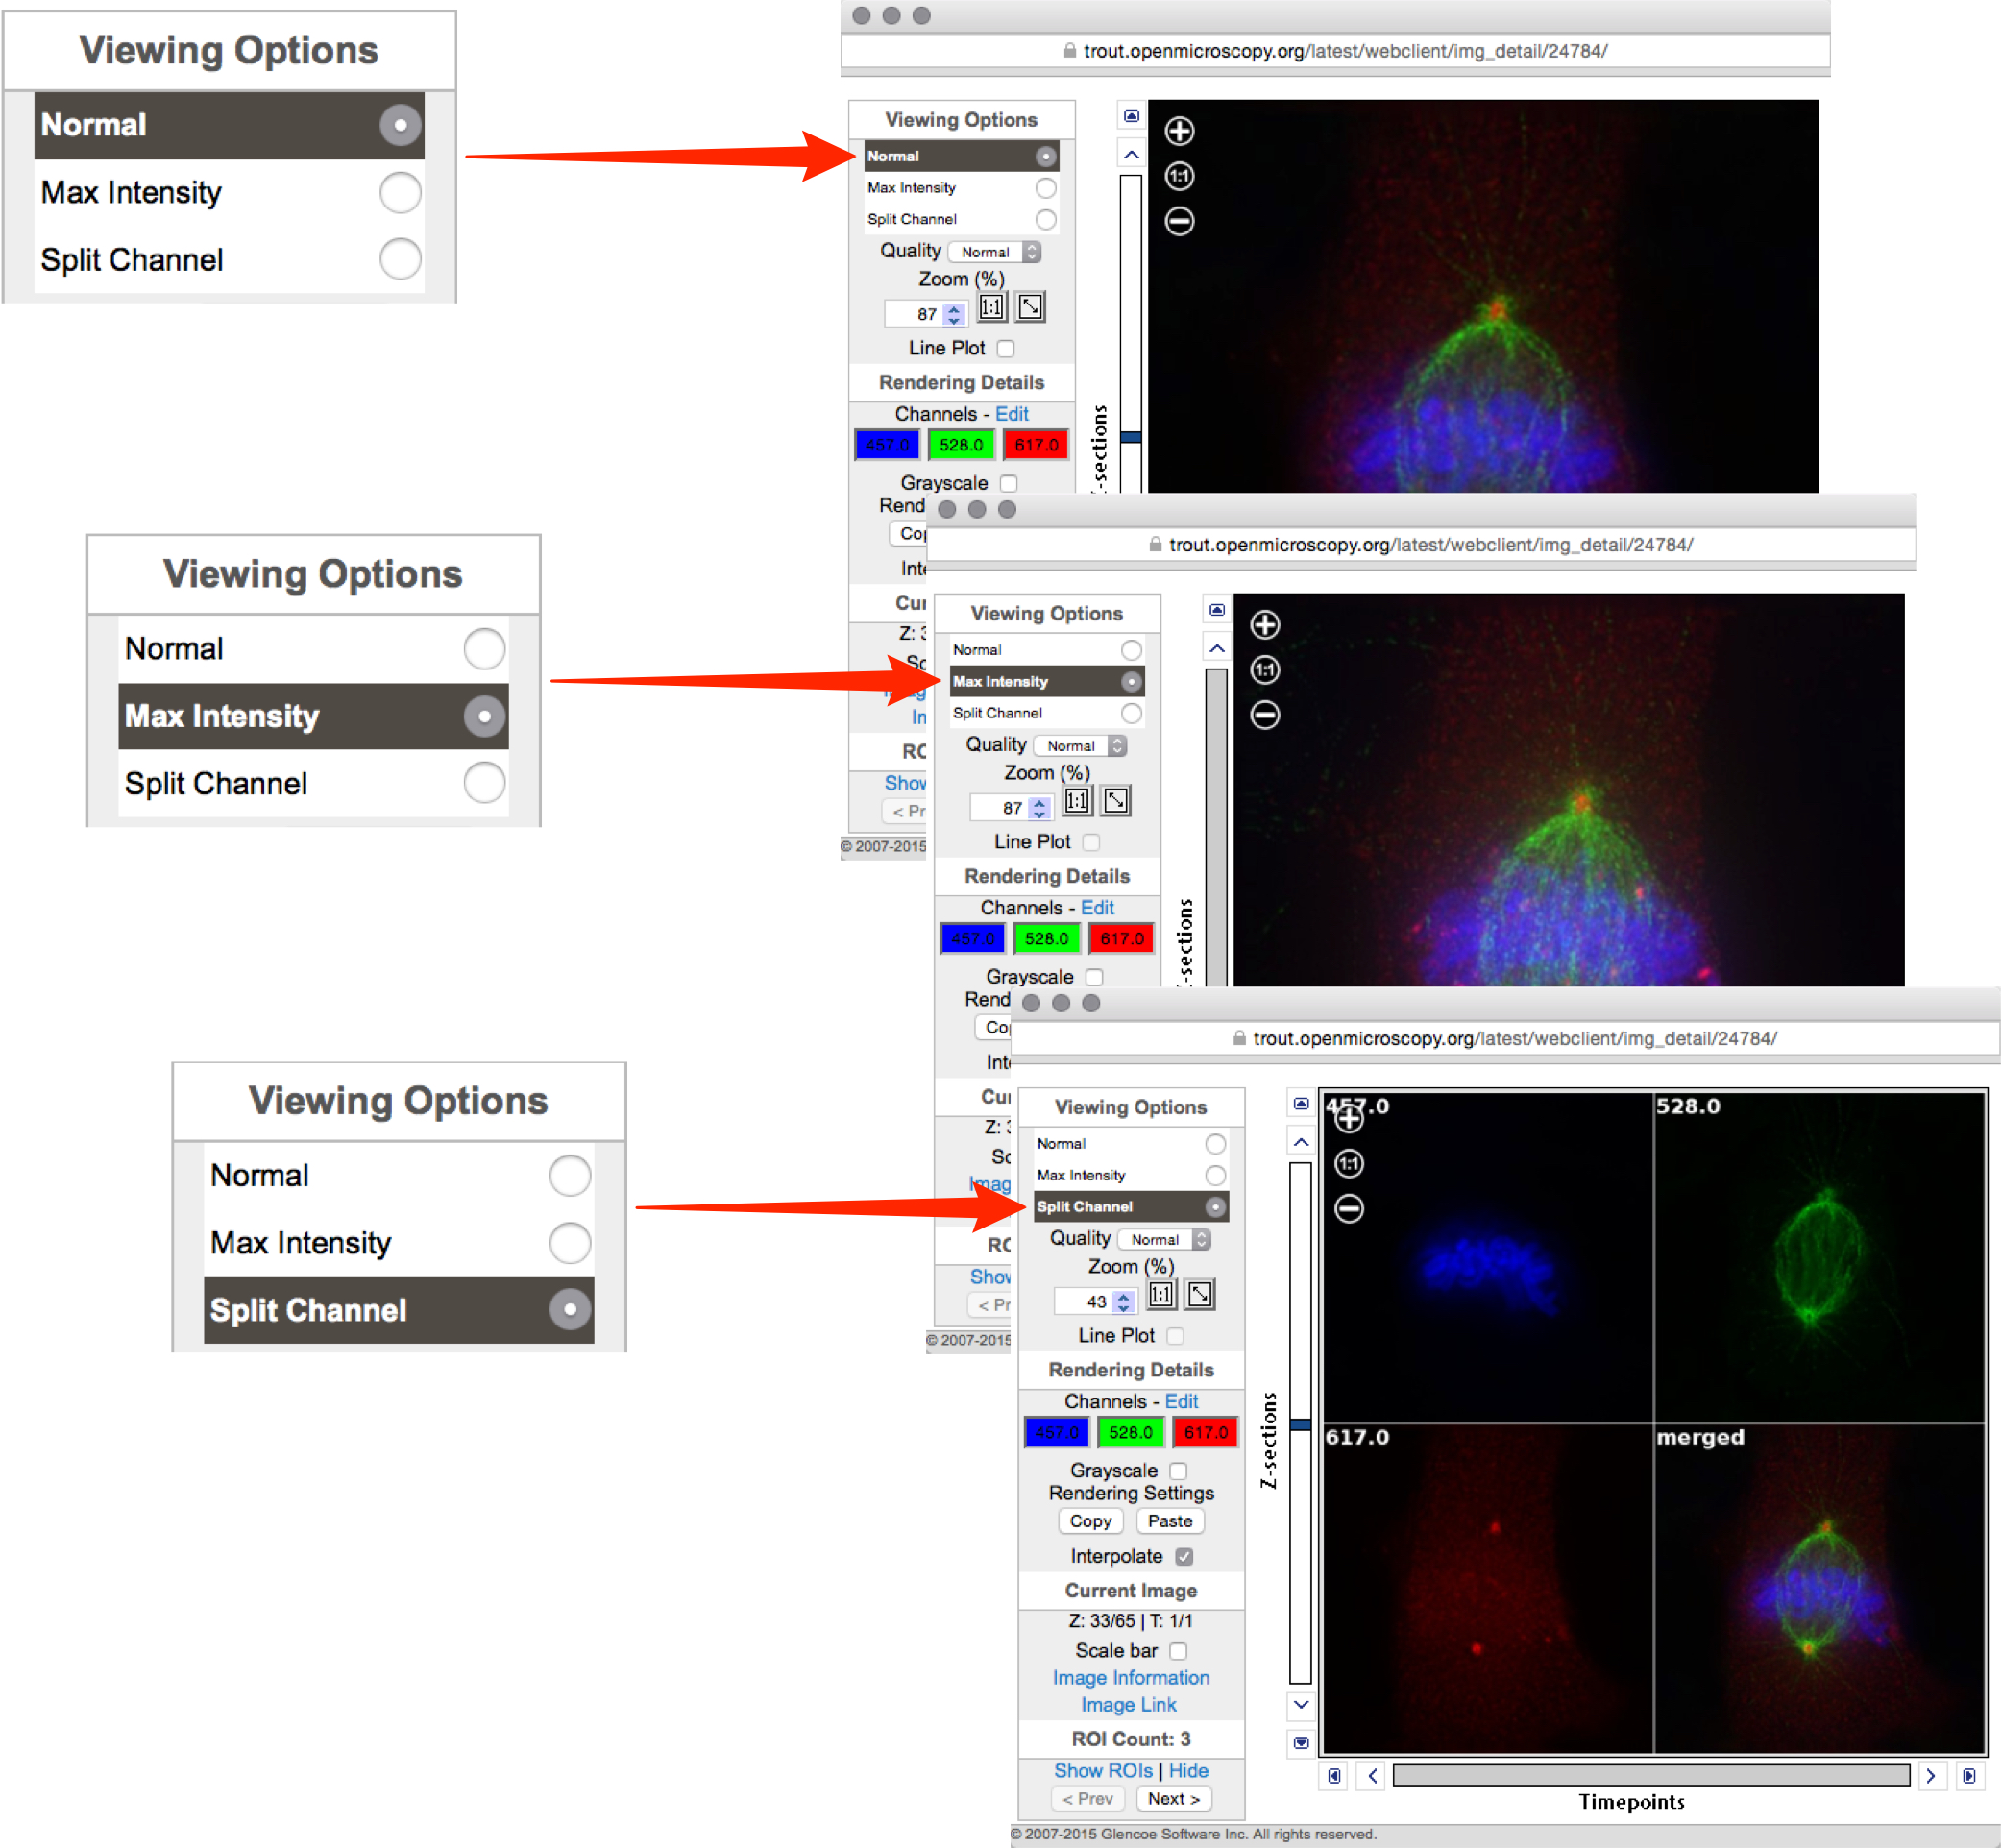
In the Image Viewer images can be viewed in Normal, Maximum Intensity or Split-Channel.
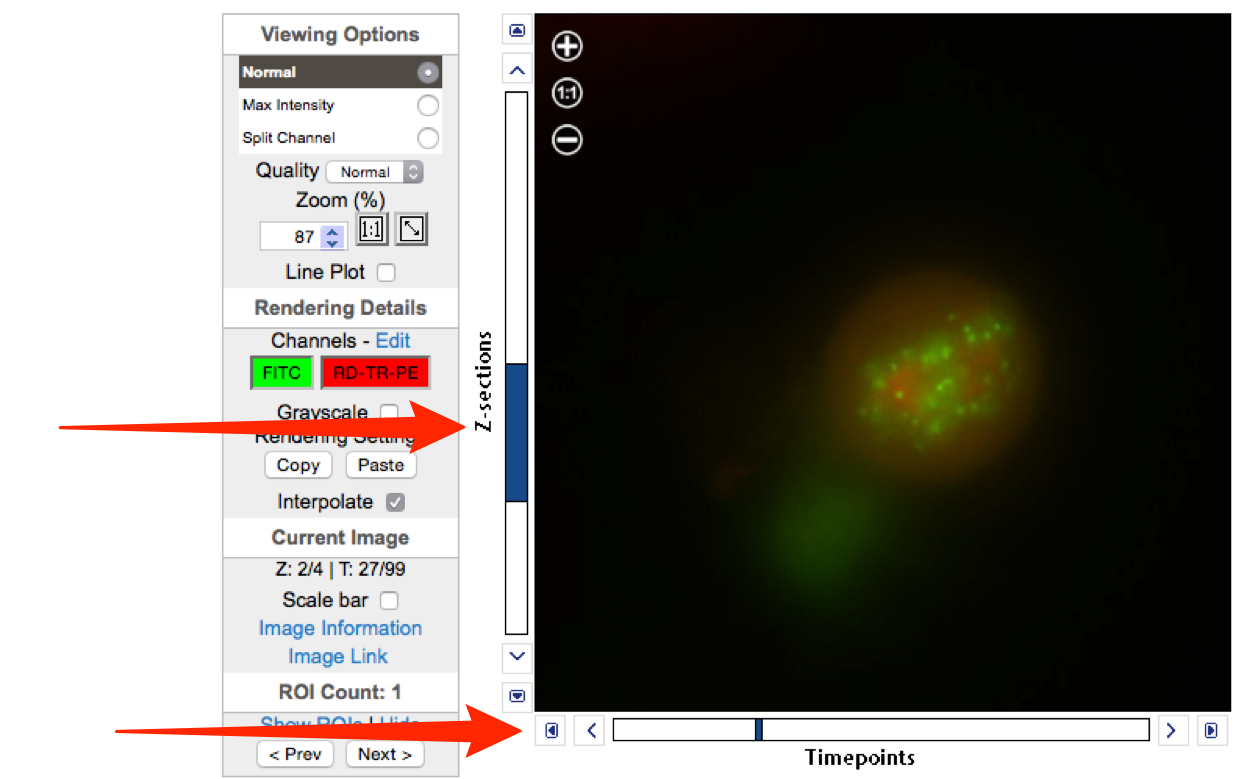
Scroll or step through Z stacks using the slider and controls to the left of the image, and time sequences (T) using the slider and controls below the image.
Zoom in and out of the image using the + or - in the top left of the image or the up and down arrows in the text box.
Click the 1:1 button to view at true size.
Click the diagonal arrow button to zoom to fit the window.

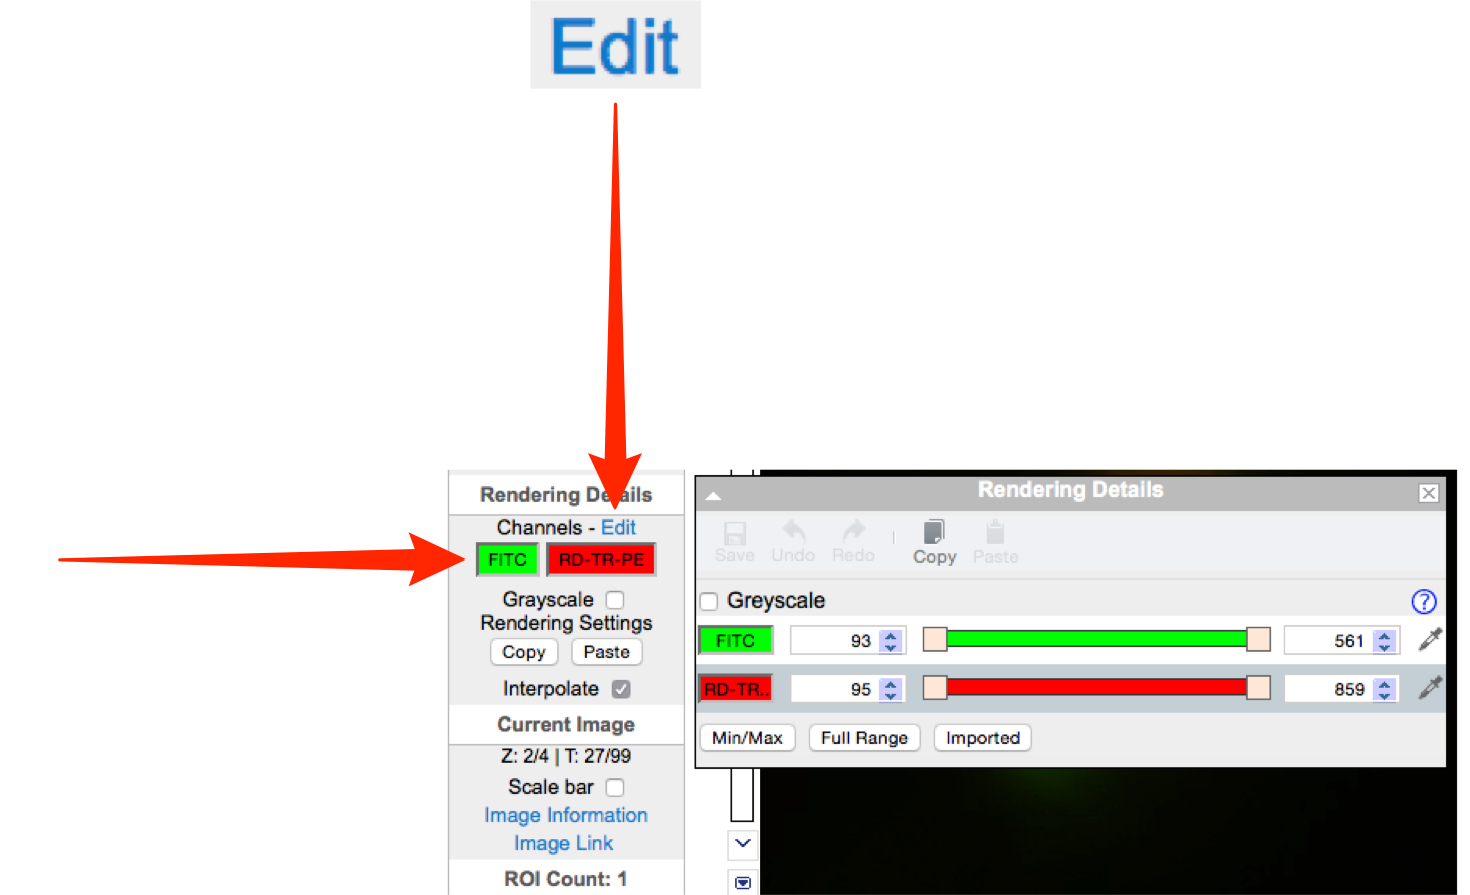
Click on Edit to open the Rendering Details window.
Use the sliders or text boxes to adjust settings for the channels.
Click the colour wells to toggle channels on and off.
Click the Grayscale checkbox to toggle colour on and off
Click on Image Information to see the basic information and dimensions of the image.

Click on Image Link to generate a URL which can be copied and pasted.
This link provides direct access via a web browser to your image, provided the viewer is a member of the user group.

Click on Show ROIs to view ROIs on the image and see details in the pop-up window (only visible if the image has ROIs).
Existing ROIs can be viewed but cannot be edited, and new ROIs cannot be added.

In the General tab of the right-hand panel, click on the pencil icon to edit the image name or image description.
Summary details of the image can be seen below the description.
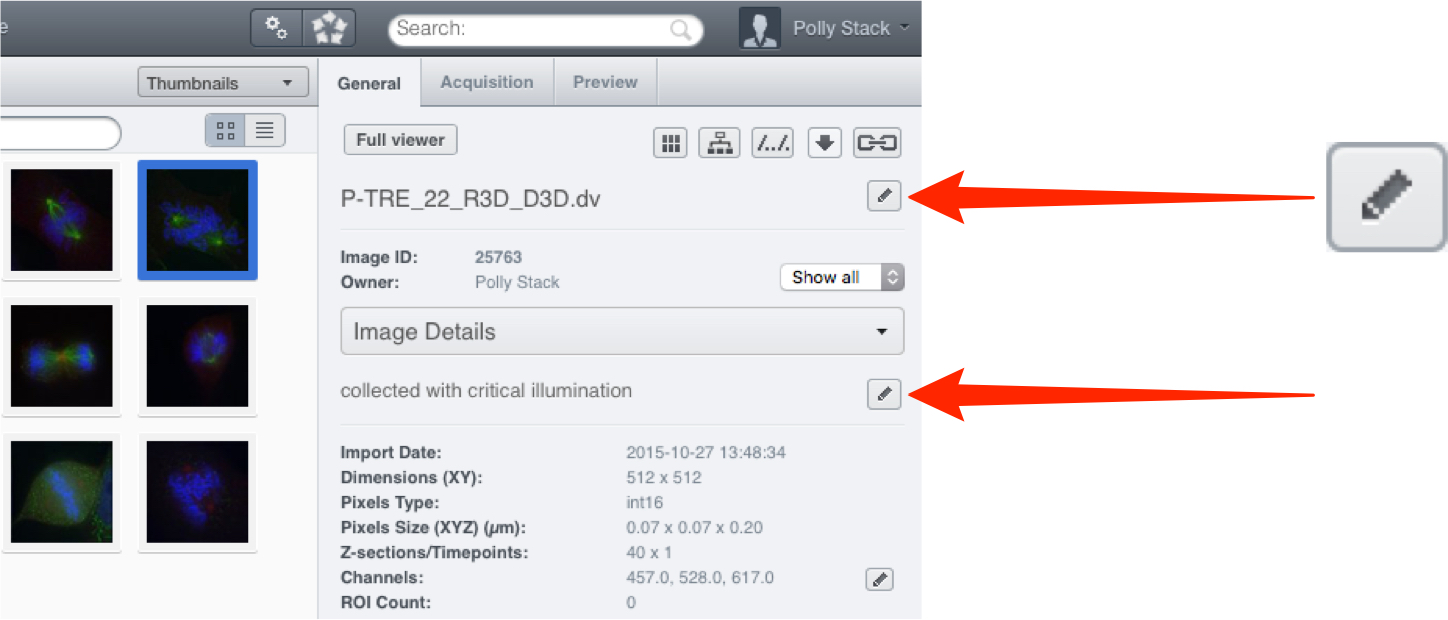
Click on the Link button to generate a URL to share the image (as described previously).

Use the Annotations section to add a rating, tag, or attachment to a Project, Dataset or image.
Details can be seen in the Managing Data workflow.
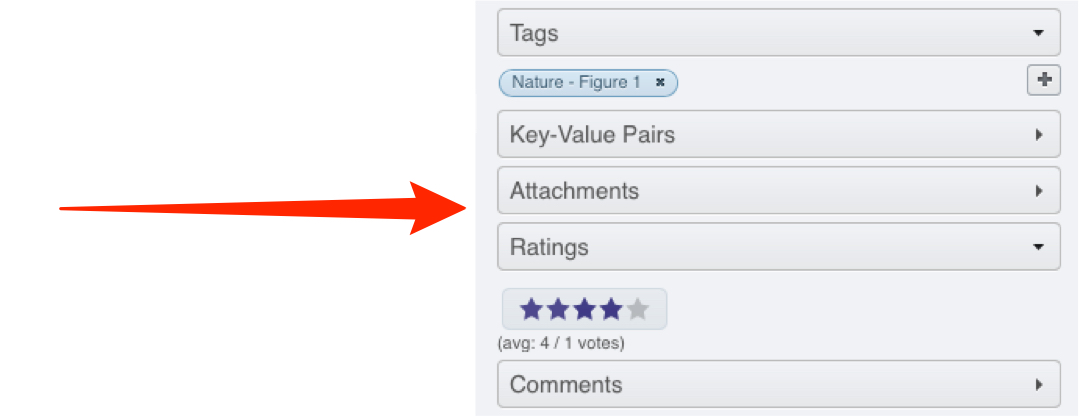
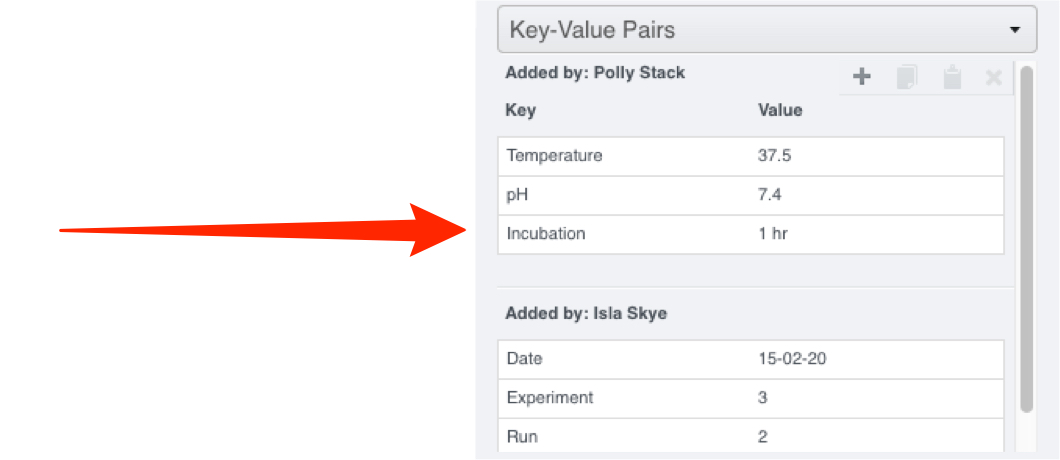
Key-Value pairs and comments can also be added as annotations.
Details can be seen in the Managing Data workflow.
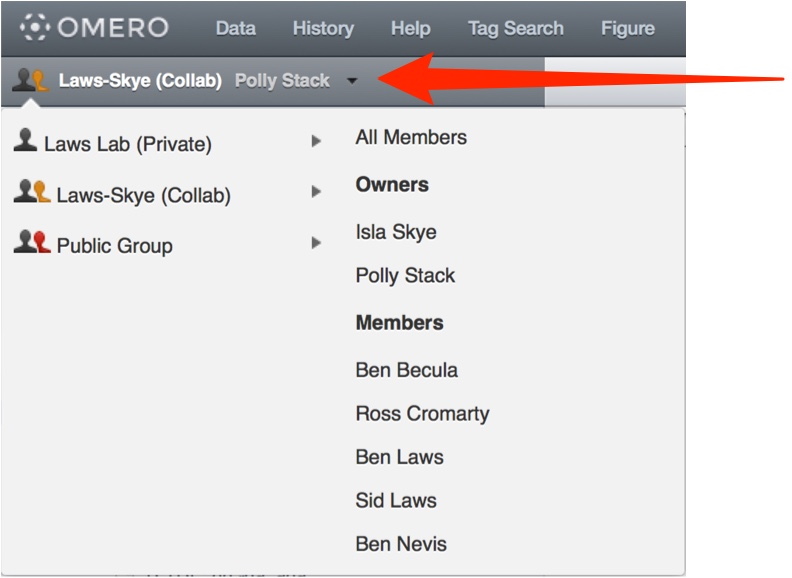
If you belong to more than one group, you can interact with the data of other users in your group.
Click on the drop-down arrow to the right of your name in the bar above the data tree, and select a group and user, or All members to see all the data in the group.
For details of how to share data using OMERO see the Sharing Data workflow section.
You can also share data with selected other users in different groups by adding it to your Shares list (the other users must have accounts on the same OMERO server).
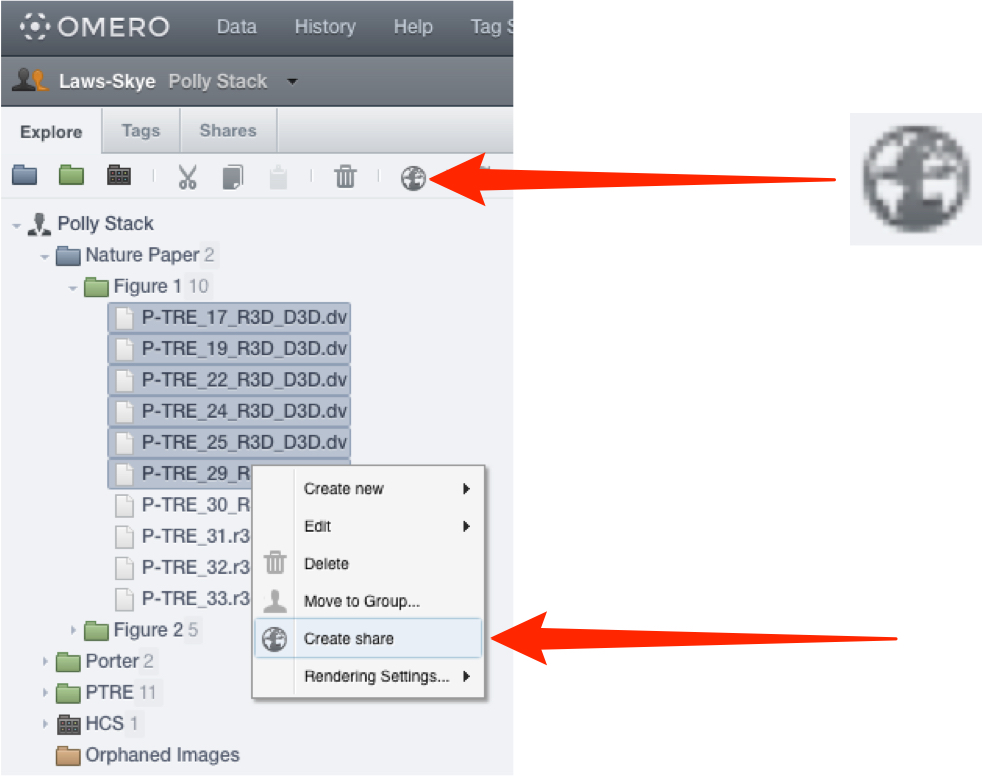
Select the image(s) you wish to share.
Click on the Globe icon in the toolbar.
or right-click on the selected images in the data tree and select Create share.
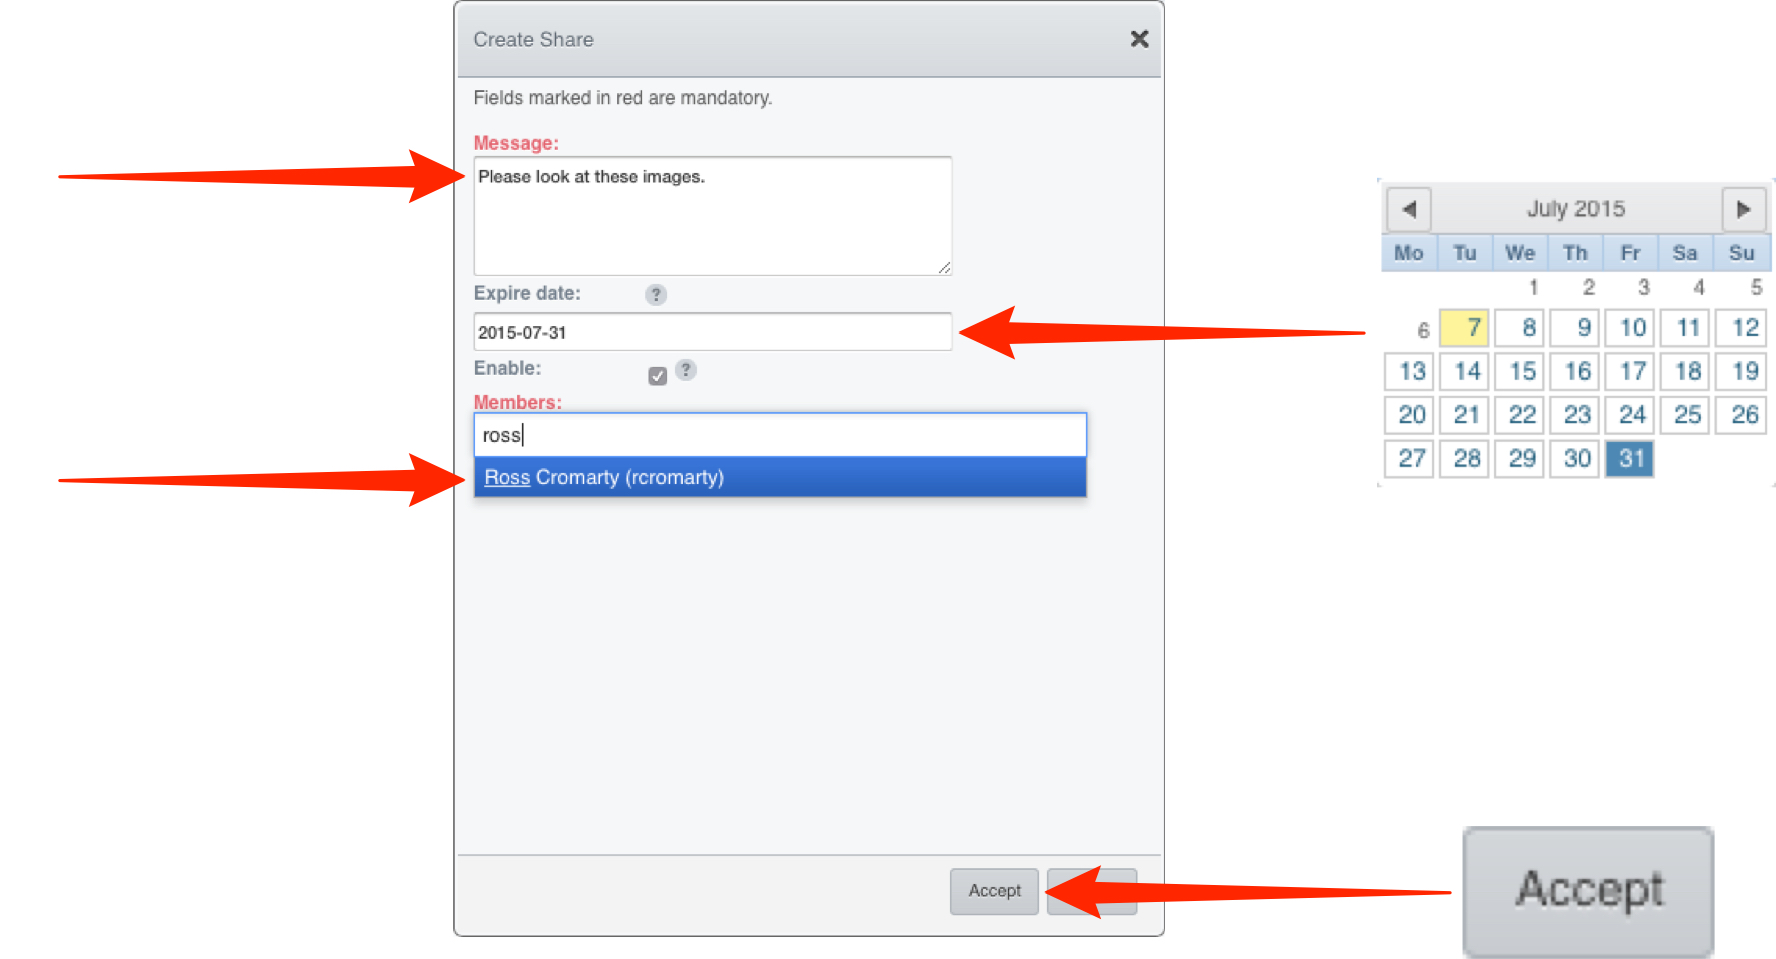
Enter a message in the Message field.
This message will be sent automatically via email to all share members.
An expiry date can be set.
Start typing the name of a user to add to the share in the Members field.
Select users to add to the share from the filtered list of matching users.
Click Accept to complete the creation of the share.
All the members of the share who have an email address set on OMERO.server will receive an email notifying them of the share.
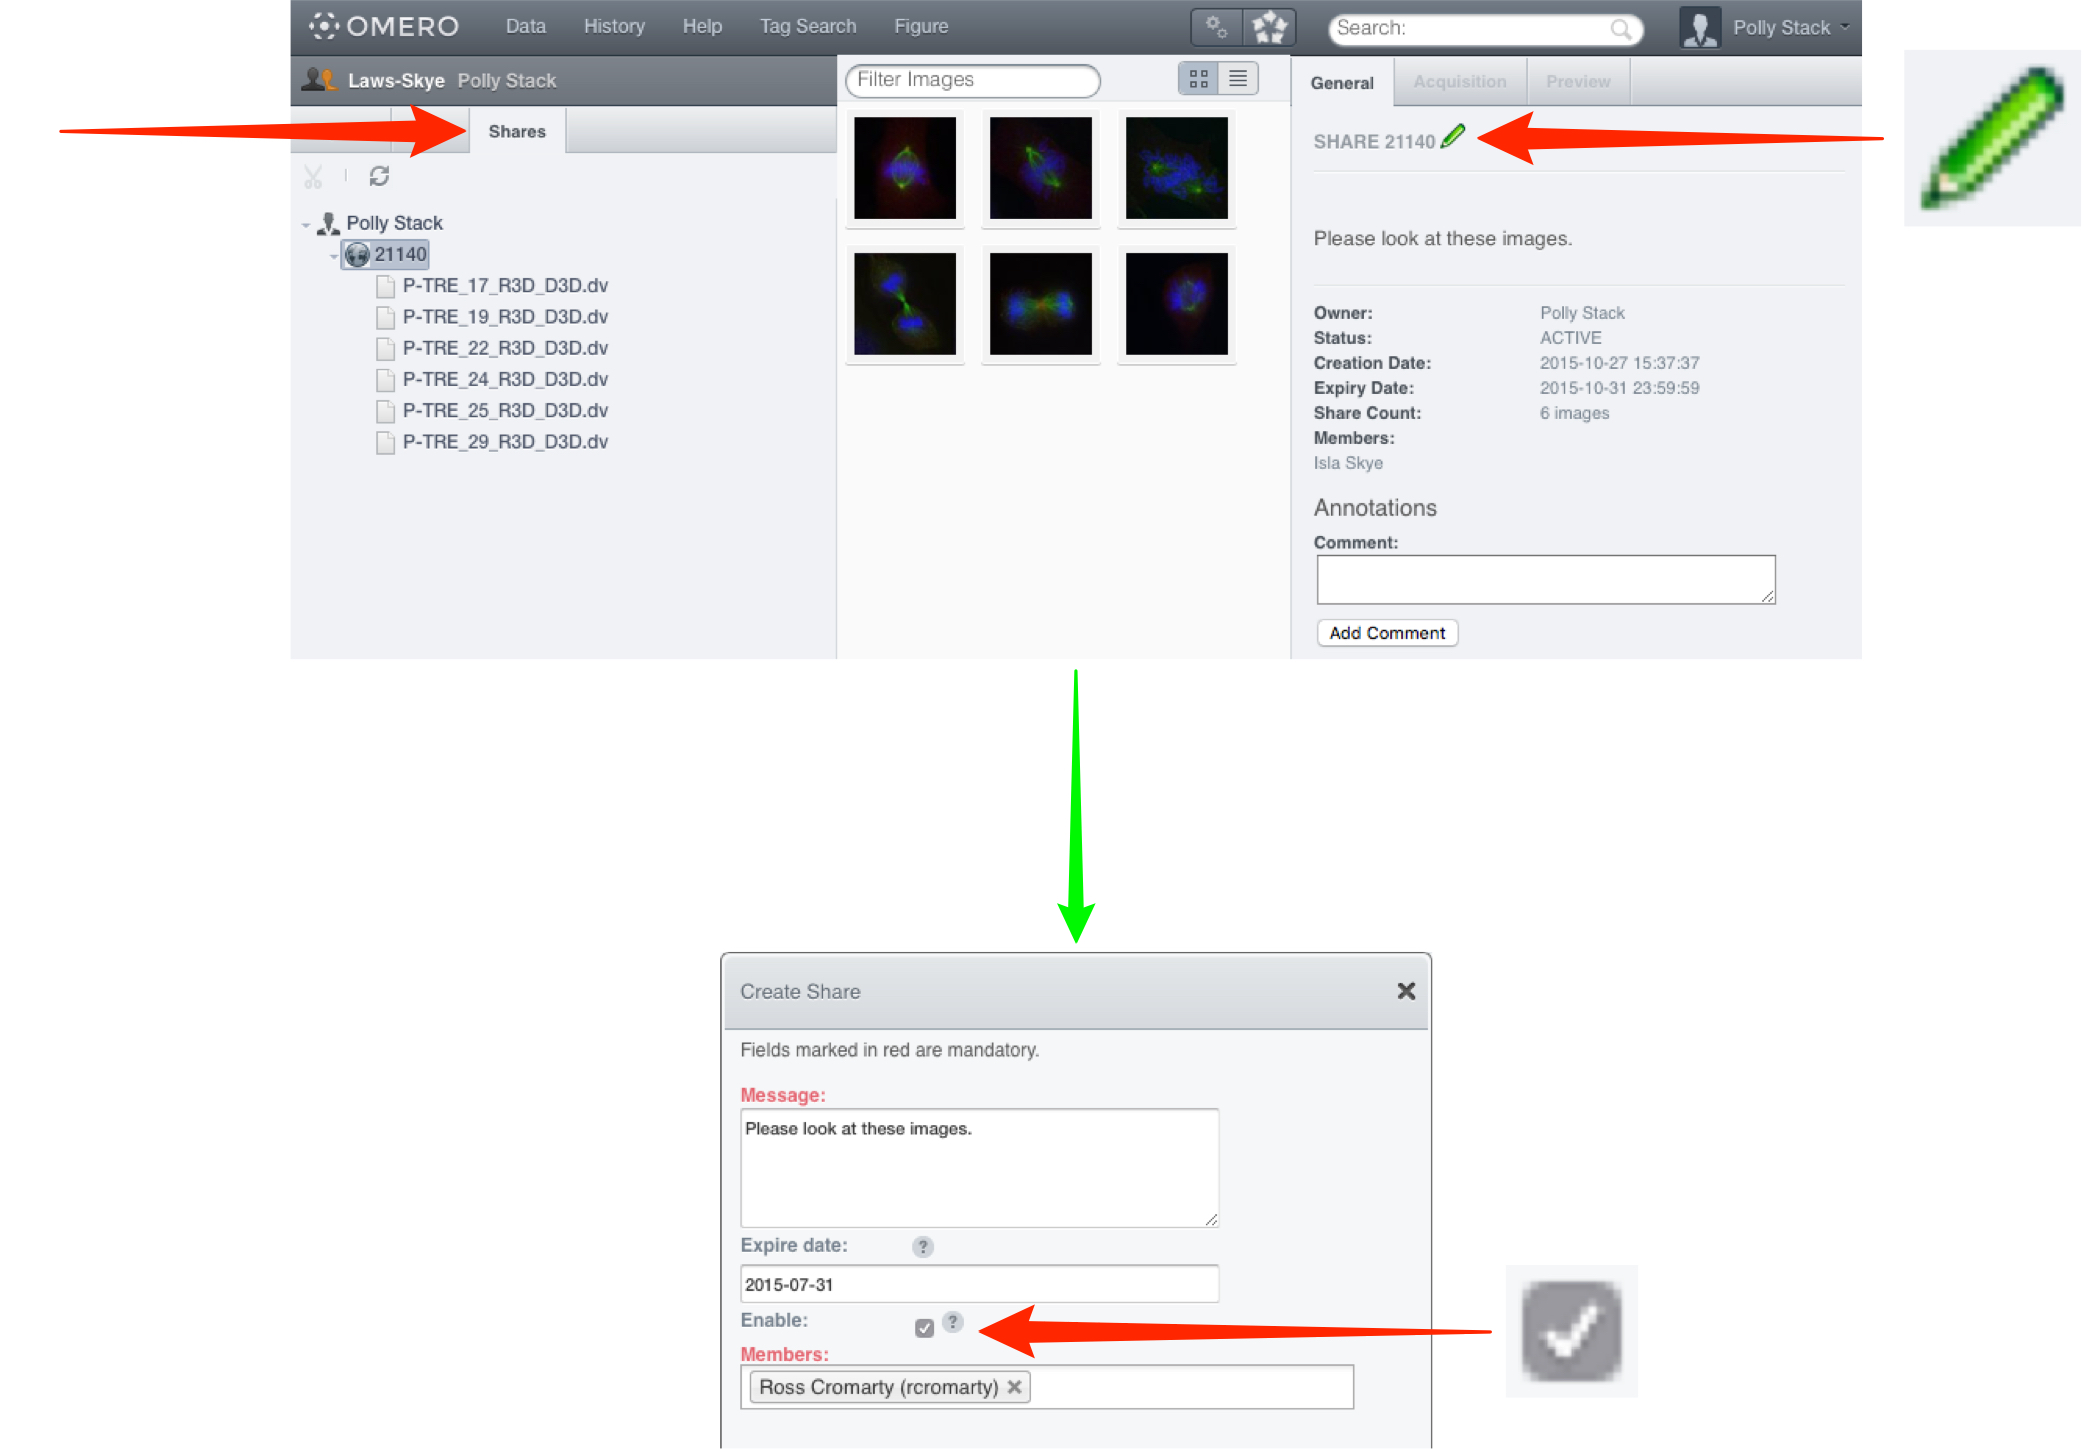
The share will appear in the Shares tab.
The details of the share can be viewed in the right hand pane.
Click on the green Edit icon edit to change the message, expiry date, or add/remove users with access to the share.
Uncheck or check the Enable checkbox to disable and enable the share.
If another user makes you a member of their share, it will appear in your Shares tab.
You will be able to view the images in the share, but not edit the share itself.
From the OMERO.web client, you can download and run a Java Web Start version of OMERO.insight.
Using the Java Web Start OMERO.insight client enables you to import data, edit ROIs and use other functionality not yet supported by the OMERO.web client.
Java Web Start also enables OMERO.insight client to be used on machines where restrictions prevent you from installing new software.
Click on the Java Web Start button and follow the instructions, accepting the software as “Trusted”.
Further details are in the Getting Started with OMERO.insight 5 section.

All Tutorial Material is available on line at: help.openmicroscopy.org
The Main OME website is at: www.openmicroscopy.org
Warning!
Due to the steady increase of issues not under OMERO's control, continued support of Java Web Start for distribution of OMERO.insight is not sustainable and is likely to become impossible in the near future.
Therefore Java Web Start for OMERO.insight has been removed from version 5.2.
Java Web Start is still available in OMERO version 5.1.4 and earlier, but has been deprecated and will no longer be supported.


